That's awesome news to hear about their quality! Makes me wanna get this system running even faster. I'm trying to educate myself on these sumps.. I see I have the bio balls, which is covering the biological aspect. I see two slats on the other side of the sump.. Will that be a place to add chemical and mechanical filtration? I don't see any sumps online that resemble what I own so what do I do for introduce those? I'm sure on the top of the balls I put some sort of sponge or pad type filter to handle to mechanical filtration right? Thanks.
Not quite sure where to begin with my new project!
- Thread starter Cedric.Davinci
- Start date
Looks a bit like one of the Eshopps wet dry sump/filters to me.
https://www.google.com/search?q=esh...m%2Fproducts%2Ffilters%2Fwdfilters%2F;900;641
https://www.google.com/search?q=esh...m%2Fproducts%2Ffilters%2Fwdfilters%2F;900;641
From thepictures you posted, it looks like an Acrylic aquarium. I word of advice, inspect the tank edges for signs of drastic crazing. I would also suggest filling it up with warm water to see how much it bows out in the front and back. I spent a tone of time and effort removingscratches, building a stand, and setting up the sump on a used 180gal acrylic. After I had it setup, I took it down a fewmonths later due to further crazing on the tank edges, as well as crazing in thefront panel. Also be careful with solventsyou use on acrylic as some can cause damage such as Windex.
Good luck withthe build.
Good luck withthe build.
Cedric, it looks like you got a lot of good inputs so far. I wanted to add a few points that may not have been answered.
Those are some good pumps - based on some research that I did at one point the models still built in Japan are "better" and hence typically cost a little more than ones made somewhere else, fyi. But overall good pumps regardless where they are made. It's hard to tell from the pictures what you have but I'd guess two pumps were used for 1) sump return pump 2) closed loop circulation pump for waterflow. But then again, based on the picture, it does look like the sump had two bulkheads on the side so likely used as you thought.
I think you mentioned two holes (for pipe) in each overflow section? It was difficult to see the drilled holes and get a sense of how you could plumb, but I would use the larger hole/pipes for the drain pipes (water from tank to sump) and the smaller in each for returns (water from sump back to tank). As someone mentioned, you may want to draw this out first and get inputs as it's hard to tell from the actual pictures.
You should also decide if you want to go hard plumbing/PVC and/or vynl tubing. There are a lot of good plumbing examples on this forum. I would plan ahead, but I find it always best to once you have the stand ready, put the sump underneath where you want it and work out the final plumbing design. If you've not done this before, there may be things that you had not considered on paper until you actually see in person. I found this helpful especially if you run hard plumbing you can see exactly how you'll want the pipes to run.
Lastly, I would make sure you have at least some sort of mechanical filter BEFORE the biological. That means adding some sort of filtration pads at least bfore the bio-filter. Keep us posted and you have questions...
Okay so I have an update on the setup. I learned a bit since my last post and as im writing this, my plumbing is about half way through. I wanted to share a few photos of the stand I built for the tank.
2"x6" lumber was used for the entire project with a top made from 3/4" plywood, primeguard wood screws, and timberlok heavy duty wood screws put it all together.
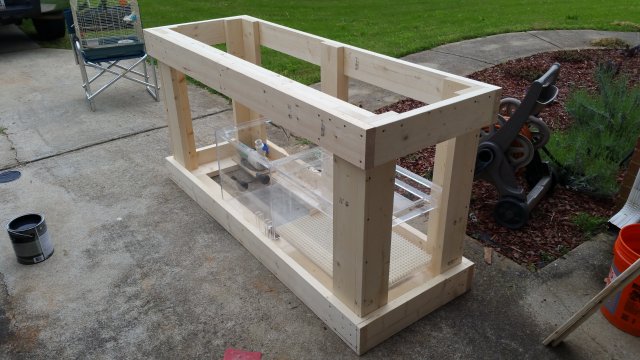
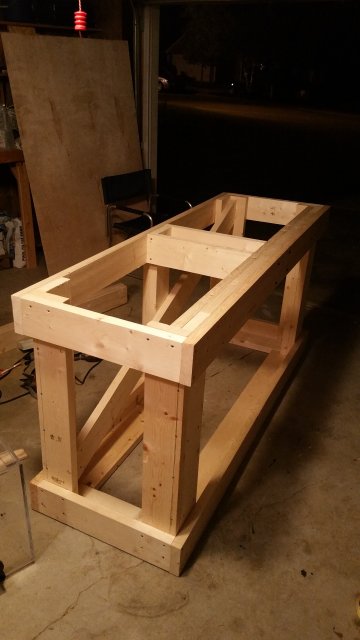
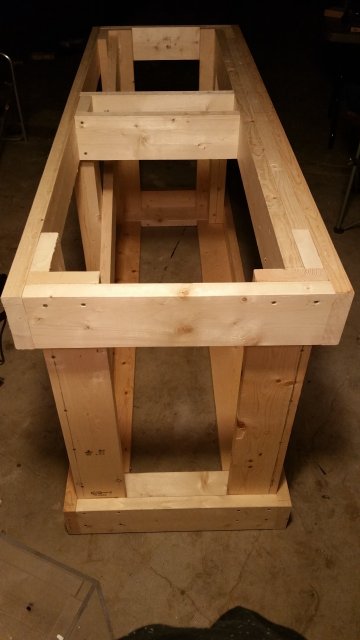
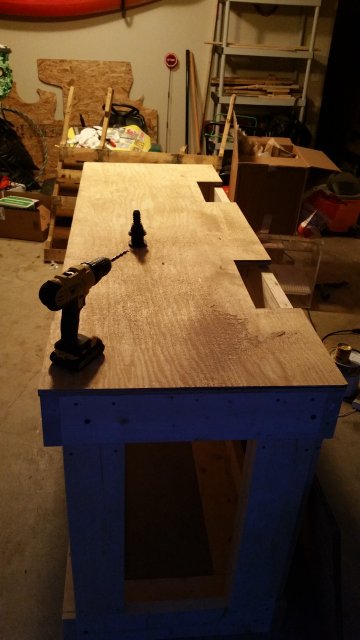
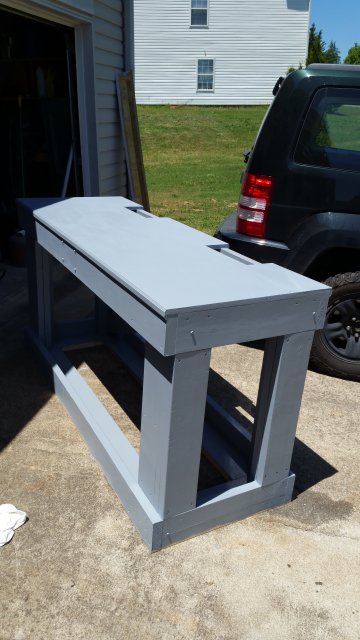
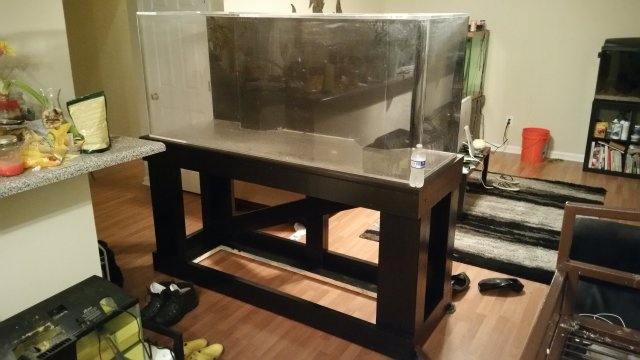
I didn't keep up with taking photos every step of the way. As you can see, I went with the overbuilt route, lol. A good coat of primer, and a few coats of gloss black paint and it was done.The stand alone was nearly too much for two people to move around. Thank you furniture slide pads. This week it should be running! I hope you guys enjoy the photos.. I had a lot of fun making it.
2"x6" lumber was used for the entire project with a top made from 3/4" plywood, primeguard wood screws, and timberlok heavy duty wood screws put it all together.


I didn't keep up with taking photos every step of the way. As you can see, I went with the overbuilt route, lol. A good coat of primer, and a few coats of gloss black paint and it was done.The stand alone was nearly too much for two people to move around. Thank you furniture slide pads. This week it should be running! I hope you guys enjoy the photos.. I had a lot of fun making it.
So, like DN said, each overflow tower has 2 holes--a small one is for the "return" line, the larger one is for the "drain". By "return" I mean the pipe from the pump output back up the overflow tower and back into the top of the tank. The return line takes filtered water from the sump and shoots it back in the tank--it "returns" water back into the tank. The "drain" line drains water into the sump when the level reaches above the level of the standpipe. Gravity just makes it fall into the standpipe and back down into the sump.
You want the drain pipe to be larger diameter than the return.
The drain is an open standpipe that should be the same height as the very bottom of the teeth on the weir cut into the overflow box. You should probably put a strainer on the top of the drain line/standpipe.
The fill level of the sump is very important. Because if electricity goes out, and pumps go off, some water will drain into the sump. If the sump is too full, that draining water during a power outage will overflow the sump and end up on the floor. Test that, and mark the correct fill line on the sump with a piece of masking tape and a marks-a-lot.
A plain old drain to a sump will draw in lots of air which makes lots of noise--like a toilet flushing all the time. So, you'll want to read about a "Durso", "Herbie" and "Beanimal" style overflow. Those are ways to make your overflow drain quietly. I run a Herbie style, and after a few weeks playing around with it, it is dead silent.
If I had to guess, I'd say the return lines are 1 inch, and the drains are 1.5 inch. The output of your pumps is 1140 GPH each, for a total of 2280 GPH. So 2 1.5 inch drains need to be able to drain 2280 GPH. If they are draining at full siphon, quiet, with no air being drawn into the drains, 1.5 inch drains will definitely handle your pump output. If they are drawing in air and they're loud, I have no idea what they'll drain. You'll have to just test it out in the garage where a flood won't ruin your floor. See this link for drain rate of various pipe sizes (http://www.reefcentral.com/forums/showthread.php?t=1814606)
Here's a link to an explanation of Herbie style overflow, with diagrams. (http://gmacreef.com/herbie-overflow-reef-tank-plumbing-method-basics/)
How many holes, and what sizes, are drilled in the tank at the bottom of each overflow tower?


