Hello everyone
Just sharing my 2x4 and plywood with EPDM liner build.
Sorry pictures are posted in wrong order. didn't feel like redoing everything..
Tank dimensions are roughly 10'x5'x42''.
My initial intensions for this build was to upgrade my big fish (especially my rays) to a bigger environment where they would be happy for a very long period of time but i also wanted the system to operate efficiently so i chose the most efficient equipment to reduce the electric bill and put everything together in a way that worked seamlessly to reduce the amount of work it required to keep everything running properly.
The above tank, sump filtration are 2x 120 gallon 60x18x26 tanks that are plumbed together to make a total of 10' of sump. I've created a K1 fluid bed filtration that works really well for my needs. i wanted something very quiet but yet effective by properly circulating my media so i came up with waterfall style rumbler. i really like how it works so far.
i hope everyone likes my build. i put about 95% of it together by myself.
Started with the sumps:
Cut baffles to size and siliconed into place. Drilled holes for 2" bulkheads on the end of each sump to connect them together.


Then i started to demolish the area the tank was to built in. i had a shallow closet that was always cluttered up anyhow so it made negotiations pretty easy with the wife.


Started building the 2x8 base. Everything is built on 12" and doubled around the outside. i laid plastic membrane down under the base as a precaution just in case there ever was a leak that the water would stay contained instead of travelling underneath my vinyl flooring. then insulated the whole base.


Laid plywood down as the floor.


Started on the window frame and structural and then insulated and lined the inside with plywood.


with the frame mostly completed with just the top cross members missing i started installing the EPDM liner in sections to avoid ugly and bulky folds. i really wanted a clean looking tank once completed so i went the extra mile and invested in 2 sided and 1 sided seam tape along with the EPDM primer/glue from Aquascape. For anyone who doesn't understand how this is done just PM me or call me out in this thread and ill explain the process. i couldn't capture the glueing and seam taping steps in photograph as it needs to be done just so... it requires both hands and needs to be done in a timely fashion. i was all alone to do this so my apologies for the lack of info.


Started on plumbing.


Got my brother in law to come over and help get the sumps up there and get the viewing window in as well. Thanks again J! Taped off 3'' all the way around and sanded the surface of the glass to help adhere it to the tank.


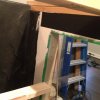
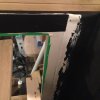
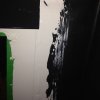
As you can see if you pay a lot of attention; when i installed the plywood (situated behind the liner) i made the opening where the glass would be installed 1'' longer and wider than the glass pane so that the pane of glass would recess into the front face of the tank and adhere to both the 2x4 structure and the EPDM liner. So i folded the liner under where the glass would lay but left 2x4 there to adhere to as well.
Right Side:

Bottom:

Top:

then i applied 3M5200 silicone to both the 2x4 frame and the EPDM liner so you can see the glass pane is flush with the inside of the front wall. i did it this way for a reason which you will see soon enough.


I then filled in the gap all around the glass pane to seal the gap between the edge of the glass and the liner.


Looking down from the top you can see the glass is flush on the inside.
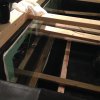


So most people would stop there. but i wanted to reassure myself that the window wouldn't leak so i took my left over 1 sided seam tape and bridged over from the EPDM liner to the glass and adhered them together. this step i am very happy i took.


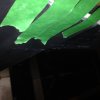
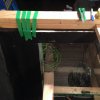
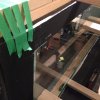
I leak tested the tank a few times and had a very slight leaks from bottom corners in which i managed to fix by applying a pig ear patch along with EPDM silicone around the edge of the seam. the filling of the tank took a long time and was slightly nerve racking because you just never know.... but i filled the tank all the way without a single crick or crack and the 3/4'' thick viewing window didn't flex at all! not even 1/32''. i was quite surprised to be honest as everyone though i was pushing the limits by using 3/4'' thick glass. (i used 3/4'' glass because it was given to me by a professional tank builder who builds custom tanks for both hobbyist and public aquariums.. i saved a lot of money just buy not needing to buy the glass "THANK YOU Pierre from Aquanov for the Glass donation)


Once the tank was leak tested and i ran the filtration i knew i could move on to installing the 3D background so i drained the tank and got going on the background. I also had some modifications to make to the filtration but i won't go into detail. Just needed to cut down baffles and drill it a couple more times to make it run as i wanted it to. Believe it or not the background was a huge job even though it was all pre made. all i needed to do was place and adhere it but even at 2 people it was a big job. Thanks again J for being my side kick. took some determination to get this all just right.


I wanted to have a big tank without having high humidity so i needed to close it up. so after applying liquid rubber to all wood that could potentially be subjected to the wet, i fastened acrylic to the bottom side of my 2x4 cross members with silicone and stainless steel screws and had the acrylic cut wider than the 2x4's to create a bracket to set the glass cover on.


Once the 3D background was cured and glass cover brakes were installed it was time to refill the tank again. The Background may not be to everyones taste but initially i was not going to do a background at all and leave it as black back. once i got to that stage i decided last minute to install a pre manufactured model that i was able to buy at an affordable price to avoid having to build my own custom DIY background. i was going after a cave style setting and i achieved it to my satisfaction.
in the midst of everything my pair of henlei rays bred so i decided to throw everyone but the female in the new tank.


Cut my glass to size and installed it.

then it was on to building the wall. i wanted a tank built into a wall but in reality its a wall build onto a tank. lol.


lights hung


Dual direction Spray Bar off last chamber of sump.

All in all im happy with my results. looking forward to adding my remaining fish to the tank once they achieved the right size.
Here are a couple of videos of the tank. Cheers.
https://www.youtube.com/watch?v=MeGXy4q33RQ
https://www.youtube.com/watch?v=YQFrvC8_nTc


Just sharing my 2x4 and plywood with EPDM liner build.
Sorry pictures are posted in wrong order. didn't feel like redoing everything..
Tank dimensions are roughly 10'x5'x42''.
My initial intensions for this build was to upgrade my big fish (especially my rays) to a bigger environment where they would be happy for a very long period of time but i also wanted the system to operate efficiently so i chose the most efficient equipment to reduce the electric bill and put everything together in a way that worked seamlessly to reduce the amount of work it required to keep everything running properly.
The above tank, sump filtration are 2x 120 gallon 60x18x26 tanks that are plumbed together to make a total of 10' of sump. I've created a K1 fluid bed filtration that works really well for my needs. i wanted something very quiet but yet effective by properly circulating my media so i came up with waterfall style rumbler. i really like how it works so far.
i hope everyone likes my build. i put about 95% of it together by myself.
Started with the sumps:
Cut baffles to size and siliconed into place. Drilled holes for 2" bulkheads on the end of each sump to connect them together.


Then i started to demolish the area the tank was to built in. i had a shallow closet that was always cluttered up anyhow so it made negotiations pretty easy with the wife.


Started building the 2x8 base. Everything is built on 12" and doubled around the outside. i laid plastic membrane down under the base as a precaution just in case there ever was a leak that the water would stay contained instead of travelling underneath my vinyl flooring. then insulated the whole base.


Laid plywood down as the floor.


Started on the window frame and structural and then insulated and lined the inside with plywood.


with the frame mostly completed with just the top cross members missing i started installing the EPDM liner in sections to avoid ugly and bulky folds. i really wanted a clean looking tank once completed so i went the extra mile and invested in 2 sided and 1 sided seam tape along with the EPDM primer/glue from Aquascape. For anyone who doesn't understand how this is done just PM me or call me out in this thread and ill explain the process. i couldn't capture the glueing and seam taping steps in photograph as it needs to be done just so... it requires both hands and needs to be done in a timely fashion. i was all alone to do this so my apologies for the lack of info.


Started on plumbing.


Got my brother in law to come over and help get the sumps up there and get the viewing window in as well. Thanks again J! Taped off 3'' all the way around and sanded the surface of the glass to help adhere it to the tank.


As you can see if you pay a lot of attention; when i installed the plywood (situated behind the liner) i made the opening where the glass would be installed 1'' longer and wider than the glass pane so that the pane of glass would recess into the front face of the tank and adhere to both the 2x4 structure and the EPDM liner. So i folded the liner under where the glass would lay but left 2x4 there to adhere to as well.
Right Side:

Bottom:

Top:

then i applied 3M5200 silicone to both the 2x4 frame and the EPDM liner so you can see the glass pane is flush with the inside of the front wall. i did it this way for a reason which you will see soon enough.


I then filled in the gap all around the glass pane to seal the gap between the edge of the glass and the liner.


Looking down from the top you can see the glass is flush on the inside.


So most people would stop there. but i wanted to reassure myself that the window wouldn't leak so i took my left over 1 sided seam tape and bridged over from the EPDM liner to the glass and adhered them together. this step i am very happy i took.


I leak tested the tank a few times and had a very slight leaks from bottom corners in which i managed to fix by applying a pig ear patch along with EPDM silicone around the edge of the seam. the filling of the tank took a long time and was slightly nerve racking because you just never know.... but i filled the tank all the way without a single crick or crack and the 3/4'' thick viewing window didn't flex at all! not even 1/32''. i was quite surprised to be honest as everyone though i was pushing the limits by using 3/4'' thick glass. (i used 3/4'' glass because it was given to me by a professional tank builder who builds custom tanks for both hobbyist and public aquariums.. i saved a lot of money just buy not needing to buy the glass "THANK YOU Pierre from Aquanov for the Glass donation)


Once the tank was leak tested and i ran the filtration i knew i could move on to installing the 3D background so i drained the tank and got going on the background. I also had some modifications to make to the filtration but i won't go into detail. Just needed to cut down baffles and drill it a couple more times to make it run as i wanted it to. Believe it or not the background was a huge job even though it was all pre made. all i needed to do was place and adhere it but even at 2 people it was a big job. Thanks again J for being my side kick. took some determination to get this all just right.


I wanted to have a big tank without having high humidity so i needed to close it up. so after applying liquid rubber to all wood that could potentially be subjected to the wet, i fastened acrylic to the bottom side of my 2x4 cross members with silicone and stainless steel screws and had the acrylic cut wider than the 2x4's to create a bracket to set the glass cover on.


Once the 3D background was cured and glass cover brakes were installed it was time to refill the tank again. The Background may not be to everyones taste but initially i was not going to do a background at all and leave it as black back. once i got to that stage i decided last minute to install a pre manufactured model that i was able to buy at an affordable price to avoid having to build my own custom DIY background. i was going after a cave style setting and i achieved it to my satisfaction.
in the midst of everything my pair of henlei rays bred so i decided to throw everyone but the female in the new tank.


Cut my glass to size and installed it.

then it was on to building the wall. i wanted a tank built into a wall but in reality its a wall build onto a tank. lol.


lights hung


Dual direction Spray Bar off last chamber of sump.

All in all im happy with my results. looking forward to adding my remaining fish to the tank once they achieved the right size.
Here are a couple of videos of the tank. Cheers.
https://www.youtube.com/watch?v=MeGXy4q33RQ
https://www.youtube.com/watch?v=YQFrvC8_nTc


