Well seeing as it's been almost 48 hours and still no leaks, I think it's safe to say that it is watertight and not leaking anytime soon. That means it time to start plumbing so I can get my sumps ready to cycle. My current plans are to run 2 55 gallon sumps connected by a bulkhead, each with a separate return pump. I plan on running k1 in 1 sump and a mix of different things in the other. I am still trying to decide how much k1 to use as I am unsure how much my full grown fish will eat per day. Will update with pictures once I have some plumbing done, but it might be awhile as I will have little time this weekend to work on the tank.
600g DIY plywood build
- Thread starter DIFish
- Start date
Congratulations. Sounds like a pretty good plan. How hard was it to build? Would you do it again and recommend it to someone?
Thanks, it was actually all pretty easy and simple to build. I would 100% do it again. For the price it is almost impossible to beat, and did not take any amount of skill to build. It will be interesting to see how long this tank holds up with no leaks.Congratulations. Sounds like a pretty good plan. How hard was it to build? Would you do it again and recommend it to someone?
I really like this build. Very straightforward. Seems like probably the most cost effective and pain free way to build a tank this size.
So the walls of the tank are basically a single solid sheet of 3/4" birch plywood with 8" (?) strips of plywood as bracing on the outside? Interesting.
I don't know if I would have made the overflow box out of wood. It looks like the pond armor may not have soaked all the way into the wood grain based on your pictures? I'm not trying to bash your design, but I'm curious if you feel this way too, or if you're confident that the pond armor made a good coat around the plywood.
Overall, very nice looking tank so far. Great job on the background as well. If this all works out well for you, this is probably the method I will look into when I can one day build a 500+ gallon tank in my basement.
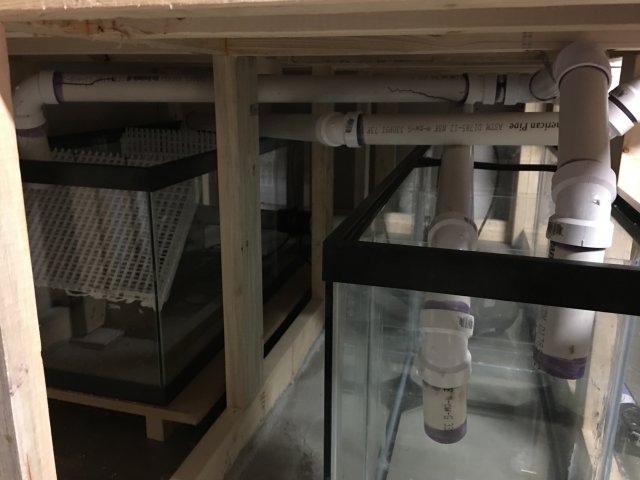
Well its been a couple days now and still no problems, well, with the plywood tank at least. My sumps however are a different story. I decided that 2 55 gallon aquariums that I had lying around would be perfect for my sumps, but my only problem was making it to where neither overflowed and the water level stayed the same in each. My solution was to put a 2inch bulkhead connecting the two. So naturally I ordered a glass drill to cut out holes for the bulkheads. It was relatively cheap and drilling the glass didn't look that bad. To make a long story short, I got half way through the first hole and then it exploded. I'm not talking a big crack, the panel of glass literally exploded into thousands of tiny pieces. While trying to figure out why this happened, I realized the tank is almost 20 years old, and is actually completely made of tempered glass. Man do I feel dumb. Drilling the other 55 however went smoothly with no problems. Luckily though, I have a 40 gallon tank lying around that I think ill use instead. It will give me less room but I think I can manage it. Ill update with pictures once they are ready and in place, hopefully no more major issues.
Thanks, yes the walls are just 3/4inch plywood and 5inch wide bracing(3 braces on back and 2 on each side, with all corners braced), but it does not bow in the slightest. I will agree that the 1st and 2nd coat of pond armor is very iffy, but by the time I got the last coat on, I feel pretty good about it. The bracing probably isn't completely waterproof on top, but I really don't need it to be as it won't be submerged.I really like this build. Very straightforward. Seems like probably the most cost effective and pain free way to build a tank this size.
So the walls of the tank are basically a single solid sheet of 3/4" birch plywood with 8" (?) strips of plywood as bracing on the outside? Interesting.
I don't know if I would have made the overflow box out of wood. It looks like the pond armor may not have soaked all the way into the wood grain based on your pictures? I'm not trying to bash your design, but I'm curious if you feel this way too, or if you're confident that the pond armor made a good coat around the plywood.
Overall, very nice looking tank so far. Great job on the background as well. If this all works out well for you, this is probably the method I will look into when I can one day build a 500+ gallon tank in my basement.
You're right that it wont be submerged but it will still get wet time to time because of its location. Even if it doesn't it's exposed to huge amounts of humidity. So it's a good call to hit it with the pond armor. Same way I polyurethaned almost every square inch of the stand and canopy I built.
Do it once, do it right, go overboard and sleep nice every night and be proud of what you made.
Do it once, do it right, go overboard and sleep nice every night and be proud of what you made.
No amount of skill?? It looks to me like you've paid a lot of attention to detail and you've put in a LOT of skill. Maybe not mastery skill, but still skill. It looks great.
When I've seen ply tanks in the past, the glass was fastened to the plywood with more than silicone. That was my only concern as I was reading. I don't know how silicone is supposed to adhere to pond armor, but it looks like it's working so far.
I'd go WAY overboard on the sumps. My DIY sump for my 480g had two 1'x1'x5' towers with 4 feet filled with bio balls pushing 7200 gph in to a 75g long tank with a bunch of submerged media in it.
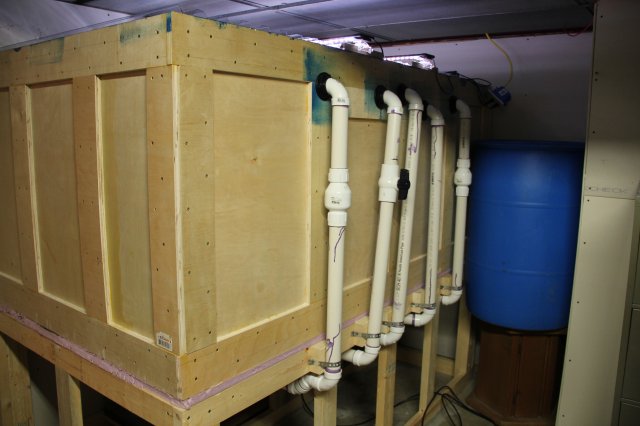
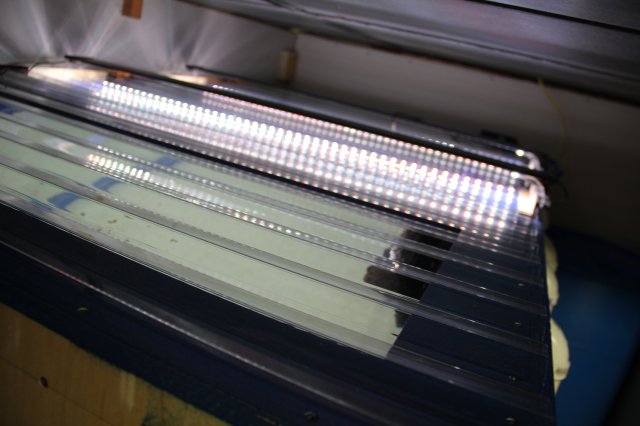
Well the plumbing took a little more time than I thought it would, but essentially I am finished with it. I will wait to water test until the silicon on the sump baffles is finished curing. But hopefully in a day or two there will be water circulating through the tank and I can get my filter media in the sump. I also picked up some corrugated plastic greenhouse roofing to put over the top and act as a lid. This should help with evaporation and keep things from falling into the tank.


