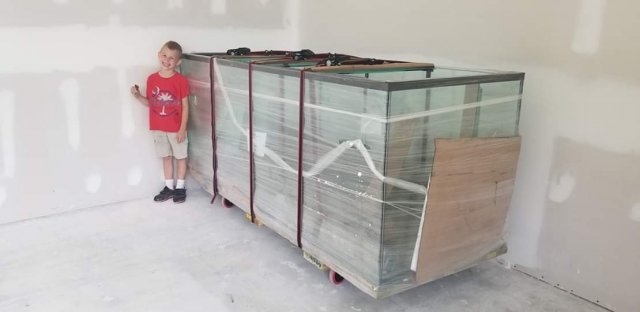
Or, where the admin disappeared to lol
First and foremost, I want to thank the rest of the MFK team for keeping the site on the rails while I've been away. You guys rock, I appreciate you so much!
So, as those of you know have been following my Facebook page know, I've been working to build a new house. It has long been a goal of mine to have a ginormous tank like so many of my fellow MFKers, but the main problem I've had is that I simply had nowhere to put one. For a while when I was in the Army and it seemed as though I was going to spend the rest of my life stationed in MIssouri, I succeeded in building a 510 gallon tank that was never fully put into operation. Shortly after I ETSed from the service, I was gifted a 365 gallon by Oddball
. I never succeeded in setting up this tank due to the simple fact that my post-army life was, uh, turbulent to put it mildly. I've had big tanks before, but for one reason or another, I never managed to get them up and running. That's always been a fairly major source of consternation for me. Wanting to get past that hurdle, I took it on myself to design my new house around a tank! Unfortunately, the process of building this house, which became really involved in February, has taken a lot of my attention. Combine that with the fact that I'm working every last shred of overtime I can find in order to pay for new furniture and stuff, and I've had to step back from the forum for a bit.
But still, here we are! We just crossed the 90% point in the construction of a custom home on eight acres.... a custom home that was built around the idea of having a huge fish tank in it.
I ordered the tank from Beth at www.glasscages.com during their Black Friday sale last November. The tank they built for me has low iron glass and custom dimensions. I based the tank off of their 540 C3 model, but I asked for the given dimensions to be the interior dimensions. Given this, the actual exterior dimensions of the tank are 96.25" long, 38.5" wide and 38" tall, which results in interior dimensions of 94.75" long by 37" wide by 36.5" tall, giving an actual volume of 553.93 gallons. The tank weighs 1075 pounds dry.
Now, since this is a brand new custom tank going into a brand new custom home, I tried to do it correctly from the get-go. The house has a stemwall foundation with overly stout footings, and a 12" thick slab. The tank was designed to have a roughly 8x3 footprint, so the perimiter of the tank under the slab had and extra stemwall rectangle under it to better reinforce the weight of this monster.
For the past eight months, the process of construction has gone smoothly (minus rain delays). Since building a house tends to take a long time, I told Beth that my tank could go on the backburner as I wouldn't be ready to take delivery for quite some time.
That time was the Friday before last.
A problem arose however because the shipping terminal in my city to whom Glass Cages sends their tanks wasn't really equipped to hadle a tank of this immensity. The shop manager told me "I didn't realize fish tanks could be this big!" lol. On top of that, some derp at the terminal evidently couldn't read the "fragile" stickers all over the box, and was whipping around with it like it was a pallet of mayonaise or something. This resulted in him wrecking the pallet. Fortunately, the tank was fine, even if the pallet was toast.
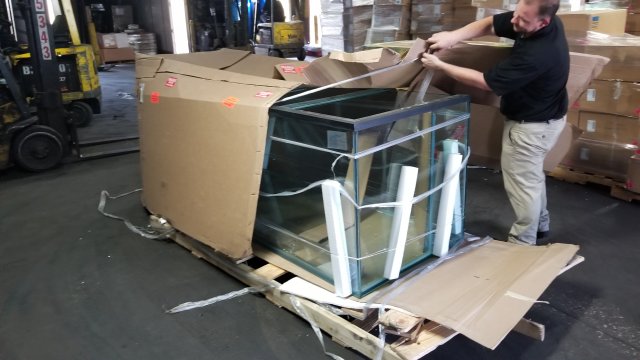
This resulted in compounding the problem I had of "just how in the hell do I get this thing home?!"
The plan I came up with was to build a new thing upon which the tank could sit. The plan was to construct a Tank Plank™.
The concept behind a Tank Plank™ was to make something that had the same footprint as the fish tank, but which was on wheels. This would allow me to move it without having to worry about lifting the damn thing.
The first step to constructing the Tank Plank™ was to lay out the boards. The Tank Plank™ is constructed of three 2x12x8 pressure treated boards and one 2x4x8 pressure treated board. For bracing, I cut a piece of 2x8 into three 38.5" lengths which were attached across the tank with deck screws.
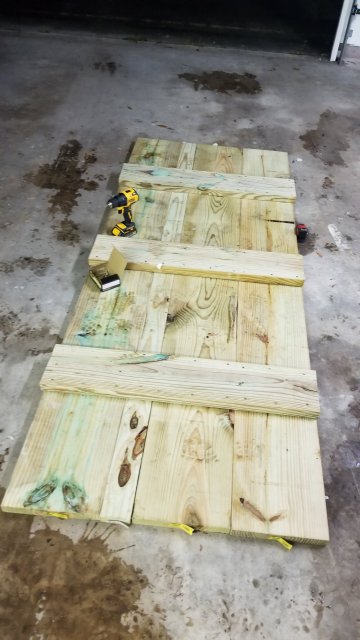
After having attached the braces on the bottom, I flipped the whole thing over and added a piece of cheap plywood to the top, also attached with deck screws.
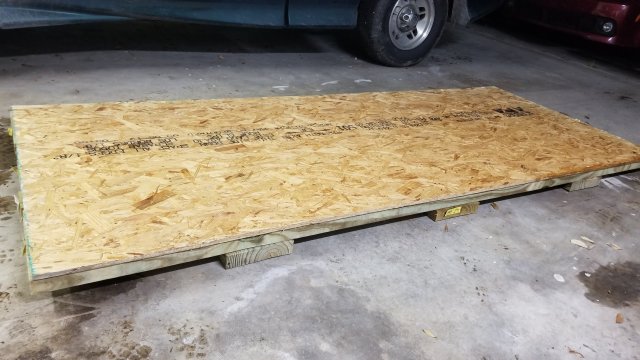
After attaching the plywood, I flipped this heavy thing back over and attached the casters that would allow it to be moved. I found some 5" braking casters at Home Depot that were rated at 350 pounds each. I attached each caster with four 5/16" lags that were 2.5" long each.
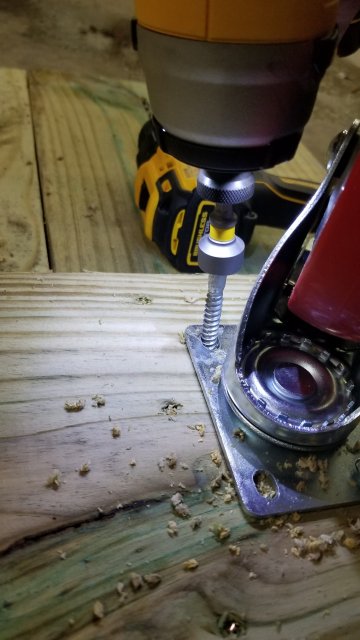
I attached the casters at 21" from the front and rear edges of the Tank Plank™, and with the outer edge of each wheel being 23.5". The reason for these measurements will become obvious later.
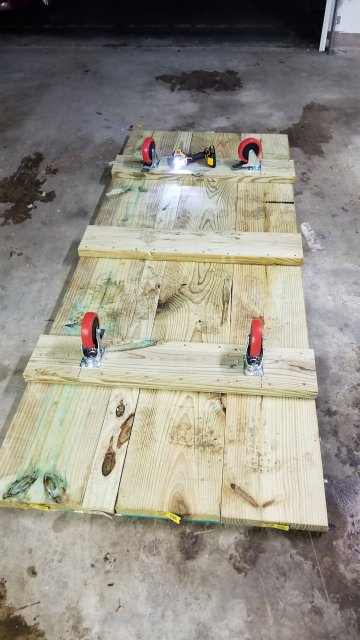
The main deck of the Tank Plank™ sits 8.25" off of the ground, an intentional decision, the reason for which will become self evident later as well. This monster ended up weighing 250 pounds by itself! I was fine with that however, as I wasn't willing to take chances with the tank.
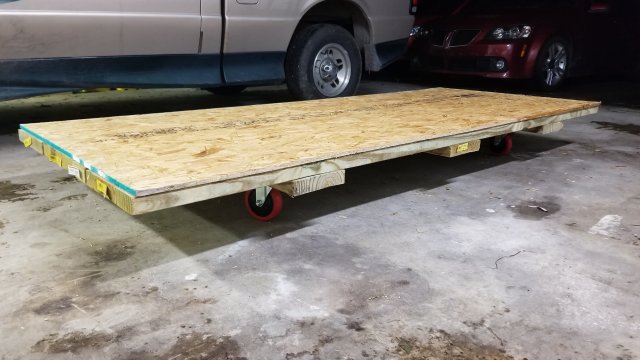
After the Tank Plank™ was done, I rented a Uhaul and trucked my way out to the terminal. Upon arriving, I unloaded the Tank Plank™ and brought it inside, whereupon we proceeded to finagle things to attempt to get the tank off of the shattered pallet.
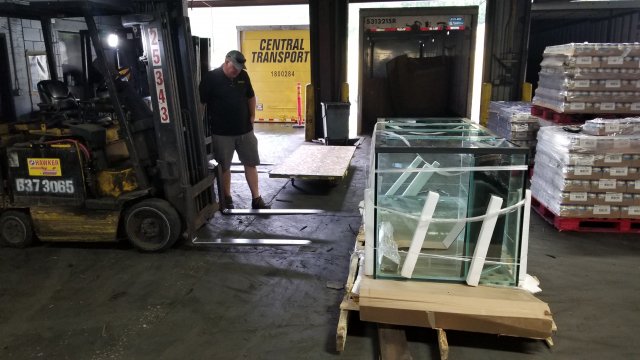
It took a LOT of careful work, but we eventually succeeded in getting the tank off of the busted pallet. We had to go in between the planks of the pallet and under some cardboard to get the forks under the tank. This was one of the two points in getting this thing home that had my nerves the most on edge.
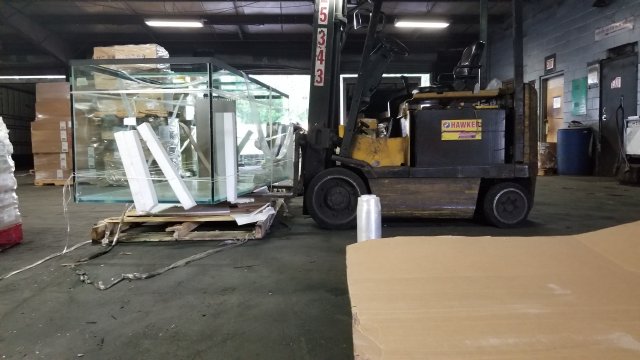
After the tank was up, we tried to place the tank onto the Tank Plank™. This proved to be somewhat tricky however, as gravity was firmly holding the tank to the forks, even with cardboard on either side of the fork to help facilitate sliding the forks out.
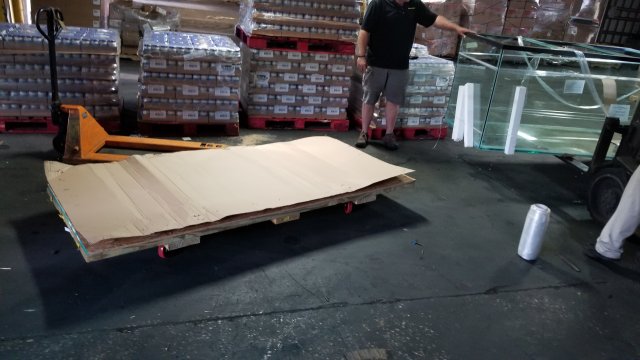
Eventually though, we did get the forks out. We had to have eight people stand in place to hold the tank and the Tank Plank™ to prevent them from sliding in order to get the forks out.
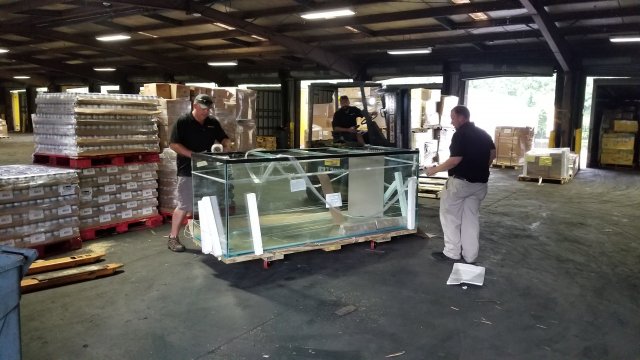
Once the tank was on the Tank Plank™, the warehouse guys wrapped it up, and I secured it with ratchet straps.
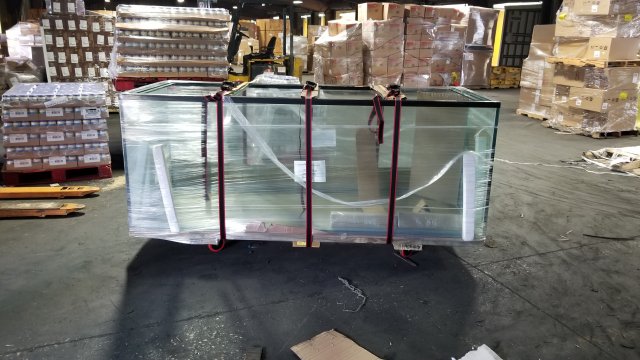
By far and away the most nervewracking part for me was when we had to lower the tank down off of the shipping dock in order to move it to the Uhaul.
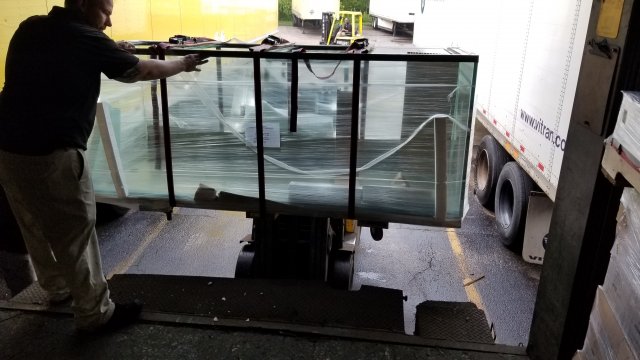
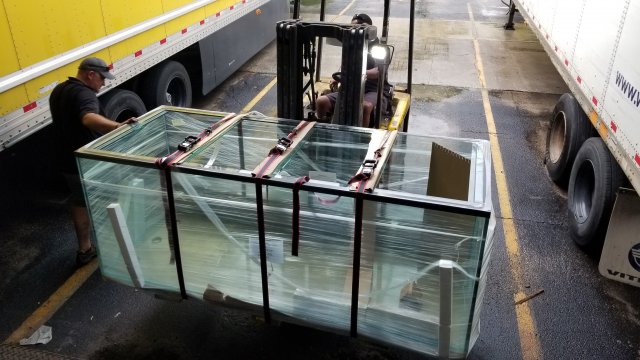
At the Uhaul, I had to have two forklifts in order to get the tank into the truck. One forklift held the ramp nice and level, and the other forklift set the tank onto the ramp. Uhaul truck ramps are 24" wide, which is why I set the wheels at 23.5" wide. The ramp acted almost like railroad tracks for the Tank Plank™, it couldn't move or wiggle in any way.
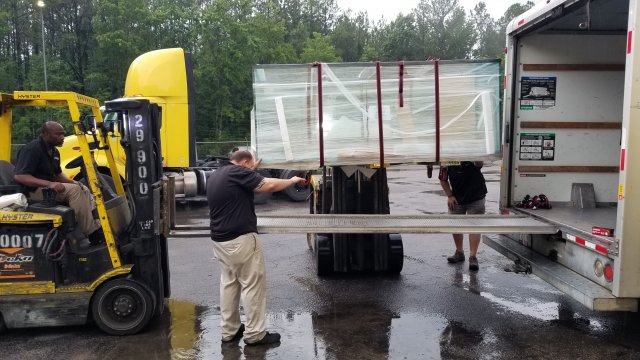
The tank rolled in as easy as you please, and was strapped in place for the trip.
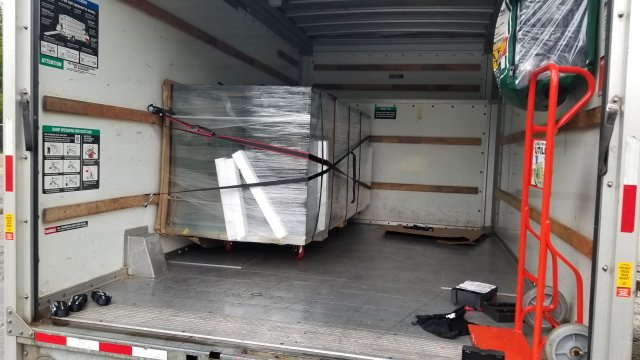
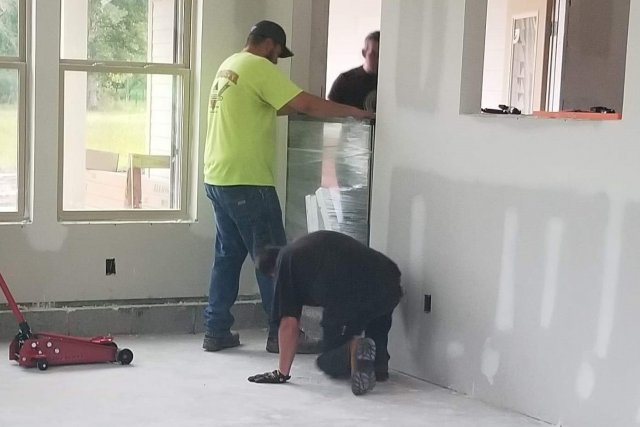
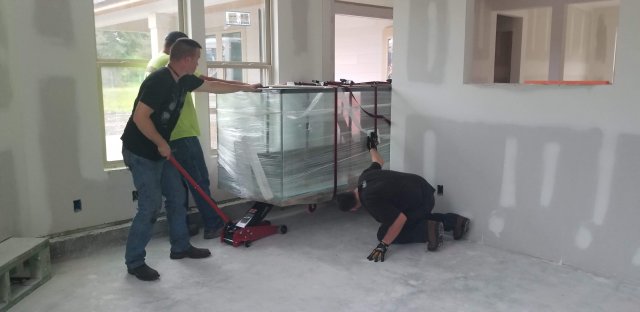
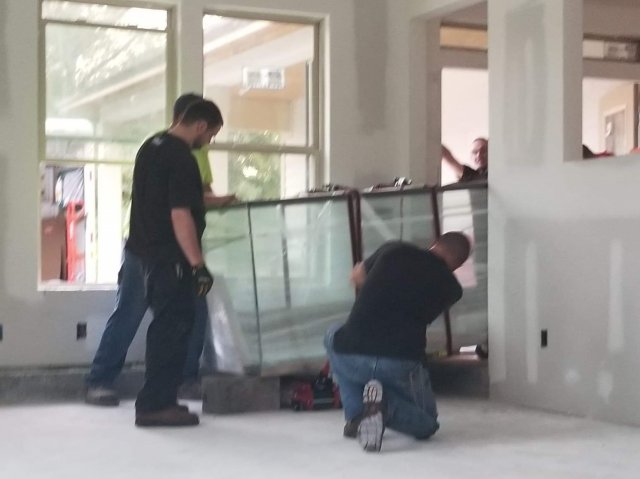
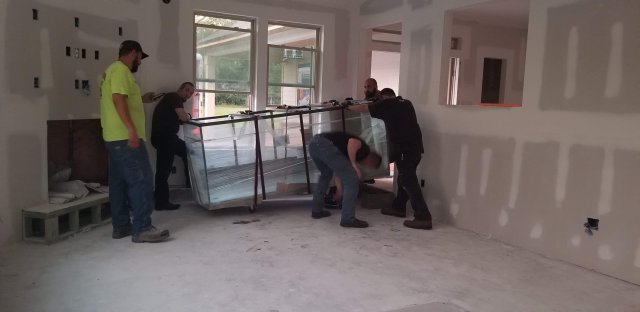
Upon arriving at the construction site, I was met by my wife and a bunch of my fellow redneck nerd buddies (the deep south results in really strange demographics lol). We stood around BS'ing for a while, and then we proceeded to try to remove the tank from the truck. Lining up the wheels...
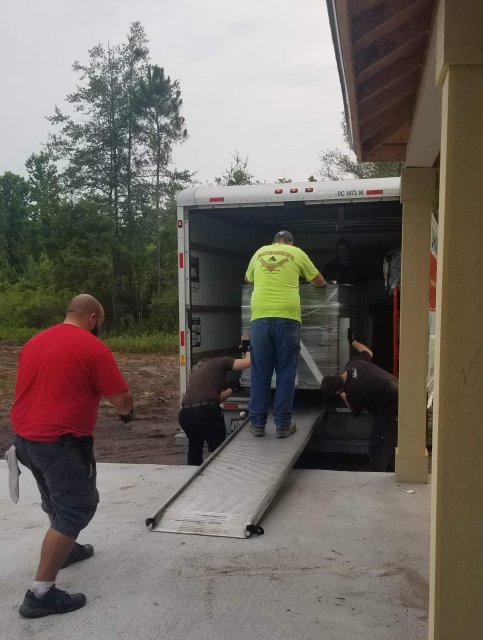
Starting down the ramp
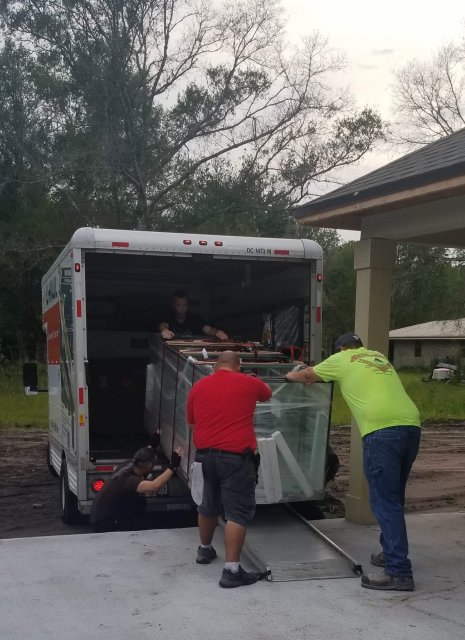
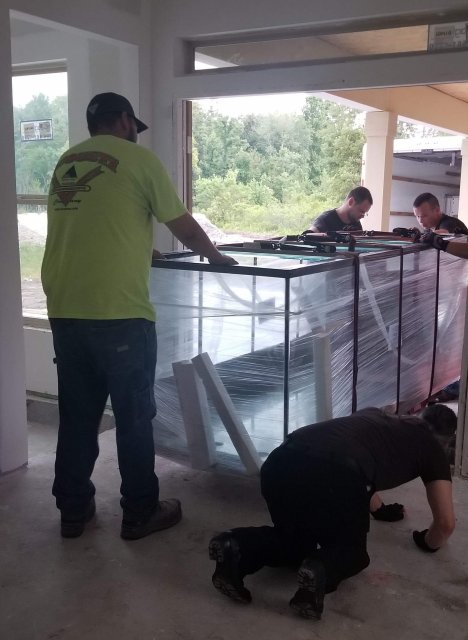
On the porch
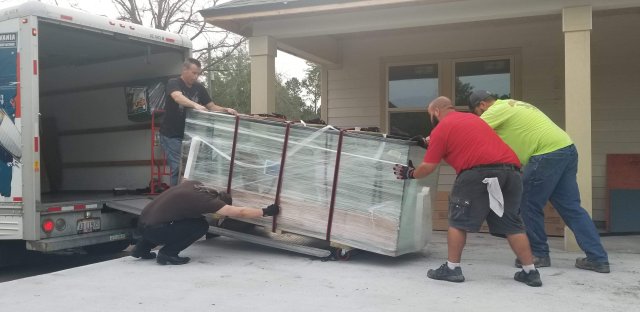
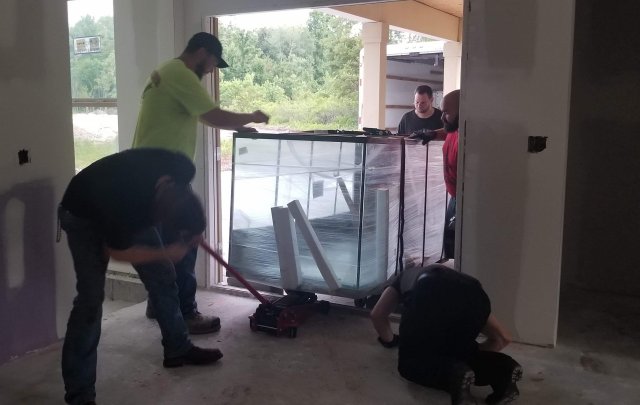
The guys standing around because I forgot to grab the floor jack from the truck for the next step
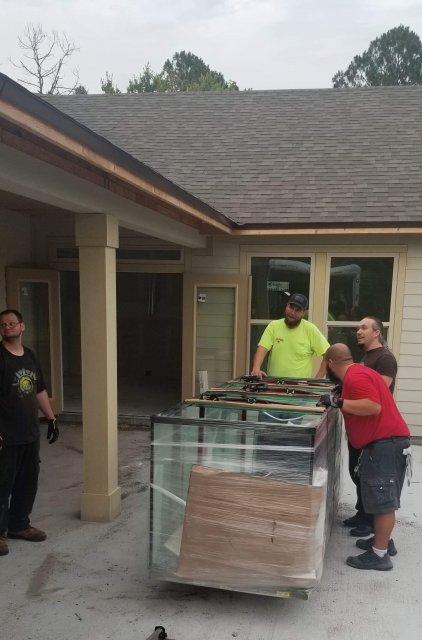
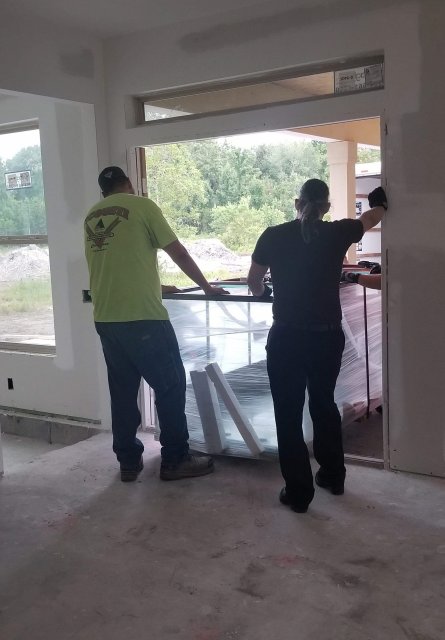
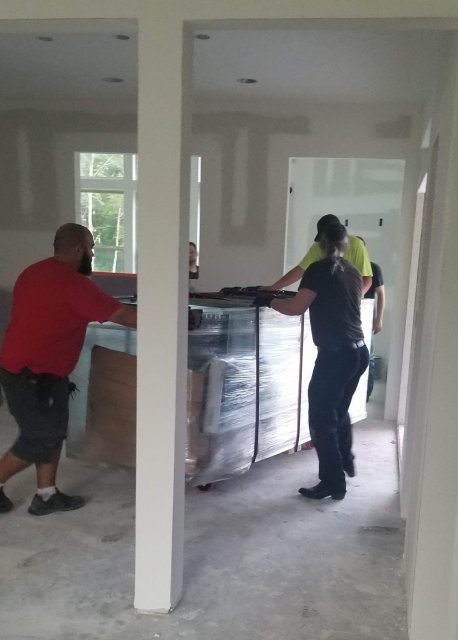
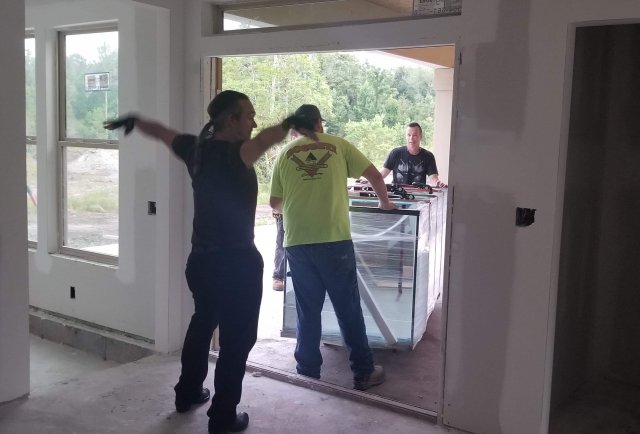
Lining up to enter the kitchen through the French doors
Continued next post.....
First and foremost, I want to thank the rest of the MFK team for keeping the site on the rails while I've been away. You guys rock, I appreciate you so much!
So, as those of you know have been following my Facebook page know, I've been working to build a new house. It has long been a goal of mine to have a ginormous tank like so many of my fellow MFKers, but the main problem I've had is that I simply had nowhere to put one. For a while when I was in the Army and it seemed as though I was going to spend the rest of my life stationed in MIssouri, I succeeded in building a 510 gallon tank that was never fully put into operation. Shortly after I ETSed from the service, I was gifted a 365 gallon by
But still, here we are! We just crossed the 90% point in the construction of a custom home on eight acres.... a custom home that was built around the idea of having a huge fish tank in it.
I ordered the tank from Beth at www.glasscages.com during their Black Friday sale last November. The tank they built for me has low iron glass and custom dimensions. I based the tank off of their 540 C3 model, but I asked for the given dimensions to be the interior dimensions. Given this, the actual exterior dimensions of the tank are 96.25" long, 38.5" wide and 38" tall, which results in interior dimensions of 94.75" long by 37" wide by 36.5" tall, giving an actual volume of 553.93 gallons. The tank weighs 1075 pounds dry.
Now, since this is a brand new custom tank going into a brand new custom home, I tried to do it correctly from the get-go. The house has a stemwall foundation with overly stout footings, and a 12" thick slab. The tank was designed to have a roughly 8x3 footprint, so the perimiter of the tank under the slab had and extra stemwall rectangle under it to better reinforce the weight of this monster.
For the past eight months, the process of construction has gone smoothly (minus rain delays). Since building a house tends to take a long time, I told Beth that my tank could go on the backburner as I wouldn't be ready to take delivery for quite some time.
That time was the Friday before last.
A problem arose however because the shipping terminal in my city to whom Glass Cages sends their tanks wasn't really equipped to hadle a tank of this immensity. The shop manager told me "I didn't realize fish tanks could be this big!" lol. On top of that, some derp at the terminal evidently couldn't read the "fragile" stickers all over the box, and was whipping around with it like it was a pallet of mayonaise or something. This resulted in him wrecking the pallet. Fortunately, the tank was fine, even if the pallet was toast.

This resulted in compounding the problem I had of "just how in the hell do I get this thing home?!"
The plan I came up with was to build a new thing upon which the tank could sit. The plan was to construct a Tank Plank™.
The concept behind a Tank Plank™ was to make something that had the same footprint as the fish tank, but which was on wheels. This would allow me to move it without having to worry about lifting the damn thing.
The first step to constructing the Tank Plank™ was to lay out the boards. The Tank Plank™ is constructed of three 2x12x8 pressure treated boards and one 2x4x8 pressure treated board. For bracing, I cut a piece of 2x8 into three 38.5" lengths which were attached across the tank with deck screws.

After having attached the braces on the bottom, I flipped the whole thing over and added a piece of cheap plywood to the top, also attached with deck screws.

After attaching the plywood, I flipped this heavy thing back over and attached the casters that would allow it to be moved. I found some 5" braking casters at Home Depot that were rated at 350 pounds each. I attached each caster with four 5/16" lags that were 2.5" long each.

I attached the casters at 21" from the front and rear edges of the Tank Plank™, and with the outer edge of each wheel being 23.5". The reason for these measurements will become obvious later.

The main deck of the Tank Plank™ sits 8.25" off of the ground, an intentional decision, the reason for which will become self evident later as well. This monster ended up weighing 250 pounds by itself! I was fine with that however, as I wasn't willing to take chances with the tank.

After the Tank Plank™ was done, I rented a Uhaul and trucked my way out to the terminal. Upon arriving, I unloaded the Tank Plank™ and brought it inside, whereupon we proceeded to finagle things to attempt to get the tank off of the shattered pallet.

It took a LOT of careful work, but we eventually succeeded in getting the tank off of the busted pallet. We had to go in between the planks of the pallet and under some cardboard to get the forks under the tank. This was one of the two points in getting this thing home that had my nerves the most on edge.

After the tank was up, we tried to place the tank onto the Tank Plank™. This proved to be somewhat tricky however, as gravity was firmly holding the tank to the forks, even with cardboard on either side of the fork to help facilitate sliding the forks out.

Eventually though, we did get the forks out. We had to have eight people stand in place to hold the tank and the Tank Plank™ to prevent them from sliding in order to get the forks out.

Once the tank was on the Tank Plank™, the warehouse guys wrapped it up, and I secured it with ratchet straps.

By far and away the most nervewracking part for me was when we had to lower the tank down off of the shipping dock in order to move it to the Uhaul.


At the Uhaul, I had to have two forklifts in order to get the tank into the truck. One forklift held the ramp nice and level, and the other forklift set the tank onto the ramp. Uhaul truck ramps are 24" wide, which is why I set the wheels at 23.5" wide. The ramp acted almost like railroad tracks for the Tank Plank™, it couldn't move or wiggle in any way.

The tank rolled in as easy as you please, and was strapped in place for the trip.

Upon arriving at the construction site, I was met by my wife and a bunch of my fellow redneck nerd buddies (the deep south results in really strange demographics lol). We stood around BS'ing for a while, and then we proceeded to try to remove the tank from the truck. Lining up the wheels...

Starting down the ramp

On the porch

The guys standing around because I forgot to grab the floor jack from the truck for the next step

Lining up to enter the kitchen through the French doors

Continued next post.....
Last edited:


