Pond Filter DIY

Luc70

Dovii
MFK Member
Jan 8, 2009
731
359
102
Bangkok, Thailand
Thanks for the compliment Fishdance.. Sure puts a smile on my face. Will try and reply more detailed tomorrow, have modified and tweaked a bit and it seems to be working very well now. No pictures yet, will make some for tomorrow’s report

cheers,
Luc
 

Luc70

Dovii
MFK Member
Jan 8, 2009
731
359
102
Bangkok, Thailand
Well, let's just start with the basics already...
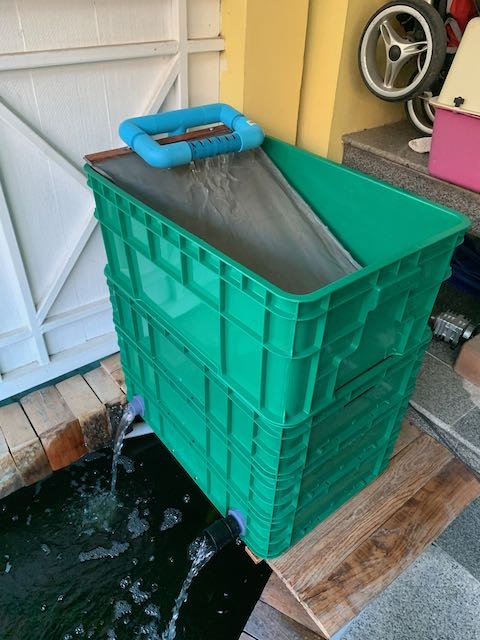
What I noticed is that with the 300 micron sieve-net, water is flowing over it rather fast. This means that most water ends up at one side of the filter, not something you want. It was easy to see with the outlet close to the lower end of the sieve having a much stronger stream of water coming out.. Now, this weekend I added a larger crate on top, filling up the original 'sieve-crate' with bioballs. The larger new top-crate then got the sieve installed at a steeper angle.

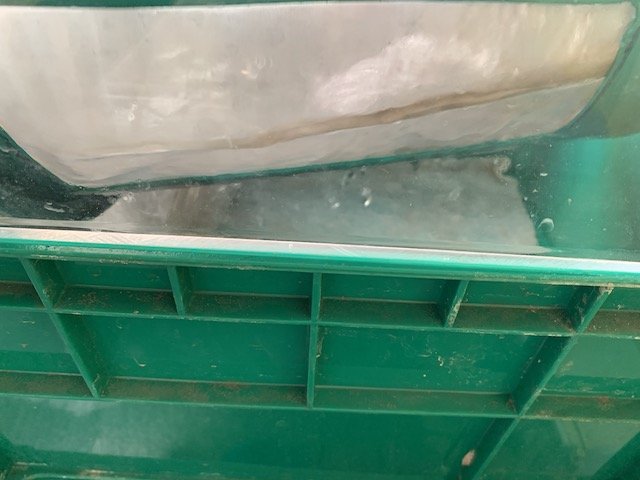
As Fishdance said, biofilm (and detritus as well), would limit the water falling down through the sieve and just let it slide/float on top of the sieve all the way to the lower end. But it then occurred to me that this is not the only reason. Actually, a lot of water does make it through the sieve, but capilairy conditions cause a lot of water that does make it through the sieve to stick and slide down on the under-side of the sieve, leaving very little water to drop straight down.

To test this, I simply rolled up some filter floss and stuck it under the sieve somewhere at halfpoint, just barely touching the sieve..
And voila.. water suddenly started going down at that point and spread much more equally throughout the filter boxes below it.
I've been watching the filter since making the change on Friday, and no matter how dirty the collection end of the sieve, water is still coming out in equal amounts out of both outlets at the bottom crate.

Cleaning the sieve remains the same, pressurised spray of water to clean out the rubbish and cleaning the filterfloss that captures all the rubbish.
Pond water is cleaner than ever before.

Some pictures tomorrow when it's light again.

Cheers,
Luc
 
  • Like
Reactions: Gpdriftwood

Luc70

Dovii
MFK Member
Jan 8, 2009
731
359
102
Bangkok, Thailand
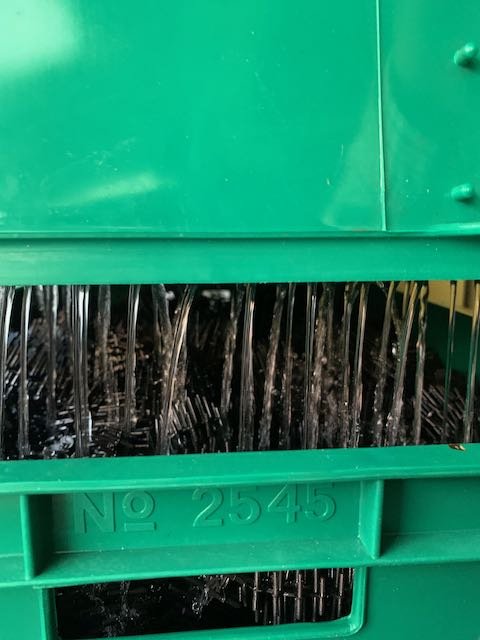
Just to add, I did not only reference this to the 2 outlets. I also lifted the crates and/or looked through the 'handgrips/sight openings' to see where the water was coming down through the many holes I drilled.
Water came down mostly through the holes at the lower end of the sieve initially, but after making the changes, it's now a much more equally spread 'rain' coming down all over the total area.
Cheers,
Luc
 

Luc70

Dovii
MFK Member
Jan 8, 2009
731
359
102
Bangkok, Thailand
IMG_2815.jpeg
Did you do overflows for every crate?
I thought about it a bit. It's actually very easy to have internal overflows, without 'spoiling' the outside looks and shape.
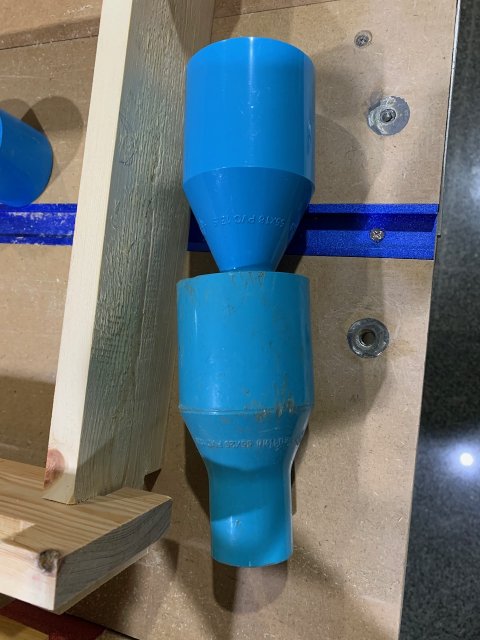
Take a PVC reducer where the smaller diameter can handle the flow of the pump.
Drill a hole in the crate's bottom that snuggly fits that smaller diameter and stick the reducer in there.
Cut the larger diameter part down to the max level you want water to stand in that crate (or use a pipe to extend it upwards).
Now, for every crate, you do the same in the same location, and you'll have a 'stacked' overflow pipe that covers each crate.
No matter which crate clogs up, the internal overflow will handle it at the level where it occurs.

Cheers,
Luc

Edit, coming to think of the stacked overflow, not a good idea. Better to have them in different locations, or you'd risk starving the lower crate's bacteria because if the top level gets clogged, all water would then go straight down into the pond.
So best to locate them in different corners at each level, so water keeps flooding the media below the clogged crate and keeps the filter alive.
 

fishdance

Redtail Catfish
MFK Member
Jan 30, 2007
1,788
952
150
Luc, your posts are probably the best part of MFK these days. Keep up the excellent work.

I'm pretty sure even one of your trays will give you sufficient filtration and anything more is excessive unrequired meddling but as a hobby this can be rewarding.

The water tension effect can also be used to promote even water distribution to your drainage holes. Mosquitoe screen accross the bottom although your filter is working well without this.

If you want to boost the efficiency of your existing screen then consider a parabolic curve, not just a steeper flat slope. This is simple physics but the aperture will decrease proportionally. Suggest 45 degree curve as a general guide. If your interested the resultant apperture calculation is Cos(radius angle) x aperture. So a 300 micron screen at 45 degrees becomes 212 micron but the entry angle of water is enhanced so better transmission.

As you are using a PVC frame, a simple inexpensive method is to curve your PVC pipe.

How I do this is to pack your pipe with sand and use a heat gun or gas cooker flame to heat until it's mallable and bend to some marked out guides. There is a steep learning curve so an easier but longer more laborious method is to heat the sand in a metal baking tray un your oven to 200 degrees Celcius for fifteen minutes, then pour the heated sand into your pipe. This will soon become very flexible and you can place into the guides to let cool.

As for your overflows, I don't think these are required. If you did want them, I would drill a side hole at appropriate level so it becomes very obvious the overflow is being used. Just a different perspective of course. It's entirely up to you and your priorities.
 
  • Like
Reactions: andyroo and deeda

Luc70

Dovii
MFK Member
Jan 8, 2009
731
359
102
Bangkok, Thailand
Thanks FishDance, enjoying the feedback and suggestions.
The Mosquito netting is interesting, never thought about that, something to try sure.
Filter is working nicely right now, with daily spray cleaning the mesh, but it's worth it trying the mosquito net to get continuous water evenly flow down.

I've stayed away from the curved screen on purpose. It complicates things, and my aim was KISS.
With the current setup, it's just a matter of tension to keep the screen nice and evenly straight. Making a parabolic shape would mean that I have to tension the screen from the sides. Can be done and there's some ideas brewing as I'm typing this, so we'll keep plugging along the coming weeks and see if we can test that.
As for the mathematics behind it? I'll pass,..lol.. but in case I need it for another project, I'll give you a buzz..:grinyes:
Did send an email out to one of my suppliers for DC-filters. I've asked him for Wedged Wire Screens, see if he has contacts for that.
If that works out, then I'll let you know the price for that. See if there's any chance of buying more if the price is good

Heating and bending PVC pipe I've done before. Easiest is to use a steel spring with the same diameter as the inside of the pipe. They cost close to nothing, and with a heat-gun, you soften and then bend the pipe easily. To get more complex shapes, prepare the outline with some scrap wood and pull the heated pipe along that shape. Wait to cool down and then pull out the steel spring.
Good idea on the sand filling though, never thought of that.

Indeed the overflows is a matter of how you look at it. I don't have them now, and not really planning for it. The many holes in each crate prevent plenty of flow, so I'm not really seeing any potential for disaster. But anybody trying out this filter, feel free to add if it makes you feel better.

I'm gonna call it a night, getting my little monster showered and in his bed.. Another day tomorrow.

Cheers,
Luc
 
  • Like
Reactions: deeda

Luc70

Dovii
MFK Member
Jan 8, 2009
731
359
102
Bangkok, Thailand
Did a bit of cleaning yesterday on the filter. Over time, there's some gunk getting into the filterfloss below the sieve.
Takes only a couple of minutes, 2 screws to remove, fold the sieve back, take the floss out and rinse the gunk out of it.
Put everything back and start the pump again. 20 minutes I think it took me.
Been looking for a wedge-wire sieve, found a straight piece of 40x40cm for THB 5,500 (USD 180). Still not 100% sure to get it. Had some discussions with FishDance on it. If I go that route, then I'd have to cut it down to 38cm wide, as that's the inside diameter, which should be no problem according to FD.. I'm tempted to try it out.. will see later this week.
Overall, identified a few things to address for the pond to maximise the filter efficiency:
1. Larger pump. My pond is about 2500 liters, pump is rated for 2800 liter/hour at zero head.
- Buy a larger pump and use the current one for circulation
- Experiment some more with different areas from where the pump collects its water
2. The Wedge Wire Sieve.
- Reduce cleaning and clogging
- Higher throuput (in combination with a new pump)

We'll see what can be done the coming weeks.
Overall I'm very happy with the filter. Cleaning, overall looks and efficiency are near perfect.
If anybody is trying to build their own version of it, would love to see pictures of it.

Cheers,
Luc
 
  • Like
Reactions: deeda

Luc70

Dovii
MFK Member
Jan 8, 2009
731
359
102
Bangkok, Thailand
It's been a while, but thought I do a quick update on the filter.
Found this video of Thay Nghia from Vietnam to build a drum-screen filter driven by water flow.
It's very easy to build and works wonders on the pond-water.
I've pretty much followed it except for the inside, where I made some folds in the screen to help with the rotation of the drum.

 
  • Like
Reactions: Chub_by

Luc70

Dovii
MFK Member
Jan 8, 2009
731
359
102
Bangkok, Thailand
Here's some pictures of my filter.
What needs to be said: This idea is absolutely great!! Big thanks to Thay Nghia who made a video of his build!!
I love it not having to use any electronics, motors or what-soever. Just use your pump-flow.

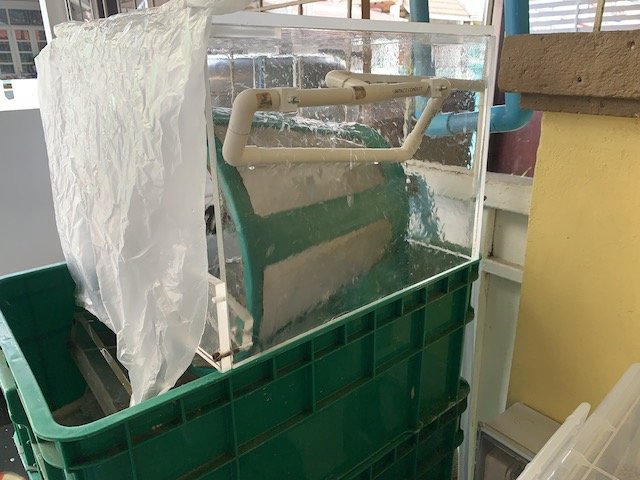
I've used some scrap 10mm plexiglass for the housing. Currently just hanging a plastic bag in front to avoid splashing during the washing cycle.
The filter-mesh is 100 micron, which I think is a good balance between filtering and clogging. Did a test-setup with 60 micron I still had, but was not happy with how fast it would clog up.
I'm using a separate pump on a 24hr timer, one of those cheap mechanical timers with 4 pushpins per hour, so 1 pin pushed down is 15 minutes running.
It's set to 15m washing, 45m normal running. Below the filter is the normal filter-fibre mat which I wash out 1 - 2 times p/week.
I also power-wash the drum from the inside out 1x p/week to keep it from clogging with algae and gunk.

As mentioned earlier, I've used folds in the mesh to help with the drum's rotation. This also makes it easy to get the mesh shaped to your bucket's tapering shape.
IMG_5469.jpeg
Here's a side shot. The filter helps to aerate of course, but also to spread the water out going down into the filter below.
IMG_5468.jpeg
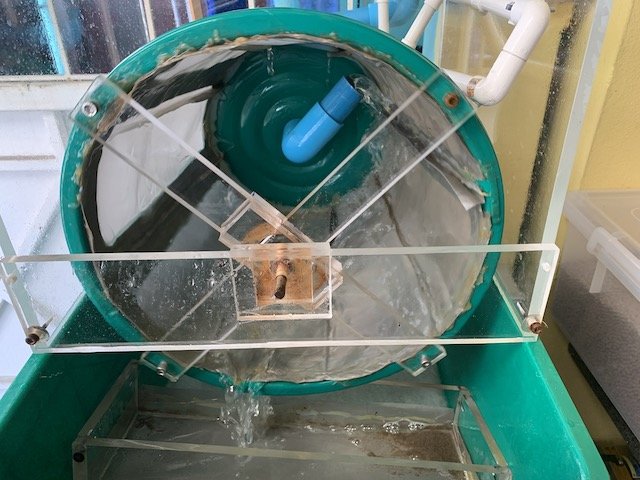
Front shot. You can see the folds, bucket is cut up leaving small strips for support. Used a hot-glue gun for assembly of the drum. The plexiglass is glued using acrylic 'glue'.
The backside of the drum just rotates around the 1" water pipe from the pump. The elbow is push on and can be removed to take the drum out.The front axle is a metal rod with some bearings. (Clearly the wrong bearings, not rust-proof...lol)
The catch for solids is a tight fit pushed down in one corner to have the solids build up away from where water falls down.
The white pipe top right is the washer. Small holes drilled in it and it is a square with one inlet at the top to ensure equal pressure at every spray hole.
It sits loose on top of the filter-crates. Top can be removed and for repairs or a good cleaning, it's easy to take the front out and remove the drum.
IMG_5466.jpeg
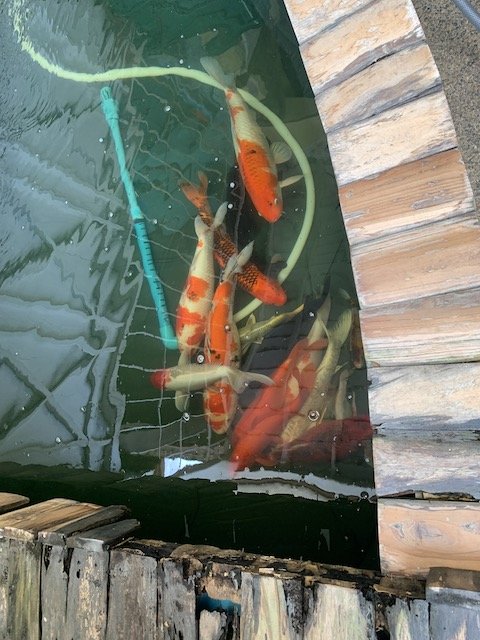
That's pretty much crystal clear to me..

IMG_5465.jpeg
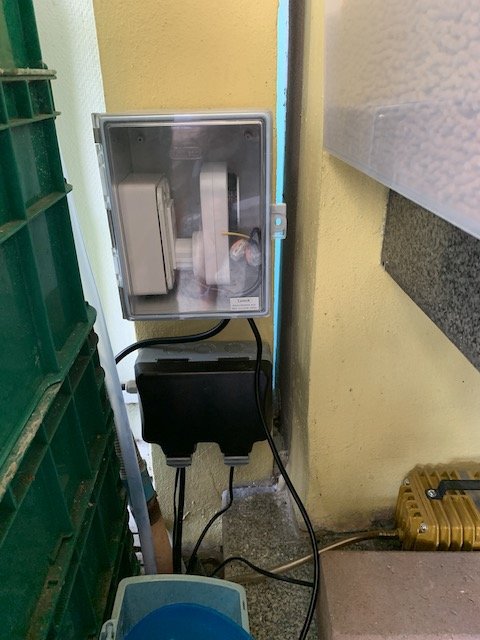
Also cleaned up the electrics. Put a proper waterproof outlet and a small project box with outlet for the timer.
The pump runs an airlift that helps me to properly keep the water flowing and eliminate dead-spots. (And of course tons of aeration)
IMG_5463.jpeg
And that's how it looks during a washing cycle.

Hope you enjoyed it and that it gives someone inspiration to try it. Can really recommend it.

Cheers,
Luc
 
zoomed.com
hikariusa.com
aqaimports.com
Store