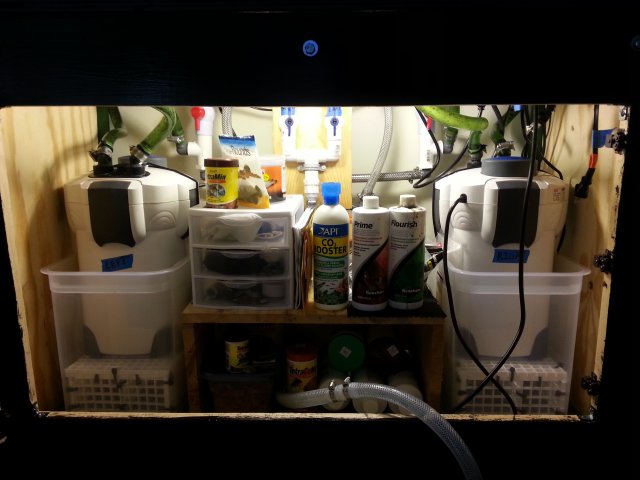
Mudbutt's drilling a tank for canister filters. 40b superthread (56k)
- Thread starter mudbuttjones
- Start date
I just feel like no thread is complete without butchering a pair of 10 gallon lids for the hinges and using some old glass from the 80's to make a functional glass top.

You may notice the little all glass handle on the front piece. Classic.
Total cost $0
Sent from my SCH-R950 using MonsterAquariaNetwork App

You may notice the little all glass handle on the front piece. Classic.
Total cost $0
Sent from my SCH-R950 using MonsterAquariaNetwork App
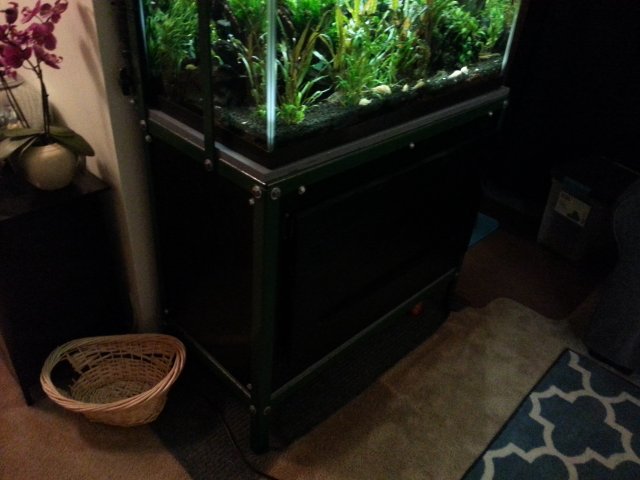
Finally finished.


I moved the seachem gravel from the old tank over and capped it with some new overpriced black planted aquarium substrate. Added a fist full of root tabs in there too while the tank was empty.
Not 100% on the aqua scape but I think it'll look better as stuff starts to grow in
Sent from my SCH-R950 using MonsterAquariaNetwork App
I ran into a few issues in the install. I figured this would be a 3 hour job and ended up taking all day.
First I lost the gasket for one of the bulkheads, so I had to drive 20 miles to a farm supply store and spend $10 for a schedule 80 HDPE bulkhead, just for the gasket.
I put a sheet of 5/8" plywood under the tank so I could attatch stuff under the stand to the bottom sheet of the plywood, like lights and the power strip. Plus the open top of the stand required the tank to be perfectly centered and I needed to put the tank back about 1/8" or so for the plumbing to clear the stand.

Its hard to tell but I used pipe straps to secure the plumbing to the stand so I cant bump it and break something while servicing the canisters

So I had to notch out the top of the rack for the returns to fit due to the added height of the plywood.
I got it up and running last night with out an issue or leak with the plumbing.
Then this morning the tank was about 5 Gallons low. Ahhh
The hose barb on the disconnect valve on the canister was cracked. (Now before you get on the hater train to sunsun town I will mention that the exact same thing happened to me on an eheim classic disconnect valve) I'm lucky it didn't drain the whole tank. It's amazing how much damage a few gallons of water can do. It did hit the basement, I've got fans and dehumidifiers running. Good thing I rent and this place is already a dump.

So I used a bunch of Silicone grease and thread tape to completely block off the threads where the barrelnut would be. I expanded the hose and slipped it over and tighetened it with a big hose clamp. So far no leaks, just gonna keep an eye on it for the next few days. I ordered a brand new valve assembly for both canisters off Amazon.

So far no bulkhead leaks, but I noticed this morning that I'm getting a leak between the ballvalve and the 3/4" pvc pipe. Its a pinhole leak, like a drip every couple of minutes. The pipe is seated all the way, infact I tapped all the fittings snug with a rubber mallet during the gluing process. I used the proper glue and primer too. I'm not sure how this could happen. I've never had a glued slip joint leak on such small pipe. I hung a little red party cup to catch the drips from hitting the carpet. I'll see if it improves. If it doesn't I'll have to drain the tank and refabricate this portion of the plumbing. I've had leaky bulkheads and unions seal them selves up over a few days. Once the plumbing gets good and dirty I think this pinhole will go away. Either way I'm starting another 55 hour work week so I'm not doing anything for a while lol.
So far so good. I guess.
Sent from my SCH-R950 using MonsterAquariaNetwork App
First I lost the gasket for one of the bulkheads, so I had to drive 20 miles to a farm supply store and spend $10 for a schedule 80 HDPE bulkhead, just for the gasket.
I put a sheet of 5/8" plywood under the tank so I could attatch stuff under the stand to the bottom sheet of the plywood, like lights and the power strip. Plus the open top of the stand required the tank to be perfectly centered and I needed to put the tank back about 1/8" or so for the plumbing to clear the stand.

Its hard to tell but I used pipe straps to secure the plumbing to the stand so I cant bump it and break something while servicing the canisters

So I had to notch out the top of the rack for the returns to fit due to the added height of the plywood.
I got it up and running last night with out an issue or leak with the plumbing.
Then this morning the tank was about 5 Gallons low. Ahhh

The hose barb on the disconnect valve on the canister was cracked. (Now before you get on the hater train to sunsun town I will mention that the exact same thing happened to me on an eheim classic disconnect valve) I'm lucky it didn't drain the whole tank. It's amazing how much damage a few gallons of water can do. It did hit the basement, I've got fans and dehumidifiers running. Good thing I rent and this place is already a dump.

So I used a bunch of Silicone grease and thread tape to completely block off the threads where the barrelnut would be. I expanded the hose and slipped it over and tighetened it with a big hose clamp. So far no leaks, just gonna keep an eye on it for the next few days. I ordered a brand new valve assembly for both canisters off Amazon.

So far no bulkhead leaks, but I noticed this morning that I'm getting a leak between the ballvalve and the 3/4" pvc pipe. Its a pinhole leak, like a drip every couple of minutes. The pipe is seated all the way, infact I tapped all the fittings snug with a rubber mallet during the gluing process. I used the proper glue and primer too. I'm not sure how this could happen. I've never had a glued slip joint leak on such small pipe. I hung a little red party cup to catch the drips from hitting the carpet. I'll see if it improves. If it doesn't I'll have to drain the tank and refabricate this portion of the plumbing. I've had leaky bulkheads and unions seal them selves up over a few days. Once the plumbing gets good and dirty I think this pinhole will go away. Either way I'm starting another 55 hour work week so I'm not doing anything for a while lol.
So far so good. I guess.
Sent from my SCH-R950 using MonsterAquariaNetwork App


Upon further inspection the reason the hose barbs broke off was from uneven pressure from the hose clamps. The plastic is very thin where the hose is supppsed to attatch but very thick where the barrel nut is supposed to be.
So I bought 2 new stop valves and used some JB marine weld epoxy in the threads and then sanded it.
 originally I used the barrel nuts but had problems with the hose leaking. This way I can slide the hose all the way on and it won't leak through the threads.
A nice sturdy leak free connection.
Sent from my SCH-R950 using MonsterAquariaNetwork App
Every time I have to service the canister I lose a couple ounces of water disconnecting the hoses

So I built a catch pan out of a sterlite container and some light diffuser crate. If I do develop a slow leak I should be able to catch it before it fills up the catch pan and hits the floor.

All done. The slow leak on the drain plumbing stopped. you can see on The right my valves For draining the tank
Sent from my SCH-R950 using MonsterAquariaNetwork App

So I built a catch pan out of a sterlite container and some light diffuser crate. If I do develop a slow leak I should be able to catch it before it fills up the catch pan and hits the floor.

All done. The slow leak on the drain plumbing stopped. you can see on The right my valves For draining the tank
Sent from my SCH-R950 using MonsterAquariaNetwork App
Yessss Jb weld! Love it. Nice build as always man.
Sent from my Z10 using MonsterAquariaNetwork App
Sent from my Z10 using MonsterAquariaNetwork App
JB WELD is the stuff dreams are made of. I could go on and on about the dumb stuff I've done with it.Yessss Jb weld! Love it. Nice build as always man.
Sent from my Z10 using MonsterAquariaNetwork App
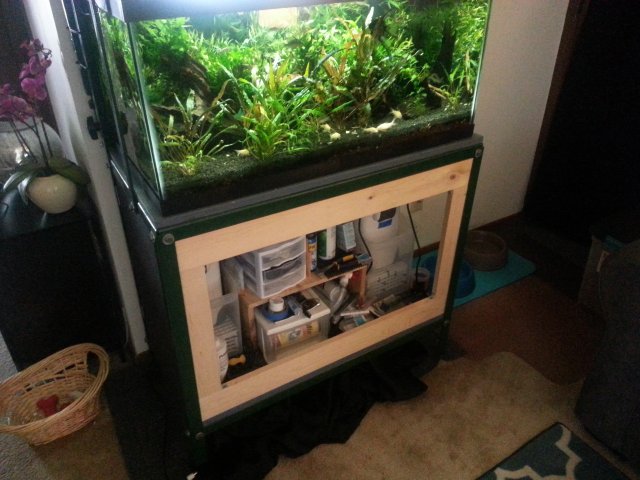
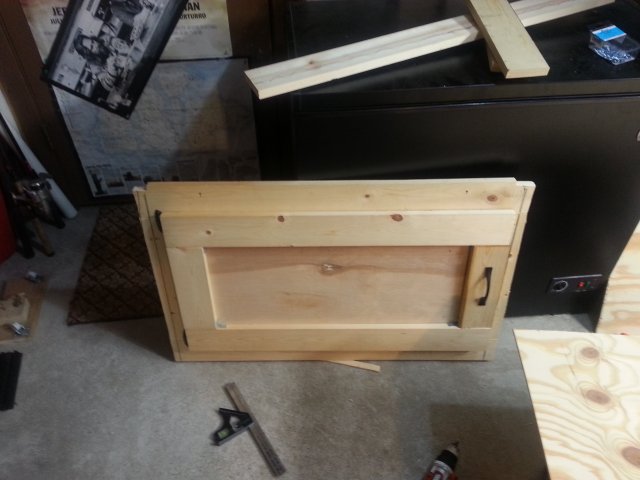
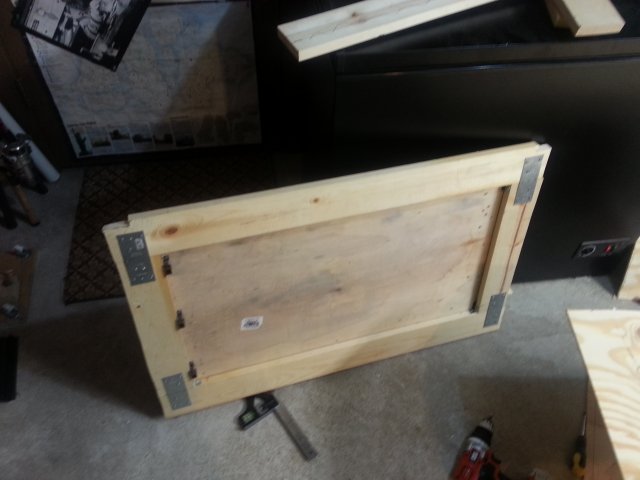
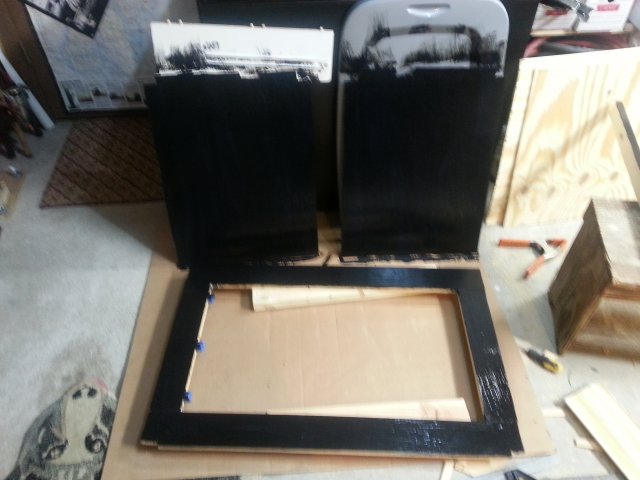
anyway back on topic. I decided tp get rid of the black curtain on the stand and replace it with a wood door and sides. Just a little childproofing. Kindof weird to build a cabinet into a steel rack, but such is life
