Nice placement on the tank. Stand is definitely sturdy you could park a tank on that thing. Im puzzled as to why the stand is so long. Ideally youd want the pillars right under the corners of the tank, but i doubt you'll have problems with all the reinforcement. I think the heights perfect.
180g (attempted low/easy maintenance) peninsula dirt bottom planted tank build
- Thread starter Oughtsix
- Start date
You are using an out of date browser. It may not display this or other websites correctly.
You should upgrade or use an alternative browser.
You should upgrade or use an alternative browser.
Thank you for the comments!
The stand is a foot longer than the tank because this is where all the plumbing, wiring and the trickle tower will go. This one foot area will be boxed in with matching wood for aesthetic purposes. The hood will extend over this enclosed one foot section to give it an integrated look.
I agree with you that the supports should be directly underneath the tank corners. I will add two single sticks of 2 x 4 directly underneath the unsupported tank corners to minimize any flexing of the top piece "ladder".
I appreciate the questions... I would much rather discover I overlooked, forgot or didn't account for something now rather that after everything is altogether.
Last edited:
Thank you for the comments!
The stand is a foot longer than the tank because this is where all the plumbing, wiring and the trickle tower will go. This one foot area will be boxed in with matching wood for aesthetic purposes. The hood will extend over this enclosed one foot section to give it an integrated look.
I agree with you that the supports should be directly underneath the tank corners. I will add two single sticks of 2 x 4 directly underneath the unsupported tank corners to minimize any flexing of the top piece "ladder".
I appreciate the questions... I would much rather discover I overlooked, forgot or didn't account for something now rather that after everything is altogether.

Yes i see now i just figured that the trickle tower and everything would be on a separate platform.
The extra 2x4s should work perfect.
So I spent ALL weekend making countless trips back and forth from the house to the shop trimming, tweaking and sanding until I got the top of the stand PERFECTLY level! Then just as I was about to dive into fiberglassing the basin (bottom of the stand) is started raining. 
So I decided to start working on the plumbing:
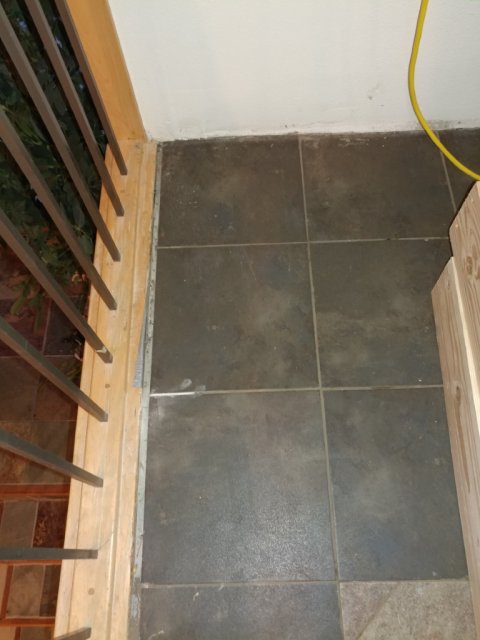
See that little bit of duct tape on the base board? It marks a buried treasure of IMMENSE value that has been hidden for 15 years!
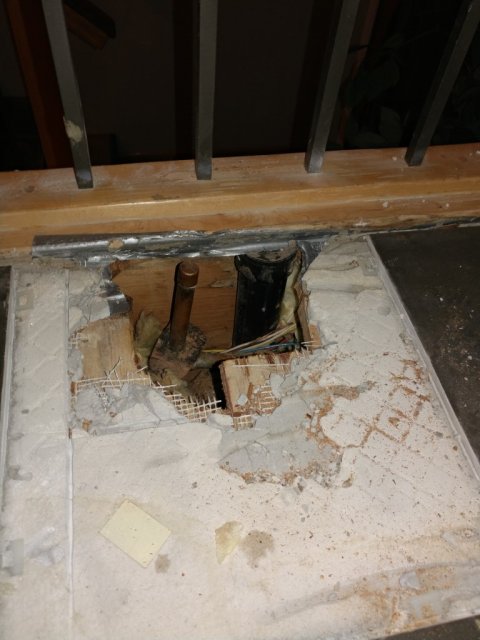
That is HOT and DRAIN... I still need to do a bit of digging to get to COLD. Conveniently who ever buried these left them nice and LONG so they could be tapped into. Unconventionally who ever burred them covered them with a reinforced layer of modified floor leveling compound (which also covers the heating coils another couple of feet away from here) which is a HECK of a lot stronger than I would have ever guessed. Then the modified mastic is on top of the floor leveling compound to secure the tile. Several full hard blows with a hammer left it virtually untouched. I had to pull out a stone chisel and even then it was slow going.
I am on well water so I fill my tanks directly from the tap without any treatment. I plan on putting a mixing between the hot and cold so I can get close to tank temperature and put a high flow tank filling (sump filling) float valve. My current thought being that I will pump water out of the first sump compartment and the float valve / auto fill will fill the second compartment of the sump with the return pump in it.
I thought about a continuous drip system but after a lot of reading and thinking I believe this system will be more water efficient. I fair amount of the dirty water will be pumped through a 1/2" hose to a water wand for watering my daughters 50+ house plants. Any more waste water that needs to be removed for a sufficient water change will be dumped down the drain or redirected to the lawn depending on the season.
I plan to put a "P" trap on the drain and plumb it into basing (bottom of the stand) to hopefully handle any emergency floods. I might put a flap valve in front of the "P" trap for a little extra sewer gas protection.
P.S. That rectangle in the lower left... is the sticker that was on the bottom of the tile when it was new.
So I decided to start working on the plumbing:

See that little bit of duct tape on the base board? It marks a buried treasure of IMMENSE value that has been hidden for 15 years!

That is HOT and DRAIN... I still need to do a bit of digging to get to COLD. Conveniently who ever buried these left them nice and LONG so they could be tapped into. Unconventionally who ever burred them covered them with a reinforced layer of modified floor leveling compound (which also covers the heating coils another couple of feet away from here) which is a HECK of a lot stronger than I would have ever guessed. Then the modified mastic is on top of the floor leveling compound to secure the tile. Several full hard blows with a hammer left it virtually untouched. I had to pull out a stone chisel and even then it was slow going.
I am on well water so I fill my tanks directly from the tap without any treatment. I plan on putting a mixing between the hot and cold so I can get close to tank temperature and put a high flow tank filling (sump filling) float valve. My current thought being that I will pump water out of the first sump compartment and the float valve / auto fill will fill the second compartment of the sump with the return pump in it.
I thought about a continuous drip system but after a lot of reading and thinking I believe this system will be more water efficient. I fair amount of the dirty water will be pumped through a 1/2" hose to a water wand for watering my daughters 50+ house plants. Any more waste water that needs to be removed for a sufficient water change will be dumped down the drain or redirected to the lawn depending on the season.
I plan to put a "P" trap on the drain and plumb it into basing (bottom of the stand) to hopefully handle any emergency floods. I might put a flap valve in front of the "P" trap for a little extra sewer gas protection.
P.S. That rectangle in the lower left... is the sticker that was on the bottom of the tile when it was new.
Last edited:
Well last weekend didn't go so great. I finally decided to dive into fiber-glassing the bottom of the stand.
I started by rounding off the edges with the router.
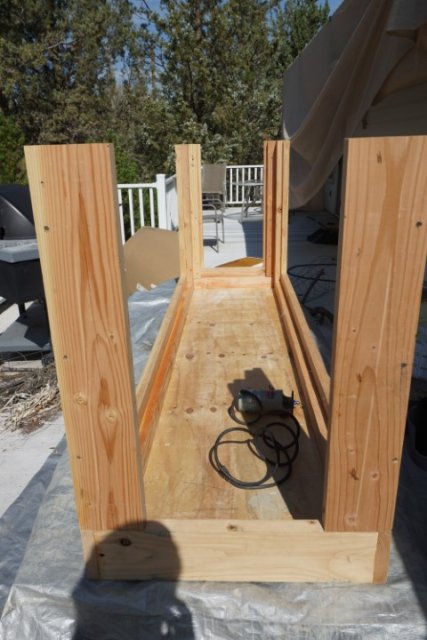
I gave the bottom a quick sanding and started mixing the resin.
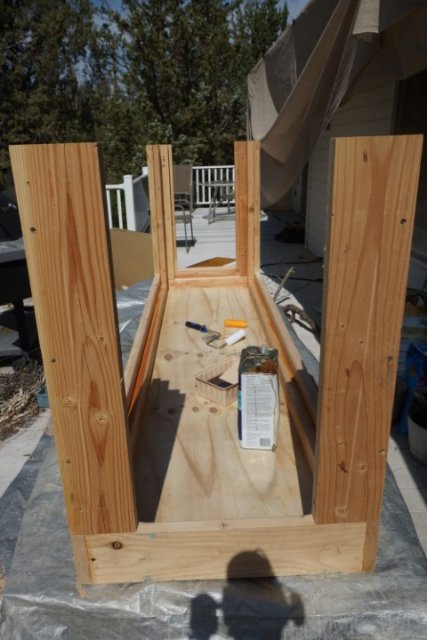
The base coat went on well.
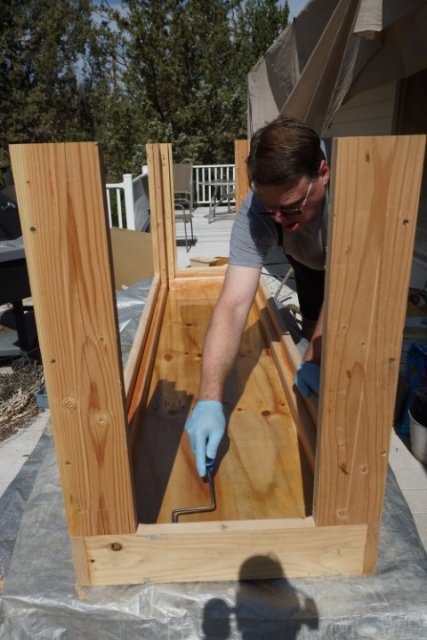
I spread the chop mat onto the base. This is the first time I used a chop mat. I have always used a woven mat in the past.

First mistake - Don't use a foam roller, it started falling apart.
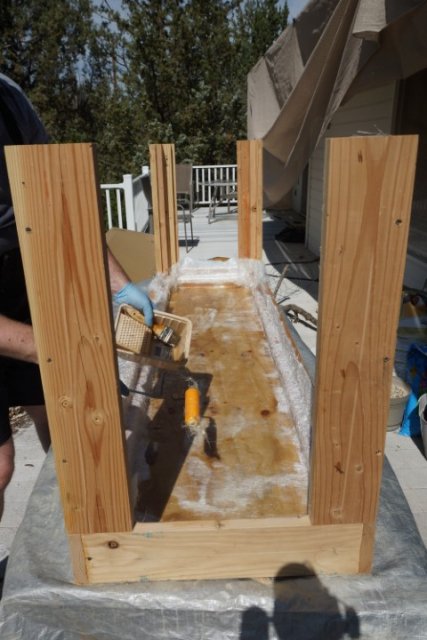
Wetting out the bottom did not go as smooth as I had hoped.
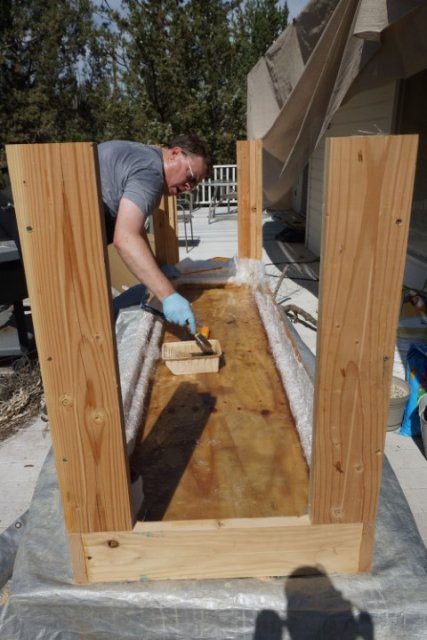
A gallon of resin done in 4 batches is more than enough for this job. I don't know if I mixed in too much hardener but I wasn't able to the entire mat wetted before the 4th batch started hardening. I ended up with an incredible mess! The bottom was completely uneven with puddles and very high spots. Most of the frame did not get completely wetted out before the resin cured too much to get it smoothed out and the bubbles and air pocket out.
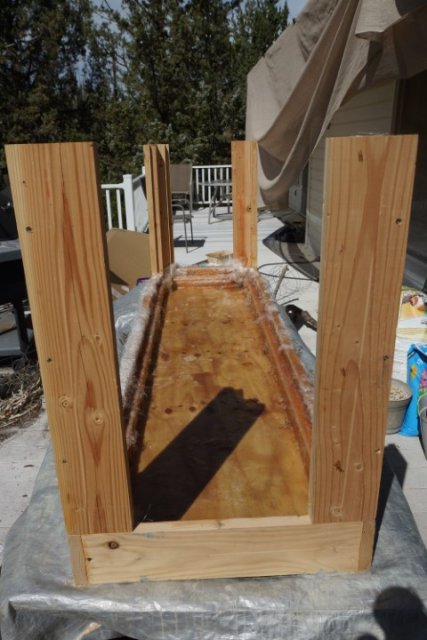
I started by rounding off the edges with the router.

I gave the bottom a quick sanding and started mixing the resin.

The base coat went on well.

I spread the chop mat onto the base. This is the first time I used a chop mat. I have always used a woven mat in the past.

First mistake - Don't use a foam roller, it started falling apart.

Wetting out the bottom did not go as smooth as I had hoped.

A gallon of resin done in 4 batches is more than enough for this job. I don't know if I mixed in too much hardener but I wasn't able to the entire mat wetted before the 4th batch started hardening. I ended up with an incredible mess! The bottom was completely uneven with puddles and very high spots. Most of the frame did not get completely wetted out before the resin cured too much to get it smoothed out and the bubbles and air pocket out.

This evening I went to town with the grinder and sander. Man that resin is HARD!!!! It ate up my 40 grit discs. I finally resorted to a diamond cup wheel to really smooth things out. Then I went over it with a 40 grit disc and then with a 80 grit belt. Sanding fiber-glass is MISERABLE!!! I am glad I sprung $6 for the Tyvek suit and of course I used a respirator. I have about a 2" band of fiber-glass micro splinters between where the Tyvek sleeves stopped and my gloves started.

Yeah, this is "Cleaned Up!". I was too mad at myself to take good pictures of how bad it was before I spent a few hours sanding.

Tomorrow I am going to put another coat or two of just resin on after doing a bit more clean up. I think it will look good enough for the bottom of an Aquarium stand once the voids are filled and everything is smoothed out. A week of rain did prove it to be water tight... before I sanded it down.
Next time I think I will just put fiber-glass tape on the seams and I definitely will not be using the chop mat again!!!

Yeah, this is "Cleaned Up!". I was too mad at myself to take good pictures of how bad it was before I spent a few hours sanding.

Tomorrow I am going to put another coat or two of just resin on after doing a bit more clean up. I think it will look good enough for the bottom of an Aquarium stand once the voids are filled and everything is smoothed out. A week of rain did prove it to be water tight... before I sanded it down.
Next time I think I will just put fiber-glass tape on the seams and I definitely will not be using the chop mat again!!!
Just curious why are you your fiberglassing the bottom of your stand?
I want the bottom of the stand to be water tight. If I have a sump failure / overflow the stand tub will be plumbed into a drain line which should keep tank water from flooding my house. A tank failure most likely will not be contained.
The Polyester resin does an excellent job of completely sealing the stand tub. As the weight of the tank is added to stand the stand will settle some and there is a high propensity for the rigid polyester seams to open and allow water infiltration if they are not reinforced with fiber glass. The fiberglass on the seams will strengthen the seams and lower the probability of a leak in the stand tub developing. The fiberglass on the rest of the stand tub is there because apparently I am a masochist. ☹
I am learning a lot about the polyester resin that is commonly used for fiberglass. I have come to the conclusion that the difficulties I had getting the fiberglass chop mat wetted out is due to choosing too hot of a day to attempt the fiber-glassing. It was low 80's and I did the fiber-glassing out doors in the direct sun... very bad idea! I fiber glassed a stand built for my little sisters 45g corner tank several years ago using woven fiberglass mat and it turned out excellent and is still water tight today. Apparently I did the fiber glass job on a cooler day back then because it went a LOT smoother. If I were to start this stand over I would use narrow fiberglass strips about 4" wide for the seams. I would not fiberglass the whole bottom, I would just put a few coats of the resin directly on the wood without the fiber glass mat.
Yesterday was supposed to be 70 degrees so I filled the voids from the first fiber glassing attempt. It is still a bit tacky. Tomorrow it is supposed to get up to 75 degrees so I might take the day off and finish coating the interior of the stand with resin and use a heavy amount of catalyst to hopefully get a nice hard water proof interior coat. Evidently there is a balance between the resin curing too fast which makes it brittle and taking for ever to cure remaining tacky for a very long time. Fortunately the quality of my fiber glassing job is pretty insubstantial compared to something like a boat.
If you want to know anything about fiberglass or fiber glassing an object ask a boat builder / restorer... they have a ton of great information online rich with horror stories of fiber glassing jobs gone wrong!
P.S. Oh yeah.... I have a tendency to overbuild things. Build it once and build it right the first time!
Hey nothing wrong with being ocd
We got some good sun today and it is about 72 degrees right now. The resin I filled the voids with cured to an appropriate hardness, I was a bit worried.
I had a bit of a diversion at lunch today though. I picked up some cast acrylic for a price I couldn't pass up! monsterfishkeepers.com/forums/threads/how-much-do-4-x-8-sheets-of-1-2-cast-acrylic-sheets-cost.722127/page-2#post-8151707
I will resist the temptation to tear this stand apart and make it wider for a wider tank... although it is tempting I will never finish a tank if I divert myself with a new tank build!


