180g (attempted low/easy maintenance) peninsula dirt bottom planted tank build

jjohnwm

Sausage Finger Spam Slayer
MFK Member
Mar 29, 2019
3,761
9,193
164
Manitoba, Canada
Cool thread, '06 (I'm guessing you're a shooter?). I followed the link you put in my planted-tank-sock thread to here. A couple of quick questions/comments:

First: you mentioned at some point using your favourite DE filter for bio filtration? How is this going to work? Assuming that DE is diatomaceous earth, this is about the last filter that would be suitable for biofiltration. Each time it clogs...which will happen quickly and often...it requires replacement of the DE powder which will mean throwing away all your bacterial colonies. Is there some modification going on here, or have DE filters changed dramatically since my day with them?

Second: you are lucky beyond belief to have those plumbing fittings right there, as you know. Take full advantage of the hot and cold, certainly...but have you considered the wisdom of using that drain for water changes? Since you are on a well, I assume that you also have some sort of septic field or other self-owned sewage system, rather than being on sanitary sewers. Any system with which I am familiar has a finite lifetime, or at least requires regular maintenance. I know in my own case that I never dump tank water down the drain for this reason, despite being on an ejector system which is about as trouble-free a system as can be had. For awhile I simply drained into my floor sump and allowed the sump pump to remove the water for me; recently I added a completely independent drain line running into a nearby field. Just something to think about.

Third: if you do use the drain, why not trace it down to the basement and ascertain if it already has its own P-trap down there? If so, you don't need to mess around with another one under your tank. Even if you don't have a trap in the basement, it might be easier to add one there rather than in the cramped confines under the tank/stand.

Fourth: I know I had four points, but already forgot the last one. :) When if it comes back to me, I'll post it up. Meanwhile, thanks for the great thread, I am watching it with interest and preparing to steal as many ideas for my "ghetto" version as possible. Cheers!
 

Oughtsix

Redtail Catfish
MFK Member
Apr 9, 2011
1,600
553
150
Redmond, OR
Hey John(?)!

The DE filter I am referencing is in my sig. I have used it in the past and the maintenance of the filter was a whole lot less than I had ever expected. The Hayward EC40 has a handle on the top of it (I think there is a previous pic showing the filter in the start of the stand). When the DE clogs you just shut off the pump then pump the handle up and down a few times which knocks the DE off the filter screen tubes. When you turn the pump back on the screens are recoated with a fresh layer of DE exposed. I have gone years without flushing out the diatomatious earth and putting a new charge in the filter (I actually had to take the 110g tank down due to a leak before I had to change the DE). I believe that the DE filter itself will provide all the bio filtration I will ever need... but I am going to be using bio balls in the trickle tower as my main bio filtration as I really like the way it oxygenates the water and off gases organic compounds. Of course the microbes are going to go where they want to go and colonize where they are happiest so I don't really have any say on where my bio filtration will actually be.

I am currently using a 20" BigBlue cartridge filter charged with DE on our current 35g tank. We have several years on the initial charge of DE. My first DE filter was a Diatom XL (I am guessing this is what you have used previously?)... The Hayward EC40 is a pool filter... same incredible results but massively different scale!

There used to be a wall there which I ripped out 16 or so years ago and replaced with the railing. There was a small wet bar right there, just a small sink and cupboards. I didn't mention this previously but I know there isn't a P trap because I ripped it out when I ripped out the sink and the wall. :) I marked the spot with the duct tape when I put the tile down as I knew some day there would be an aquarium there! :) I have 12" between the floor and ceiling below so I am good for space for the P trap. The tough part will be welding the final drain pipe into the P trap from under the tank. I think I have this covered?!?!??

I did own a place with septic problems at one time but my current house has a pretty stout septic system. I live in Central Oregon and we have VERY porous volcanic soil. It has swallowed up the water from a 20' x 40' x 5' above ground pool darn near instantly (as fast as I could drain the pool) so I am not too worried about the septic field. BUT I don't like to just waste water even though it costs me pretty near nothing to pump it out of the ground. 9 months out of the year I will direct the filter change water into the garden. The drain will only be used during the winter months when I will likely have freezing issues with a discharge line into the garden.

But, now that you made me think through this again I have just decided to do away with the 1" electric valve... instead I am going to use an old sump pump to drain the water out of the sump... that will be a lot easier. (Thanks for brain storming with me!) I had better add the drain line to the garden before I forget.

The extra sump/drain pump will have 3 possible outlets:
1) Down the drain.
2) Into the garden.
3) Into a hose to be used to water my daughters 50+ house plants. --that many plants with a watering can is ridiculous! LOL!

I really appreciate the feed back! Having someone to talk through my plans with is incredibly helpful! Just re-questioning what I am doing and why I am doing it helps so much!

Cheers!
Michael.

P.S. I am more of a target shooter than a hunter. :)
 

jjohnwm

Sausage Finger Spam Slayer
MFK Member
Mar 29, 2019
3,761
9,193
164
Manitoba, Canada
Hey Michael, yes, it's pretty nice...and lucky...to come across a thread where someone is doing a project very similar to your own; I'm going to be following this closely and comparing our two plans. I have it a lot easier as my tank is just in my basement fishroom/workshop, not on display in my house the way yours is, but functionally they are like peas in a pod.

My DE filter experience, as you guessed, is with the old Vortex DE filters that worked like a charm but required frequent and inconvenient cleaning. In comparison to those, that pool filter looks irresistible. A question: when you do the manually-pumped cleaning thing, does the filter blast a cloud of fine silt/powder into the tank for a few moments as the DE powder re-deposits itself when turned back on?
 

Oughtsix

Redtail Catfish
MFK Member
Apr 9, 2011
1,600
553
150
Redmond, OR
Hey Michael, yes, it's pretty nice...and lucky...to come across a thread where someone is doing a project very similar to your own; I'm going to be following this closely and comparing our two plans. I have it a lot easier as my tank is just in my basement fishroom/workshop, not on display in my house the way yours is, but functionally they are like peas in a pod.

My DE filter experience, as you guessed, is with the old Vortex DE filters that worked like a charm but required frequent and inconvenient cleaning. In comparison to those, that pool filter looks irresistible. A question: when you do the manually-pumped cleaning thing, does the filter blast a cloud of fine silt/powder into the tank for a few moments as the DE powder re-deposits itself when turned back on?
Yes, when I pump the handle to strip and re-coat the screens that hold the DE in the EC40 it most definitely does cause a small cloud the tank water for 5 minutes or so with DE dust. The whole filter charge DE does not cycle through the tank, just a very small percent of DE that makes it through the screens initially. The water never becomes anywhere near opaque with DE. I have planted tank with a potting soil substrate capped with gravel so any DE that settles in the tank before being caught by a cycle of the DE filter just becomes part of my substrate. I have never noticed the tank inhabitants to be bothered by the DE cloud after many years of running a DE filter full time.

When I initially setup the EC40 I was considering plumping in an extra tank bypass valve so I could charge and recharge the DE without clouding the tank. Basically I would just add a Y valve to the return to tank line from the EC40 to redirect the return to the tank directly into the sump. For me, in my experience, the extra valve and plumping for bypassing the tank doesn't seem necessary. (Hmmmm... but not very difficult in my new tank configuration.... Hmmmm....)

Many years ago a friend gave me a Vortex DE filter. I got addicted to the perfectly clear water and decided there had to be a way to run one full time without the constant DE maintenance and continually running that inefficient Vortex motor. I can't fathom running a tank without a full time DE any more. LOL!!!!

--- Cheers, Michael.
 
Last edited:

jjohnwm

Sausage Finger Spam Slayer
MFK Member
Mar 29, 2019
3,761
9,193
164
Manitoba, Canada
I ran mine for a few hours a week on each tank I had; and, yes, the "invisible" water is addictive...never mind the benefits related to disease/parasite reduction.

I am close to giddy at the idea of running one 24/7! :)

I suspect that if I go with this filter, it will probably have its own pump, rather than being in-line with the rest of my filtration.
 

Oughtsix

Redtail Catfish
MFK Member
Apr 9, 2011
1,600
553
150
Redmond, OR
I ran mine for a few hours a week on each tank I had; and, yes, the "invisible" water is addictive...never mind the benefits related to disease/parasite reduction.

I am close to giddy at the idea of running one 24/7! :)

I suspect that if I go with this filter, it will probably have its own pump, rather than being in-line with the rest of my filtration.
When I first installed the EC40 the back pressure from the EC40 was nothing near what I had expected / feared it to be. My first attempt was to run the EC40 inline with my sump using the QuietOne (model? uhhh... pretty darned small) currently in the sump before ordering a bigger pump more suitable for the filter. I was shocked at how well it worked with that tiny pump. I ended up using that pump for many years never finding a need to replace it. When I ordered the EC40 I had substantial fears I was going to have to buy a 2hp pool pump to force the water through the filter... I was extremely pleasantly surprised!

You might find running an EC40 inline with your current filtration an easy and suitable alternative to setting up a separate pump dedicated to the EC40. There is a huge mass of filter area in the EC40 so it doesn't put much drag on the water flow.

For a completely worthless non-scientific testimonial: I have not had any kind of infection, fungi, bacterial or other in the 10 years I have been running a full time DE filter... and some times my tanks have not always received the best maintenance or had their water changes as often as they should have.

I think it was about a 25lb sack of pool filter DE that I ordered off of Amazon when I initially setup the EC40. I will probably have to order another sack of DE in another 50 years or so from now.
 
Last edited:

Oughtsix

Redtail Catfish
MFK Member
Apr 9, 2011
1,600
553
150
Redmond, OR
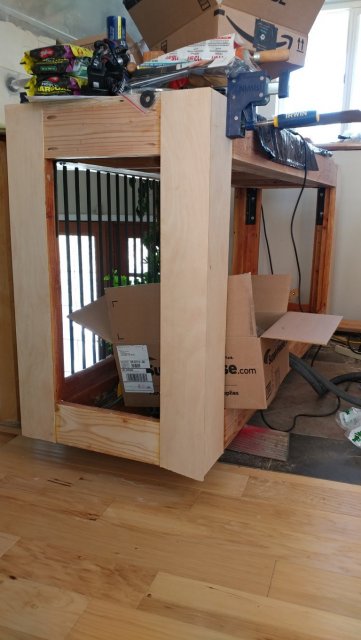
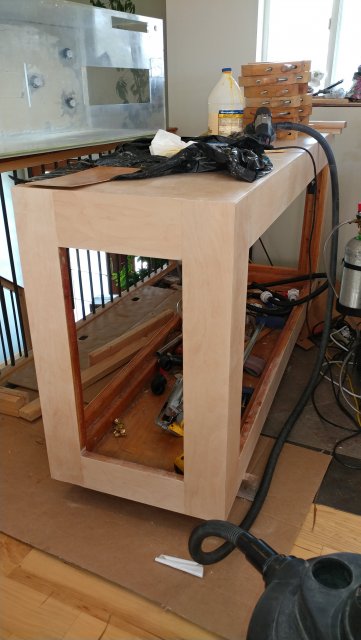
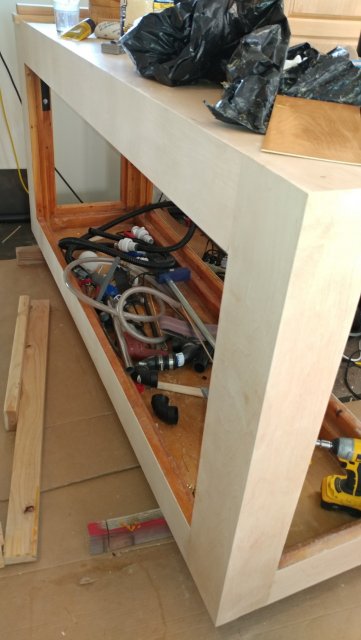
It has been a while since I have posted. I have finished wrapping the stand and sanding the heck out of it. 120 grit, 150 grit then 180 grit.

0616201616.jpg

0616201616a (Large).jpg


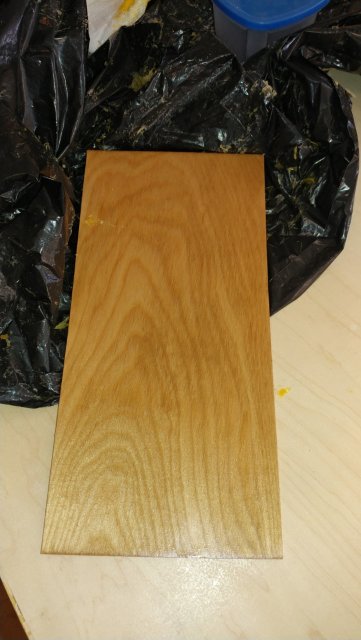
I did some test pieces for the finish. This is 1/3 Boiled linseed oil, 1/3 Spar varnish and 1/3 Turpentine... a finish I use often.

0616201616b (Large).jpg


I am a little disappointing in the grain pattern in some of the pieces. :( It was supposed to be maple but I am pretty sure it is birch instead. Roll peeled veneers never look as nice as sliced veneer or solid wood. I am kind of regretting the choice but don't know if I have the patients to redo the veneer.

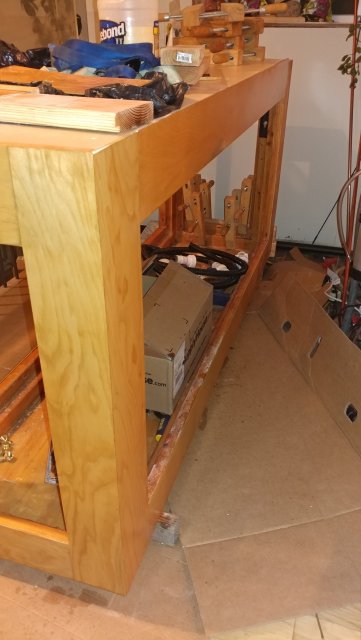
0619200058.jpg

0619200059 (Large).jpg

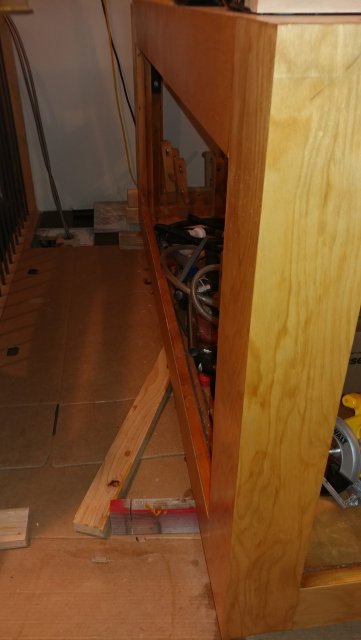
3 coats applied. I will sand it out after it has dried and apply 2 more thine coats. Spar varnish has long molecular chains which is mainly for sunlight / UV resistance but it also does a very good job for water resistance. Spar varnish is a marine grade finish. It takes FOREVER to dry! A good two days minimum with fans on it between coats.
 

Oughtsix

Redtail Catfish
MFK Member
Apr 9, 2011
1,600
553
150
Redmond, OR
Every time I setup a new tank I forget how expensive it is for all the little stuff. Just the plumbing fittings are killing my budget, a few hundred dollars worth, even though I ordered the bulk of it from supplyhouse.com which is about 1/3 to 1/2 cheaper than Lowes or Homedepot and has gotten all my orders to me within 3 days of ordering. So after a few pay checks I was able to make some progress.

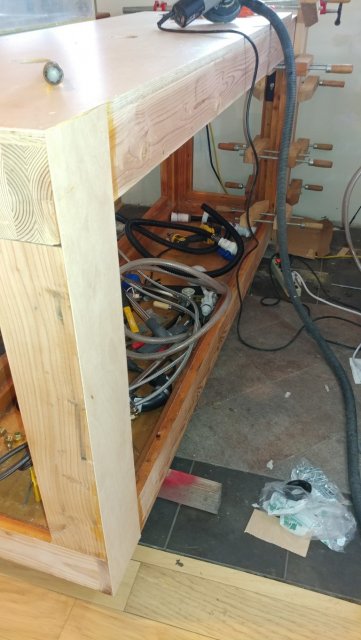
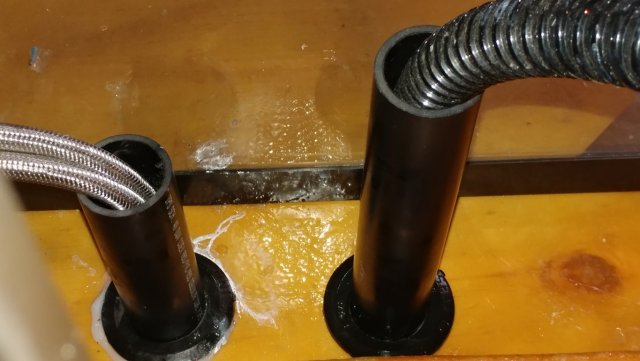
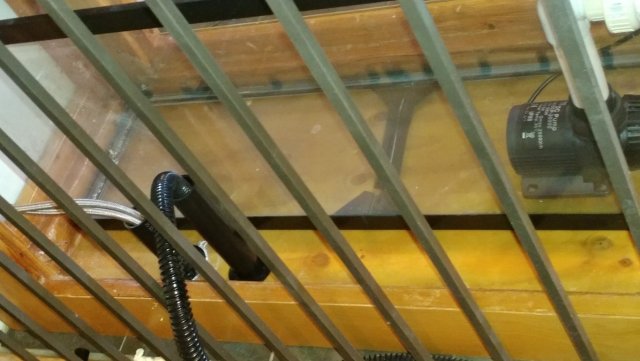
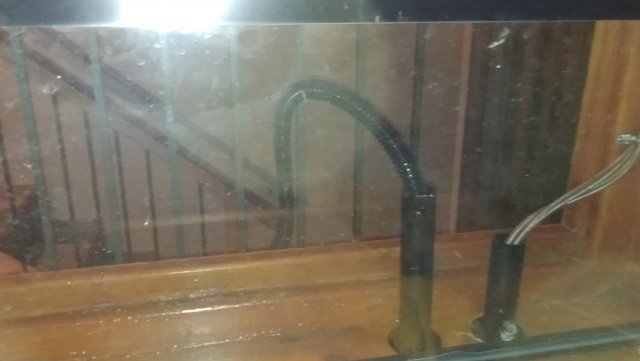
BY FAR these two holes were the hardest to drill! I had one chance to drill them in the correct position so they lined up with the plumbing under the floor. It took me weeks just to work up the courage to just do it!

0902202254 (Medium).jpg

0902202253a (Medium).jpg

0902202252 (Medium).jpg

The pipe with the braided stainless lines coming out of it is the hot and cold water supply lines to the tank. Since they are flexible the positioning wasn't critical. The black pipe with the black spiral tubing coming out was extremely position critical. I have a tall U pipe (acting a a P trap) to keep sewer smells out of the aquarium stand and living room / house underneath the floor. That pipe had to line up with the under floor U trap. I did make the U trap out of a combination of ABS sewer pipe and rubber elbows so there is a fair amount of play in the U trap due to the rubber.

I propped the baluster side of the stand up with a 2 x 4 at one end so the whole stand leaned at an angle. I installed the black uniseal in the bottom of the stand with a generous helping of silicone to make sure everything was sealed up well. The stand bottom was thicker than the uniseal is designed for so pushing the pipe through the uniseal was VERY difficult. I finally had to sand a good bevel on the end of the pipe to get it through the uniseal.

After the drain pipe was through the uniseal I generously covered the end of the pipe and the U tube in the floor with ABS cement. Then I removed the 2 x 4 so the stand was flat on the floor and pushed the pipe further down until I could feel it engage with the U trap. With a little fussing I could feel the pipe fit into the U trap and I gave it a good push with a turn to seat the pipe into the U trap. The next day I filled and emptied the 180g tank through this drain pipe without any water appearing in the garage ceiling below so I am confident I have the drain well sealed.


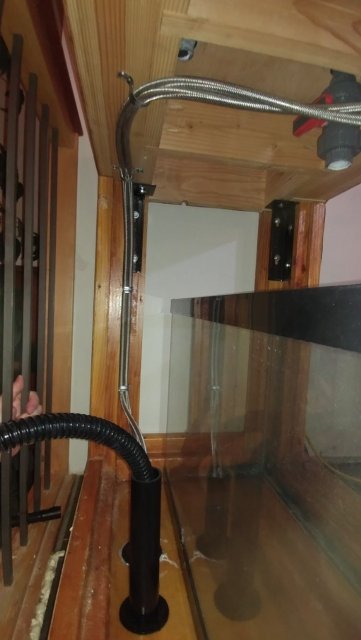
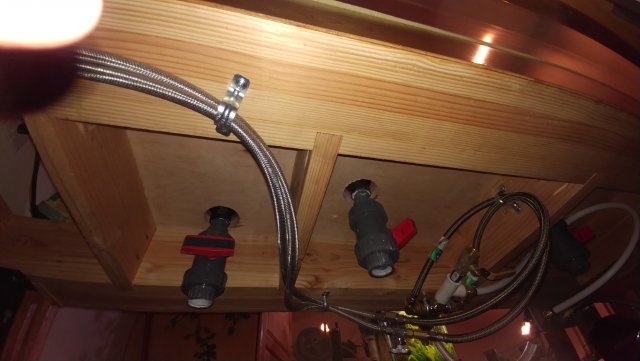
I had actually fished the hot and cold supply lines up through the other black pipe before messing with the drain:
0902202254b (Medium).jpg

I fastened the lines to the stand with 1" pipe hangers to try to keep everything neat.

0902202255a (Medium).jpg
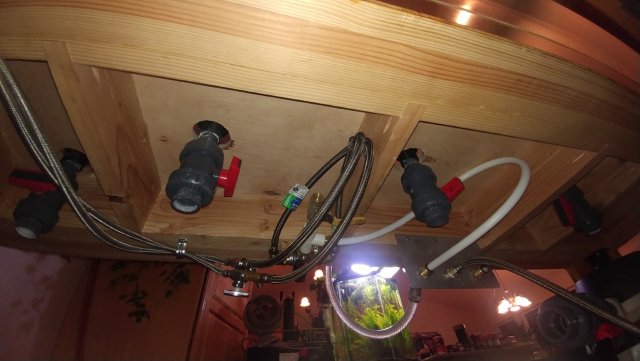
I then ran the supply lines to some shut off valves then onto the temperature compensating valve.

0902202255b (Medium).jpg

Then I ran the warm mixed hot / cold water line from the temperature compensating valve into a T. One side of the T is plumbed into a garden spigot via PEX and shark bite fittings so I can attach a hose to fill the tank with warm water of the proper temperature. The other side of the T just has a shut off valve on it currently and it has not been plumbed to the float valve in the sump yet. The float valve in the sump will act as an auto top off but with a good high flow capability. Water changes will be done by pumping water out of the sump and down the drain / sewer pipe which will lower the water level. When the water lever goes down the float valve will open and supply temperature controlled water to the sump (I am on a well so no water pre-treatment is needed.)


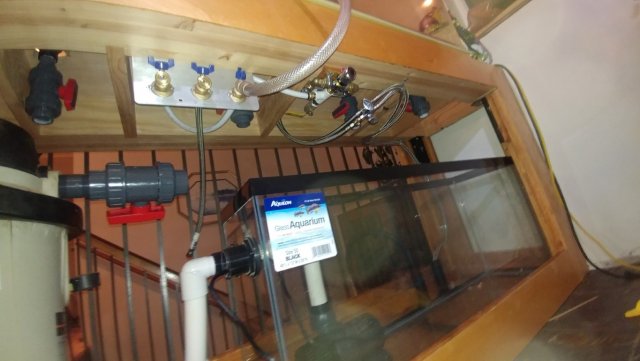
0902202256a (Medium).jpg

The left most spigot will be fed by a pump which will pump tank water out of the sump and be used to water house plants. The middle spigot will be plumbed into a T on the cold supply line... I don't know exactly what I will use it for but I am sure it will come in handy some day. The right most pump was described above and is temperature mixed warm water. The above picture shows a hose coming from the temp controlled spigot up to the tank for filling the tank.


0902202256b (Medium).jpg

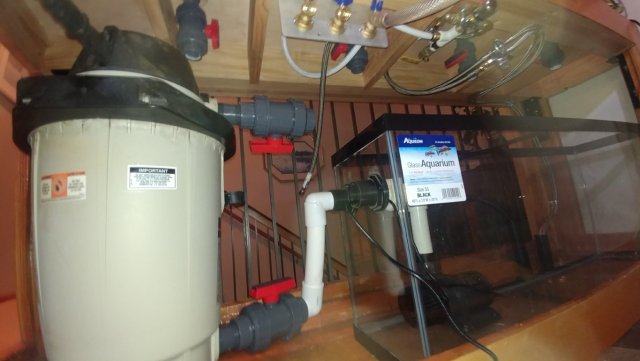
The sump pump is a Jeboa DCP 20000... which I didn't even know they made. From Amazon the DCP 20000 was ~$195 which is less than I had budgeted for a DCP18000. I am currently using a DCP5000 in another tank and know that the these pumps can be easily throttled electronically from the control box. The return water from the pump goes through the glass via bulk head into my VERY MUCH LOVED Hayward DE filter (see my signature for details). From the DE filter the return water will go to the far end of the tank, loop up so the the bottom of the loop is above the tank water line then come back down to feed the bottom returns.

I am not sold on the whole bottom return idea and it is actually a bit of a stress point figuring out how to implement the bottom returns inside the tank with the gravel topped dirt substrate. My current thought is to drill some holes in some basalt rock and let the return water come up through these basalt rocks. I am choosing basalt because my house is built on a basalt lava flow and it is everywhere on my property... i.e. free.

I am open to suggestions on how to implement the bottom returns in a dirt bottom tank?

The return pipe is 1 1/2" which will be split among the 5 x 1" bulkheads in the bottom of the tank and metered by the red handled gray 1" union valves. The tank came with these holes in the bottom, I did drill them out to accept 1" bulkheads as shown in a previous post on in this thread.
 
Last edited:
  • Like
Reactions: Backfromthedead
zoomed.com
hikariusa.com
aqaimports.com
Store