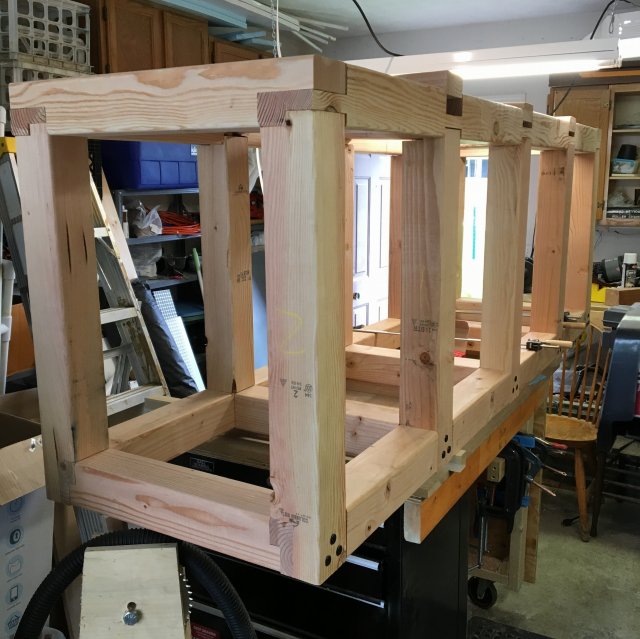
300g Saltwater Custom Stand Build
- Thread starter Mike Thorn
- Start date
This stand looks a little small I think you should beef it up a bit. Looks good man. That stand almost desrves to be the show piece itself. I can't wait to see your tank if you take this much effort and craftsmanship with your stand
Wellll...the irony is that I got a good deal on a used acrylic 300, but it has a ton of crazing. So we'll see. I have some lighting tricks up my sleeve but it might be an interesting deal.I can't wait to see your tank if you take this much effort and craftsmanship with your stand
Last weekend was productive, and the stand has now progressed out of the shop and temporarily into the house.
I knew that the area the tank will live in is very, very near level, but not quite; so I wanted to do the final fit-up of the stand, before fastening all the interior plywood, with the stand in place and leveled to the floor where it will live.
So, my brother-in-law helped me heave it into the house and later I nearly threw my back out moving the aquarium up onto it, haha.
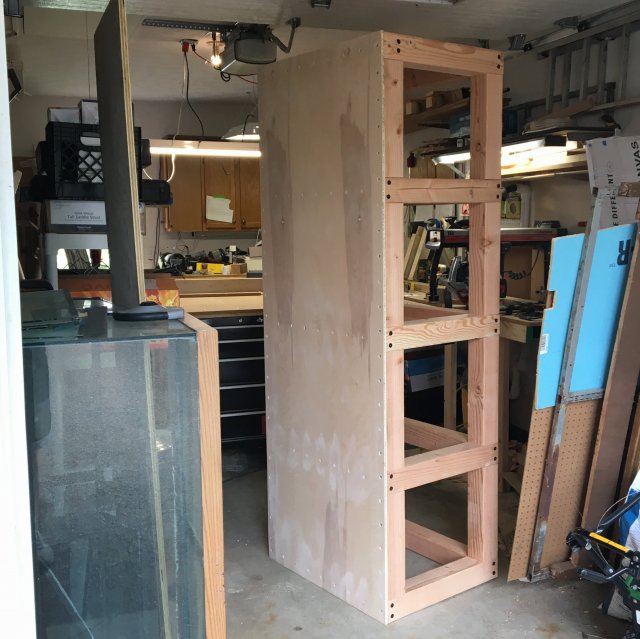
This panel shown here is the back of the aquarium; I knew that the uprights were as close to vertical as I was going to get, so I knew I'd do no harm to the squareness of the stand in place if I fastened this down out in the shop. 48 screws later...
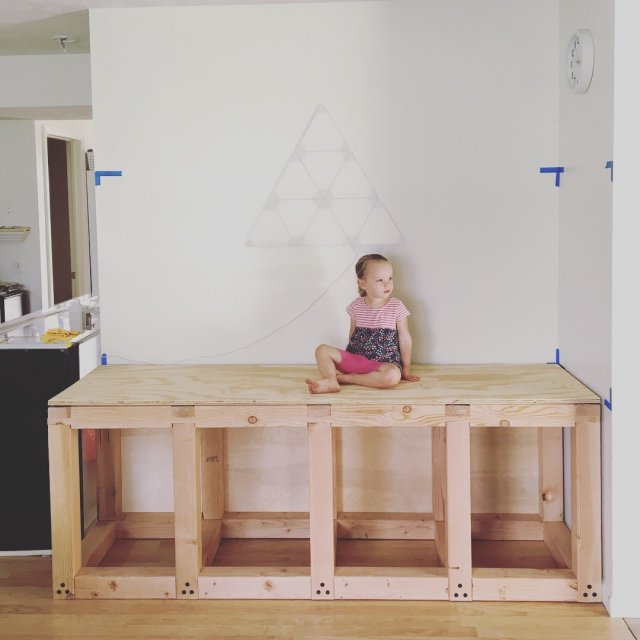
We had to "test" it. There's about 3/16" drop from back left to front right, which I'll correct the old-fashioned way:
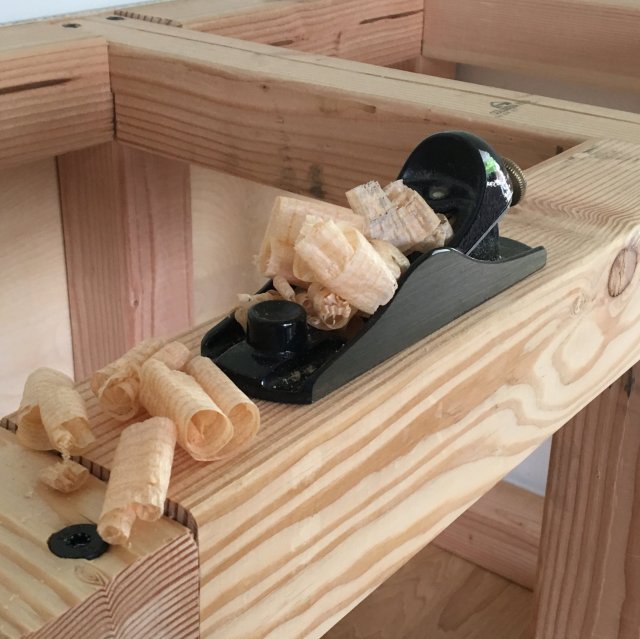
In this image I was taking out a high spot, maybe 3/32 across a 4" wide area, but it was enough to teeter-totter a 3ft level on. It probably would have been absorbed via compression into the 3/4" CDX plywood, but I had the plane out already and was enjoying the sharp blade on the soft wood. It only took a few minutes to achieve perfect flatness.
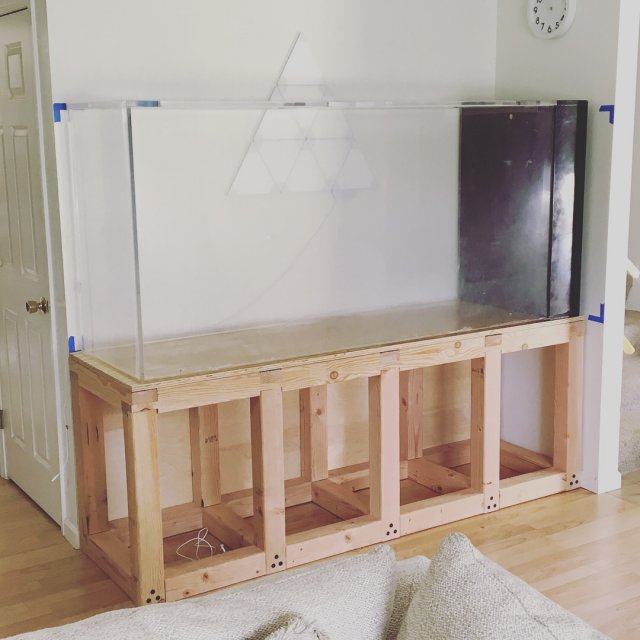
This is pretty close to how it will look when done. I'll be adding insulation on 3 sides of the tank itself, and facing it with 1/4" birch ply. Also, I'll be adding birch ply to the insides of the cubbies, wrapping the bottom of the tank with trim, and staining/sealing the wood, but other than that this is pretty much what I imagined.
The canopy is still a WIP, as I've seen some new ideas recently that were pretty inspiring, but we'll see what it actually comes down to. Our second child is due in April so I know that if I don't have this show up and running by then, it's going to take quite a while longer...
I also picked up another 75gal tank super cheap (only $30!) for the sump. I'll have twin 75's stacked, out in the garage, with a 55gal reservoir for mixing water changes. Since it will be located right over the sump I'm planning to add some electric valves and a Raspberry Pi to automate the water change process. All I'll have to do is restock salt additives after every change. I ordered a refurb Spectrapure CSPDI 4-stage RODI system this week (50% discount for the refurb!), which will drip feed the reservoir.
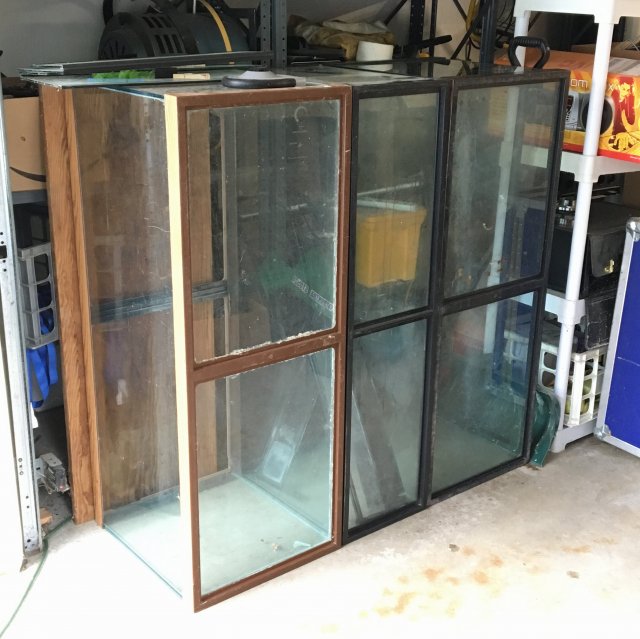
It's mildly amusing to me that I've got 300 gallons of capacity in the house, and 200 gallons of maintenance capacity in the garage...
I knew that the area the tank will live in is very, very near level, but not quite; so I wanted to do the final fit-up of the stand, before fastening all the interior plywood, with the stand in place and leveled to the floor where it will live.
So, my brother-in-law helped me heave it into the house and later I nearly threw my back out moving the aquarium up onto it, haha.

This panel shown here is the back of the aquarium; I knew that the uprights were as close to vertical as I was going to get, so I knew I'd do no harm to the squareness of the stand in place if I fastened this down out in the shop. 48 screws later...

We had to "test" it. There's about 3/16" drop from back left to front right, which I'll correct the old-fashioned way:

In this image I was taking out a high spot, maybe 3/32 across a 4" wide area, but it was enough to teeter-totter a 3ft level on. It probably would have been absorbed via compression into the 3/4" CDX plywood, but I had the plane out already and was enjoying the sharp blade on the soft wood. It only took a few minutes to achieve perfect flatness.

This is pretty close to how it will look when done. I'll be adding insulation on 3 sides of the tank itself, and facing it with 1/4" birch ply. Also, I'll be adding birch ply to the insides of the cubbies, wrapping the bottom of the tank with trim, and staining/sealing the wood, but other than that this is pretty much what I imagined.
The canopy is still a WIP, as I've seen some new ideas recently that were pretty inspiring, but we'll see what it actually comes down to. Our second child is due in April so I know that if I don't have this show up and running by then, it's going to take quite a while longer...
I also picked up another 75gal tank super cheap (only $30!) for the sump. I'll have twin 75's stacked, out in the garage, with a 55gal reservoir for mixing water changes. Since it will be located right over the sump I'm planning to add some electric valves and a Raspberry Pi to automate the water change process. All I'll have to do is restock salt additives after every change. I ordered a refurb Spectrapure CSPDI 4-stage RODI system this week (50% discount for the refurb!), which will drip feed the reservoir.

It's mildly amusing to me that I've got 300 gallons of capacity in the house, and 200 gallons of maintenance capacity in the garage...


