Eheim 2262

  • We are currently upgrading MFK. thanks! -neo
Nice pickup S snake_charmer !

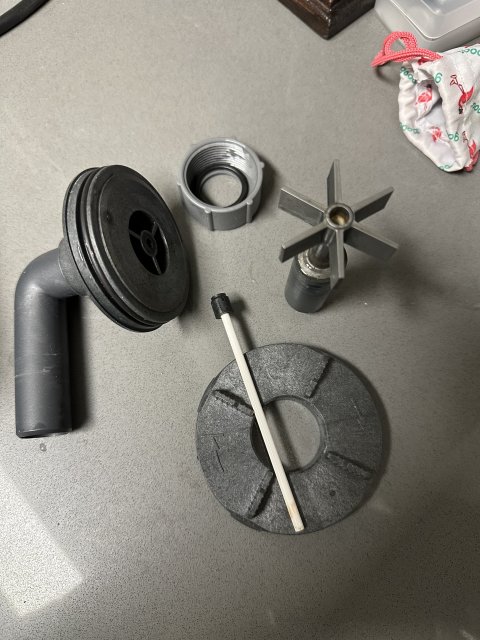
If you are handy at DIY projects and don't like how much space the OEM intake takes up at the tank rim, consider checking out This topic and specifically my posts #23 and #25 for making your own J-tube. But do read the whole topic for additional information.
 
When it rains it pours I guess. A nice kick to the groin. Any idea why the pump would be leaking out of what appears to be a weep hole?

IMG_8265.jpeg
 
It would be very unusual for the pump to be leaking at the rear end IMO. Usually it is at the front end of the pump where the o-ring seal is either due to incorrect position of the o-ring, a pinched o-ring or the pump cover isn't snug. It might be actually leaking at the front and traveling to the back.

Did you buy the filter new or was it used?
 
It would be very unusual for the pump to be leaking at the rear end IMO. Usually it is at the front end of the pump where the o-ring seal is either due to incorrect position of the o-ring, a pinched o-ring or the pump cover isn't snug. It might be actually leaking at the front and traveling to the back.
Did you buy the filter new or was it used?
Yea, I purchased it used a few days ago. There was a gentleman selling two of them as he upgraded to a sump. I sent him the video and he responded that maybe there was something loose because he never experienced that before. However, I never touched the top lid/pump area prior to starting it. I may try setting it up tomorrow outside of the stand to try and pinpoint exactly where it’s leaking from.
 
O-rings look fine along with the impeller. Leak was definitely coming from the motor and not the front exhaust port. No idea where as it looks like cast metal with just these parts. Worst case scenario I’ll chalk it up as being screwed over on a deal and buy a new one. I could always keep this one as a project.

IMG_8275.jpeg

IMG_8276.jpeg
 

Attachments

  • IMG_8275.jpeg
    IMG_8275.jpeg
    2.2 MB · Views: 24
Last edited:
I have a hunch it’s leaking from within this through the power cable routing. I can fill up the cavity without any leakage but it could be another story under pressure. If that’s the case I could have a massive paper weight on my hands as I don’t see a solution to repairing that. Will update tomorrow.

IMG_8277.jpeg
 
Last edited:
The parts of the pump that are replaceable are not cast metal but a type of plastic and the motor and cord end shown in the last pic are all encased in epoxy so I don't really see how that part can leak.

Since the filter itself is used, I would look at replacing the o-ring (eheim part # 726 935 0) on the pump cover to see if that fixes the problem or at the least, try putting a small amount of lube to the o-ring using either regular Vaseline, Eheim lube (if available) or o-ring lube used for potable water that can be found at most home improvement stores.
Great news! I got it back together again and it hasn’t leaked for several days. I did lube the o-rings with olive oil. I know it can go rancid but it was a very small amount on a q-tip. I also have mineral oil or vaseline like you suggested. If you think it’s needed I could tear it back apart and remove/reapply a better lubricant. If I’m being honest I think it may have been the front plate that wasn’t turned fully counter clockwise. That would lead to it dripping down onto the bottom bracket. The canister was probably tilted toward the rear slightly, which resulted in the water trickling out at the power chord area.

Major crisis adverted and now I just have to figure out how to modify the intake/exhaust configurations to a more secure and pleasing format. I did see your heat gun diy post. I may consider it as the intake tubing is positioned diagonally against the wall due to clearance. The exhaust tubing gets severely choked down in diameter, which if it’s designed and optimized off of Bernoulli’s principle I get it. I’m just not certain that’s the case and wondering if performance would be better with the exhaust piping diameter set up to match the tubing at the pump.

IMG_8307.jpeg
 
Glad you got the 'leak' fixed, it was probably a combination of a dry o-ring and the locking ring not fully engaged. I wouldn't take it apart again until the next service interval when you need to clean the pump or filter media.

Is the intake pipe too long and that's why you need to have it an an angle in the tank? If so, you can cut it to the proper length so it fits vertically or you can prop up the assembly by wedging something under it at the rim of the tank like a small block of wood or even a piece of scrap PVC.

If you decide to cut the intake pipe and it's more than a couple inches long, save the cut piece of pipe and you can use some hose to reattach it if you get a taller aquarium down the line. I've got pieces parts leftover from modifying stuff in a storage box that come in handy later on.

As to the output/exhaust pipe to hose connection, I've never had any issues with reduced flow, it's designed to work as is with the OEM parts. IMO it's just a minor 'choke' point and shouldn't affect the flow at all.
 
  • Like
Reactions: snake_charmer
Glad you got the 'leak' fixed, it was probably a combination of a dry o-ring and the locking ring not fully engaged. I wouldn't take it apart again until the next service interval when you need to clean the pump or filter media.

Is the intake pipe too long and that's why you need to have it an an angle in the tank? If so, you can cut it to the proper length so it fits vertically or you can prop up the assembly by wedging something under it at the rim of the tank like a small block of wood or even a piece of scrap PVC.

If you decide to cut the intake pipe and it's more than a couple inches long, save the cut piece of pipe and you can use some hose to reattach it if you get a taller aquarium down the line. I've got pieces parts leftover from modifying stuff in a storage box that come in handy later on.

As to the output/exhaust pipe to hose connection, I've never had any issues with reduced flow, it's designed to work as is with the OEM parts. IMO it's just a minor 'choke' point and shouldn't affect the flow at all.

I shortened the intake pipe to be on par with the length of the AC110 that’s also currently in the tank. I have to have it mid level because I run a sand bottom and I want to avoid sucking up too much into the canister/pump. As far as the diagonal orientation, I have it set that way because the intake is too wide from the wall to the rear of the tank. I’ve also attached a picture to show you. This is where the J tube modification you built would really be perfect with the 4” clearance.

Good advice on keeping the extra piping I cut off for the intake. It’s about 7.5” so a decent amount. I utilized the intake coupler to add a fx6 output.

IMG_8310.jpeg
 
  • Like
Reactions: deeda
MonsterFishKeepers.com