After getting the pond running at my brother's house, though not 100% complete yet, I decided to start a long overdue filter upgrade for my small pond at home.
The pond is about 1.30m deep, 2m long and 1 meter wide. It had one of those blue barrels, filled with bio-balls and it was a pain in the ass to clean, with rubbish settling at the bottom.
So my ideal filter is:
1. Compact
2. Very easy to clean
3. Loads of media for bacteria to sit on
4. Easy to clean
5. Cheap to make
6. Easy to clean...
7. Modular and future proof (like adding more media)
Obviously, I hate maintenance and cleaning.. So a filter has to be.. ok ok.. you get it already..
Still.. I'd like to add.. easy to clean...
I've been looking at all those nice Bakki showers and what not. Way too expensive of course, and even self-building would require loads of big bins/tubs
That's going to be a pain in the ass to..well.. clean..
Space is at a premium, so I decided to go with stackable crates. The warehouse type crates.
I could have gone with some bigger storage bins, but that will be monstrously big, and you're limited in how and which media to put in.
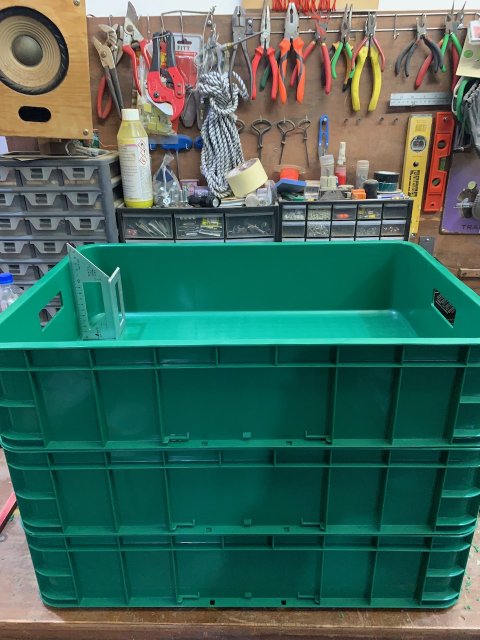
Crates.. Blue or green. I liked the green color. 145mm high, 620x410mm. Perfect.
There's several things I want to build in.
- Top layer: 300 micron sieve and filterfloss below it.
- Middle layer: 40 ceramic rolls and the remained is filled up with bio-balls
- Bottom layer: Bio-balls and the outlets.
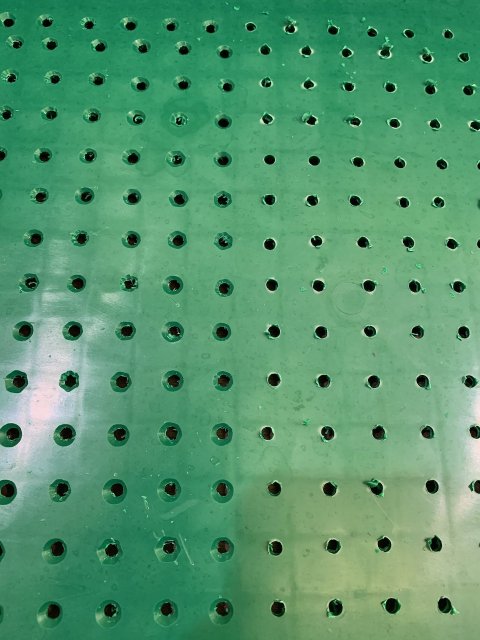
I checked and choose crates that have a 'webbing' in the bottom. This will make drilling holes very easy. Each square one hole.
After that, turn the crate around and go over each hole with a reaming bit? not sure what they call it in English, but it takes away all the sharp corners and makes it easier for water to flow.
My crates had openings for handles. So I epoxied some Plexiglas in to close the openings and it allows me to look inside each crate.
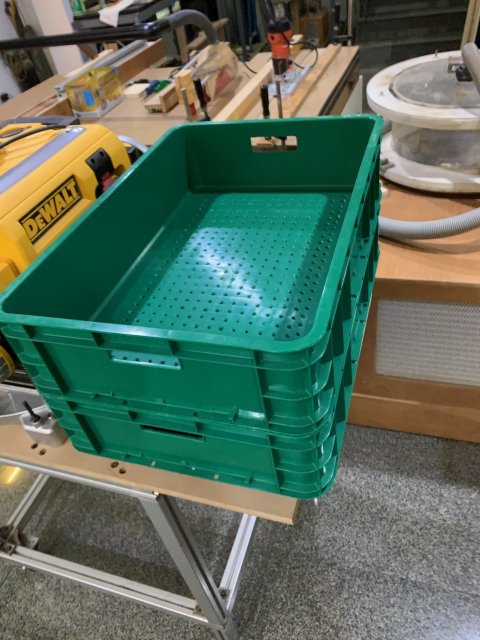
Took me an hour or so to drill all the holes in 2 crates. Obviously, the bottom-crate is not drilled.
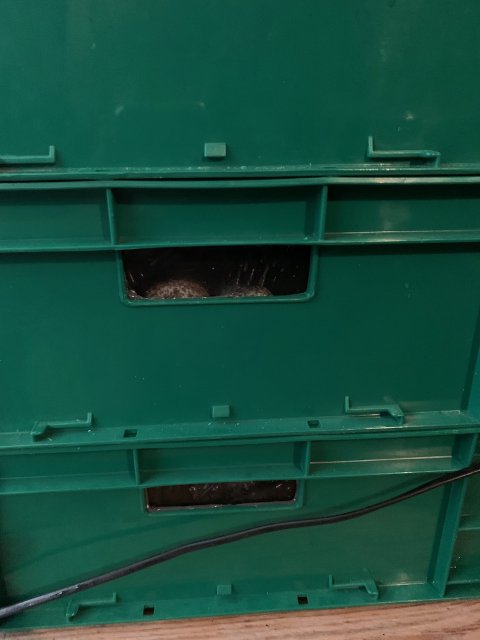
Here's the Plexiglas openings.
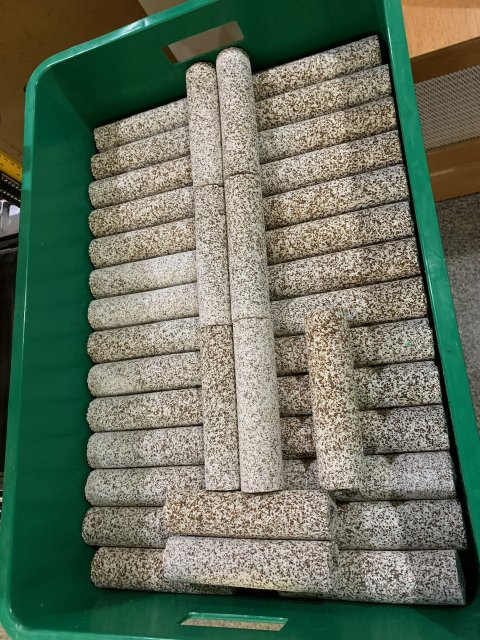
And the ceramic 'rolls'. Rest of the crate has been filled up with bio-balls.
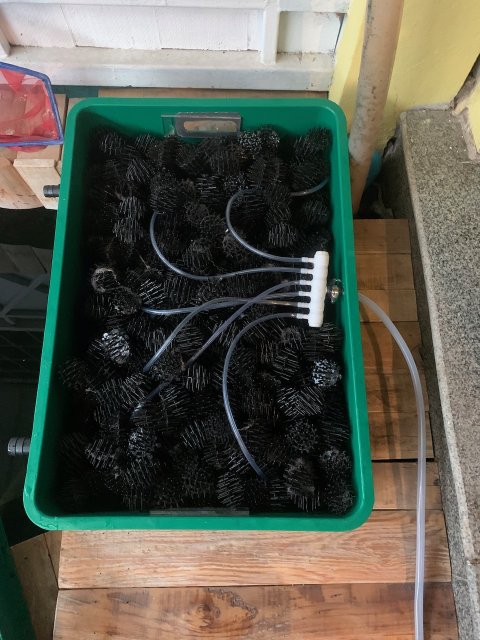
Bottom Crate, I've added 6 airstones.
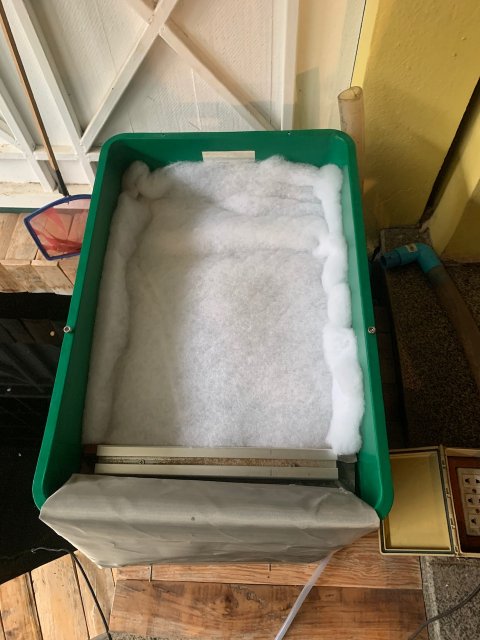
This is the top crate. I've used 300 Micron sieve and it's attached to a piece of aluminium to keep it up from the bottom. The aluminium is bolted to the bottom of the crate.
Filter floss below it, to add more space for bacteria and to scrub the water even further.
The sieve just folds back over it and is attached to the edge of the crate with 2 bolts again.
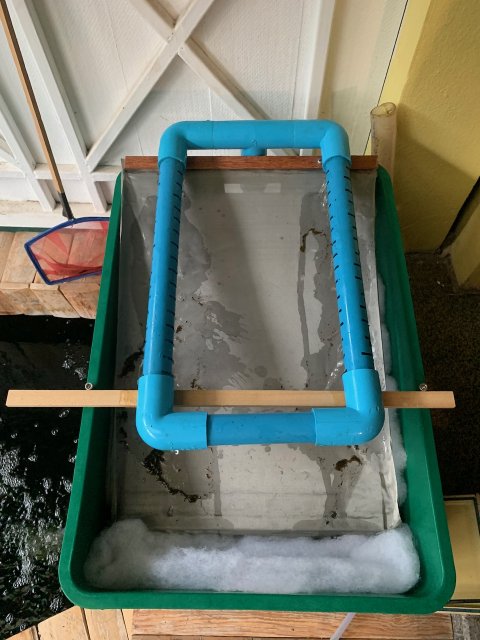
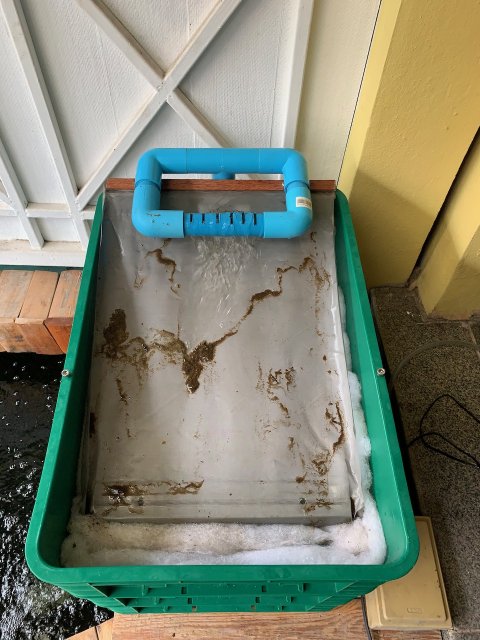
Here it's complete, the sieve folded back and a temporary setup of the pump outlet over it.
Still want to clean that up a bit, but that's for later.
Now, the nice part is the filter floss at the bottom of the picture. This is separate from the floss in the previous picture and just sits there to trap any solids coming off the sieve.
The sieve angle is very shallow, but I just use a bottle of water or a hose to wash the solids down into the floss.
Take out the floss, rinse the solids out or just replace with a new piece.. that's all there is in cleaning..
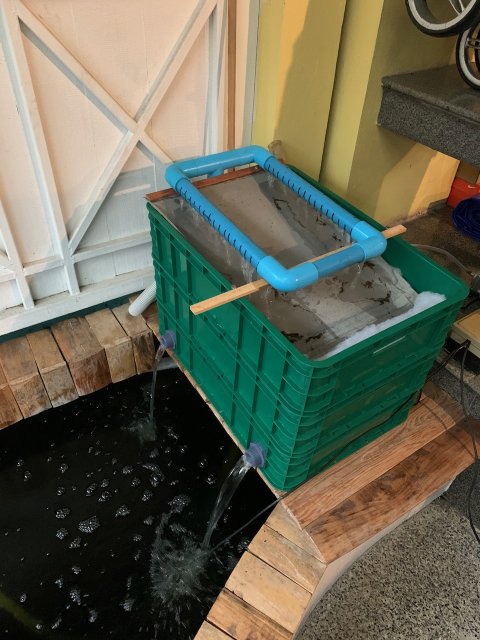
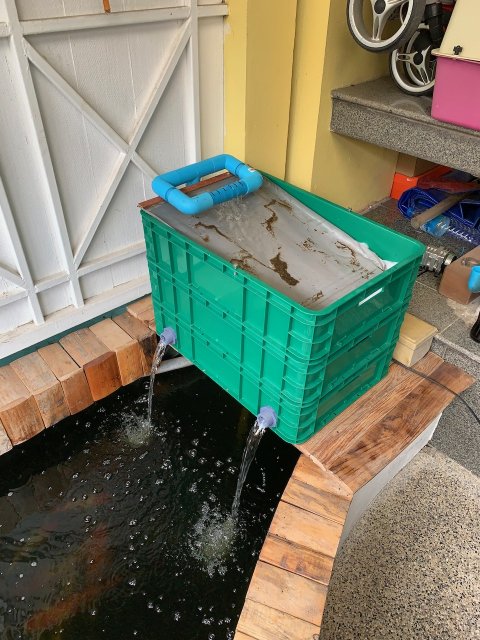
And voila. A working and fully functional filter!
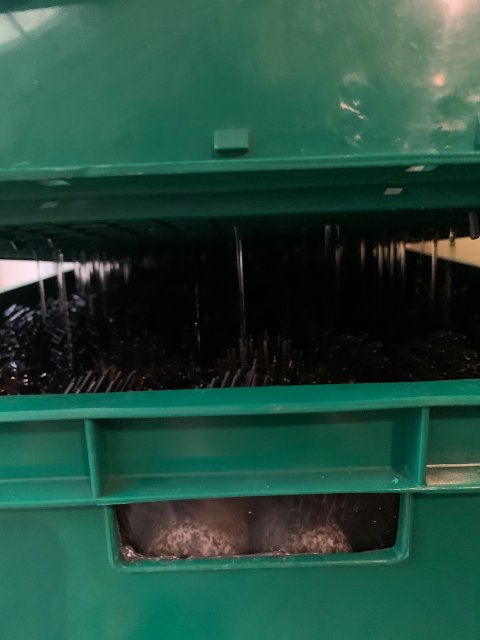
And a peek inside while running. Nice spread of water running down evenly.
Now the good thing is, I've left some slack in the hose from the pump.
So I could just lift the top, add another crate to the stack in 5 minutes.
Or how about populating a filter for another pond or tank?
Overall, looks like a winner for my targets. Will update with some more observations over the next couple of weeks.
Might order another couple crates, one for media and the other to use up-side down as a cover..
Tomorrow spend some time on the pipes for the pump. Electrical will be upgraded as well when I receive the parts.
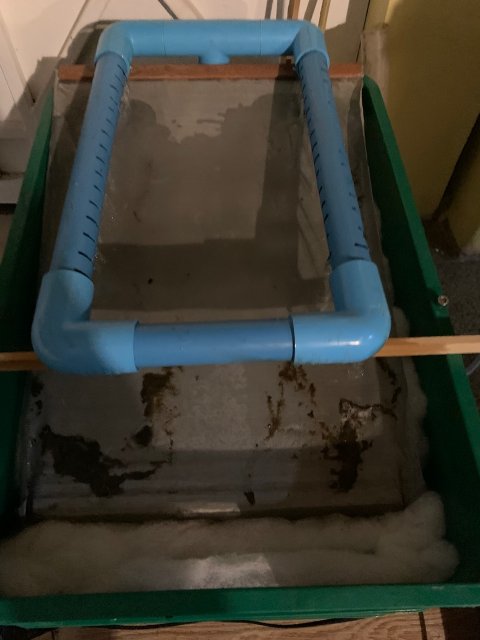
And after 2 hours, flushed down the gunk with a bottle of pond-water.
Cheers,
Luc
The pond is about 1.30m deep, 2m long and 1 meter wide. It had one of those blue barrels, filled with bio-balls and it was a pain in the ass to clean, with rubbish settling at the bottom.
So my ideal filter is:
1. Compact
2. Very easy to clean
3. Loads of media for bacteria to sit on
4. Easy to clean
5. Cheap to make
6. Easy to clean...
7. Modular and future proof (like adding more media)
Obviously, I hate maintenance and cleaning.. So a filter has to be.. ok ok.. you get it already..
Still.. I'd like to add.. easy to clean...
I've been looking at all those nice Bakki showers and what not. Way too expensive of course, and even self-building would require loads of big bins/tubs
That's going to be a pain in the ass to..well.. clean..
Space is at a premium, so I decided to go with stackable crates. The warehouse type crates.
I could have gone with some bigger storage bins, but that will be monstrously big, and you're limited in how and which media to put in.

Crates.. Blue or green. I liked the green color. 145mm high, 620x410mm. Perfect.
There's several things I want to build in.
- Top layer: 300 micron sieve and filterfloss below it.
- Middle layer: 40 ceramic rolls and the remained is filled up with bio-balls
- Bottom layer: Bio-balls and the outlets.

I checked and choose crates that have a 'webbing' in the bottom. This will make drilling holes very easy. Each square one hole.
After that, turn the crate around and go over each hole with a reaming bit? not sure what they call it in English, but it takes away all the sharp corners and makes it easier for water to flow.
My crates had openings for handles. So I epoxied some Plexiglas in to close the openings and it allows me to look inside each crate.

Took me an hour or so to drill all the holes in 2 crates. Obviously, the bottom-crate is not drilled.

Here's the Plexiglas openings.

And the ceramic 'rolls'. Rest of the crate has been filled up with bio-balls.

Bottom Crate, I've added 6 airstones.

This is the top crate. I've used 300 Micron sieve and it's attached to a piece of aluminium to keep it up from the bottom. The aluminium is bolted to the bottom of the crate.
Filter floss below it, to add more space for bacteria and to scrub the water even further.
The sieve just folds back over it and is attached to the edge of the crate with 2 bolts again.

Here it's complete, the sieve folded back and a temporary setup of the pump outlet over it.
Still want to clean that up a bit, but that's for later.
Now, the nice part is the filter floss at the bottom of the picture. This is separate from the floss in the previous picture and just sits there to trap any solids coming off the sieve.
The sieve angle is very shallow, but I just use a bottle of water or a hose to wash the solids down into the floss.
Take out the floss, rinse the solids out or just replace with a new piece.. that's all there is in cleaning..

And voila. A working and fully functional filter!

And a peek inside while running. Nice spread of water running down evenly.
Now the good thing is, I've left some slack in the hose from the pump.
So I could just lift the top, add another crate to the stack in 5 minutes.
Or how about populating a filter for another pond or tank?
Overall, looks like a winner for my targets. Will update with some more observations over the next couple of weeks.
Might order another couple crates, one for media and the other to use up-side down as a cover..
Tomorrow spend some time on the pipes for the pump. Electrical will be upgraded as well when I receive the parts.

And after 2 hours, flushed down the gunk with a bottle of pond-water.
Cheers,
Luc


