
Setting up a used 450 gallon tank
- Thread starter Egon
- Start date
You are using an out of date browser. It may not display this or other websites correctly.
You should upgrade or use an alternative browser.
You should upgrade or use an alternative browser.

Big update for this thread! I bought an 1100 gallon dream tank and I wanted to put the tank in front on this 450. Then build a room around it to make it like an exhibit. Also keep the noise down in the rest of the house. The Monster Fish Keepers 360 needed to go to make room. I combined all the fish in the 450 until the 1100 could be set up. The blue tape on the wall is where a new door is going, to get access to the future fish room.


Last edited:
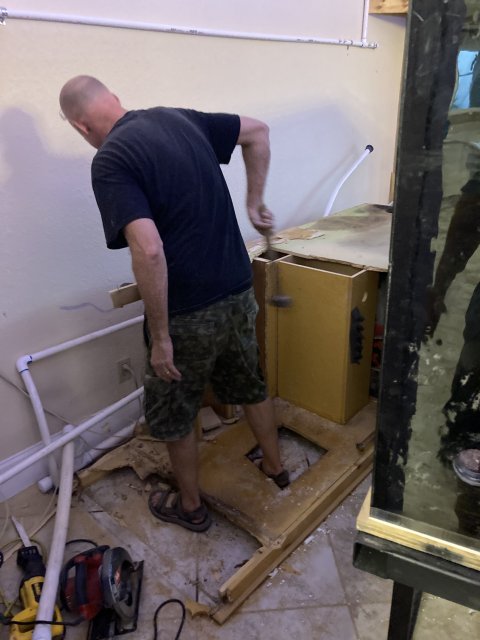
The old particle board stand was replaced with a metal stand. After all the fish were moved to the 1100 I drained the 450 and slid it on the new metal stand then demoed the particle board stand. It was in horrible shape. I’m really glad I did this! Then I moved the tank back to its original spot. Now it sits behind the 1100 in its own fish room. I also built the stand to over hang the large sump so one overflow on the 450 will drain right into the sump. Saving some space and plumbing. Also using just one large sump for both tanks is appealing. I will set up a trickle system putting 3 or so gallons of water into the tank and it will drain to the front yard. My plants love the fishy water! 


Attachments
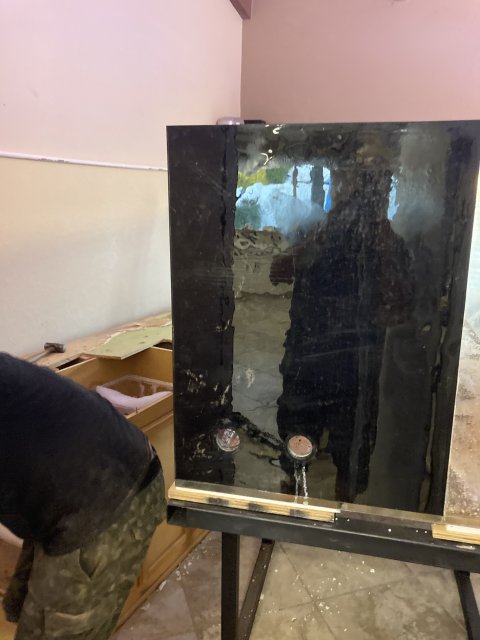

Today I capped some holes in the 450 to simplify the plumbing. 5 holes total were silicone with some extra acrylic I had laying around. Then I had some extra paint from the 1100 project and I painted the bottom and touched up the backdrop. I really love this dryloc paint. It hides the silver or white styrofoam I set my tanks on. Sometimes a fish will dig or move the gravel and seeing that glaring silver/white showing through eats me up. I have issues :/


Sorry about the double pictures and somehow I attached the central air pictures too? Might as well talk about that. I set up a large air pump and sent the air to both tanks via PVC pipe. It works great! Each line has a tiny valve so I can adjust the flow to each air stone separately. I put a whole bunch of these valves in, 6 behind each tank and 3 more near the sump just in case I wanted to do something that required air in the sump?

The bottom is just cast acrylic. That’s why I painted it, so the styrofoam under the tank wouldn’t show through when the fish moved the gravel. The back is maybe 1/16” plastic. I will take a pic. Looks like it’s just glued on the back.

I just finished the drain plumbing. It was real simple. I recycle my plumbing to save money. I have a lot of couplers attaching longer pieces to run the length of the bottom of this 8’ tank. Also I had some 1.5” flexible PVC so I used it under the tank so I can move that drain around if I decide to put a lid on my sump. That way I can lift the drain up or move it side to side to remove and install the lid.
Also you can see how the tank over hangs the sump and that drain just drops right into the sump.


Also you can see how the tank over hangs the sump and that drain just drops right into the sump.
Filled the tank with water and let it sit about a week for the water to stabilize and chlorine to leave the water. Hooked up a pump and ran it for a little and no leaks! The 1100 I got came with one of these submersible DC pumps (100 watt) and two (150 watt) pumps. I used the two 150 watt pumps on the 1100. I just ordered another one of these to I will have two of each. I love the ease of plumbing submersible pumps! 


