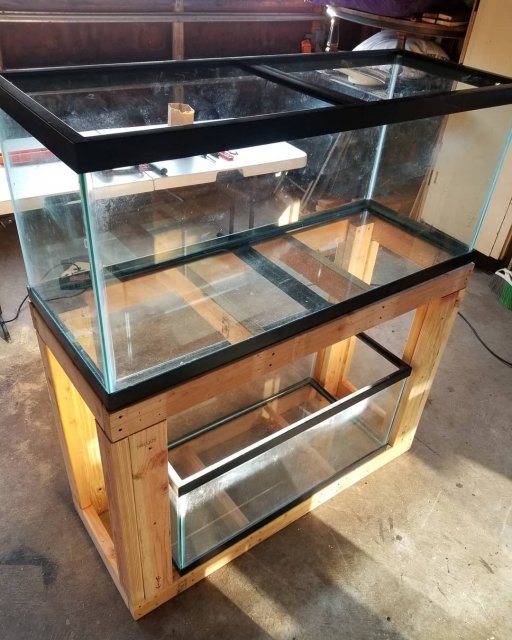
Sorry if this is a stupid question but what are vertical supports?Always use vertical supports to support the weight. Cory from aquarium coop built the racks in his store with the method you are referring to, but it was for smaller tanks, and he used large bolts instead of wood screws. He has how to videos on his channel. You could make the stand a bit wider to accommodate the vertical supports easily enough. And listen to the advice about space above each tank. I built a dual stand for a 75, and 40 breeder. I think I left 10 inches above the bottom tank and it works, but still tight at times when cleaning.
First DIY Aquarium Stand Build Advice
- Thread starter Justepic
- Start date
You are using an out of date browser. It may not display this or other websites correctly.
You should upgrade or use an alternative browser.
You should upgrade or use an alternative browser.
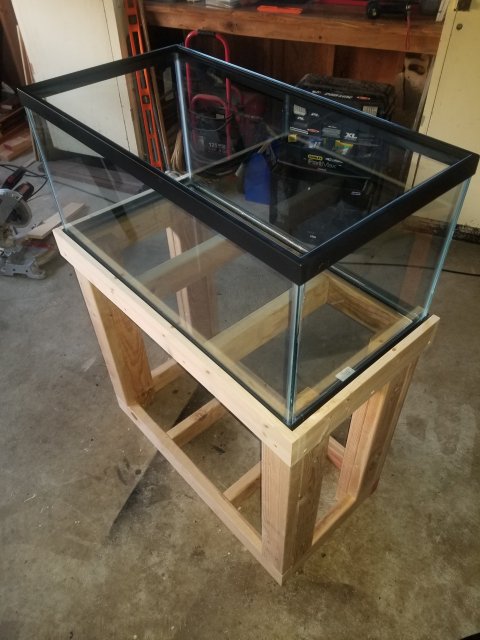
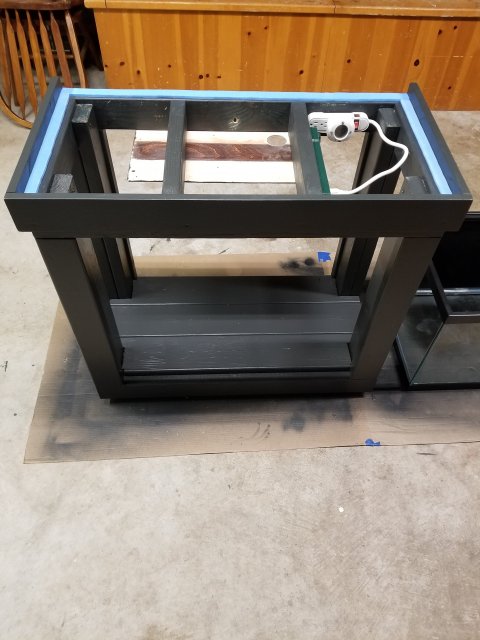
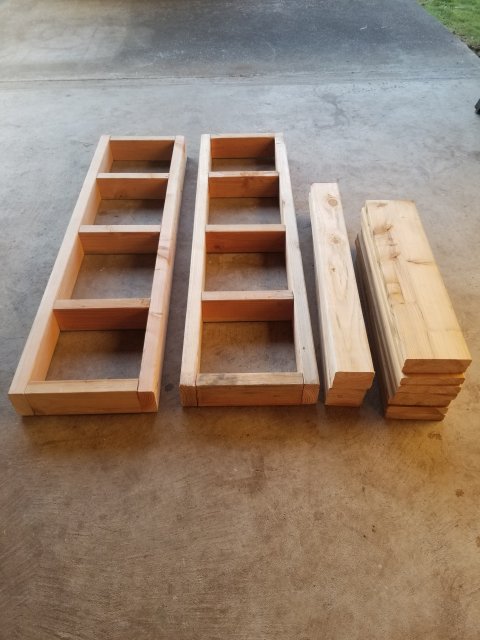
The rack you are looking at has the tanks sitting on horizontal supports with nothing underneath. That leaves you relying on the screws alone to bear all the weight of the tanks. If you look at my stands the upper and lower box frames are supported by two vertical legs under each corner. Then a third 2x4 runs up the inside of those legs. That piece is what ties everything together. The vertical supports are what set your height and they literally just sit in between your box frames as weight support. The inside beam attaches to the vertical supports, and also the inside of the box frames, tying it all together but they do not support any weight, that's why you'll see mine are always cut a little short so they dont interfere with the tank at all. I run screws into the inside beam from both directions so the screws run perpendicular to each other. I use 3 or 4 screws at the top and bottom of each of the inside beams where they attach to the box frames to help prevent rotational force there, and just a single row of screws where the inside beam attaches the to vertical supports.Also you dont have to use two vertical supports on each corner. But I do it for looks, and it also helps keep everything nice and square and helps to keep the stand from twisting without additional corner supports.


Last edited:
That was really helpful man! Thanks, Raka. The design you used looks like this https://www.monsterfishkeepers.com/forums/threads/worried-that-your-stand-wont-hold-up.302232/ and I will use that as a starting point.
So I will start with making 3 of the racks that you built ( that you can see in the last pic) and then attaching them to a 165cm leg beam. However, I will have to make the length of the rack longer because the tank will be between the leg beams on either side. Then I will have to add the vertical supports to support the leg beam! Thanks a lot, I understand it much better now. Now gotta draw up the plan
So I will start with making 3 of the racks that you built ( that you can see in the last pic) and then attaching them to a 165cm leg beam. However, I will have to make the length of the rack longer because the tank will be between the leg beams on either side. Then I will have to add the vertical supports to support the leg beam! Thanks a lot, I understand it much better now. Now gotta draw up the plan
Bear in mind that these stand might be overkill by using this many 2x4s and screws, but this kind of project is not something to take shortcuts on if you consider what would happen in the event of a catastrophic failure. We have small earthquakes from time to time where I am, and I could see a rack like that getting enough force applied to the screws that even if they didn't fail, the actual wood might. And with that much weight, one failing could in theory cause the whole thing to collapse.
Yes it will end up a little longer than the top tank in order to accommodate the the lower tanks in between the legs. I would just use a nice piece of plywood on top to clean up the top corners and use it as a little storage space for food or whatever you want. I usually put trim boards around to hide all the seams and the bottom tank trim. You'll have multiple short weight bearing legs in between each box frame, but you want those four inside beams to be one long piece on each corner, that runs up the entire height.That was really helpful man! Thanks, Raka. The design you used looks like this https://www.monsterfishkeepers.com/forums/threads/worried-that-your-stand-wont-hold-up.302232/ and I will use that as a starting point.
So I will start with making 3 of the racks that you built ( that you can see in the last pic) and then attaching them to a 165cm leg beam. However, I will have to make the length of the rack longer because the tank will be between the leg beams on either side. Then I will have to add the vertical supports to support the leg beam! Thanks a lot, I understand it much better now. Now gotta draw up the plan
This should end up quite strong, but you'll have to judge for yourself if it justifies having any 45 degree angle supports in the corners just to strengthen it up and prevent any potential twisting. My guess is that it wont be necessary, but I haven't built one three tiers high yet.
I have 2 questions:

1) can the red and orange pieces ( as well as the yellow blue ) be the same 2x4 lumber? In the image they look different.
2) can the green leg lumber lay against the yellow wood instead of having it's back on the red wood? What I mean is, imagine the right corner green leg doing a 90 degree turn clockwise. Would that be suitable?
Yes I use all 2x4 except for one of the tanks I incorporated some 2x6 along with 2x4 just for looks and because I had it in the garage already. I know some people use 2x3 but I've never tried it. And yes you can have the leg setup facing either side of the corner if that makes sense. The concept works the same. Like I said, each of my builds actually have small variations depending on how I want them to look or function. Once you start building you'll see how easy these things are. Also one tip that i do is to build all your leg structures first with only your bottom weight bearing sections. Install the four legs into your bottom frame first making sure they are nice and level vertically. Then slide your next box frame over the inside legs, and down on top of the weight bearing sections. Keep weight on it when you attach that to the inside legs otherwise sometimes the screws will lift a corner a tiny bit. You just want to make sure the weight bearing surfaces are all touching and that each successive level of the rack is flat. Then for this type of rack you would just repeat that process for your next level working from the bottom up, adding your next weight bearing sections on top of the previous box frame and screwing them to the inside leg, followed by your next box frame on top of those. Hope that all makes sense.


