New used tank!

robroy

Polypterus
MFK Member
Feb 19, 2006
1,579
237
96
BC, Canada
Slightly off topic but thought you'd be interested in this.
I bought a NEW 180G and within an hour of filling it a crack just like yours appeared inside the glass panel at the join. I had a heart-in-mouth moment and I don't think anyone will ever beat my time for emptying a full 180G

Anyhow-got the tank replaced under warranty. Recently I spoke with a staff member from the store who took the damaged tank and filled it in his garage. Its completely watertight. Hes happy as he got a free 180G but I couldn't sleep at night and especially as it was a new tank
 
  • Like
Reactions: Backfromthedead

robroy

Polypterus
MFK Member
Feb 19, 2006
1,579
237
96
BC, Canada
Slightly off topic but thought you'd be interested in this.
I bought a NEW 180G and within an hour of filling it a crack just like yours appeared inside the glass panel at the join. I had a heart-in-mouth moment and I don't think anyone will ever beat my time for emptying a full 180G

Anyhow-got the tank replaced under warranty. Recently I spoke with a staff member from the store who took the damaged tank and filled it in his garage. Its completely watertight. Hes happy as he got a free 180G but I couldn't sleep at night and especially as it was a new tank
 

Backfromthedead

Potamotrygon
MFK Member
Jul 12, 2017
4,544
6,111
164
Fredericksburg va
UPDATE

Ive decided to further the overhaul on this tank and make it into one of my main displays. It has been serving as a transfer tank and also a single species tank for my midevil in the backroom.

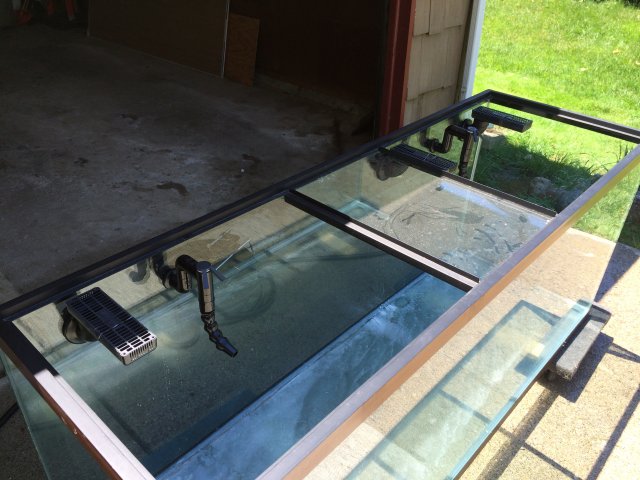
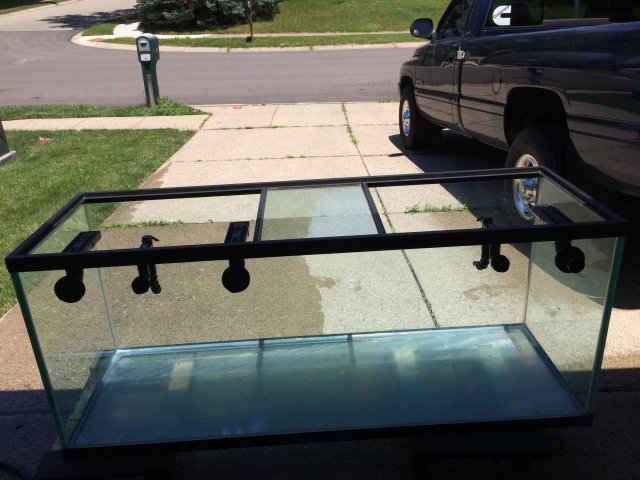
I'll be installing an overflow and 75 gallon sump and building a stand and canopy, as well as cleaning up the glass and seals. I started on it this afternoon:

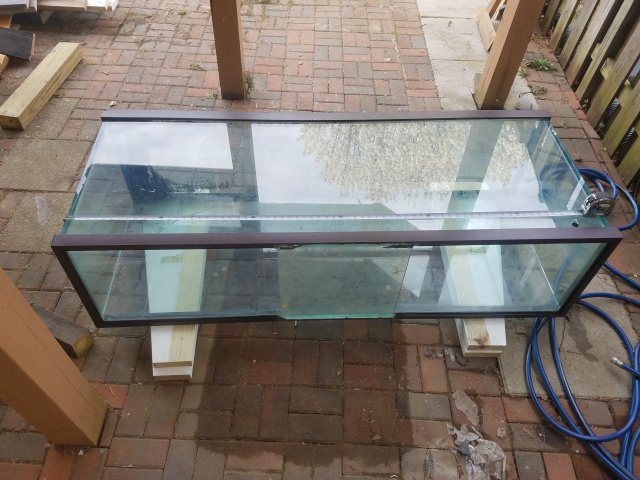
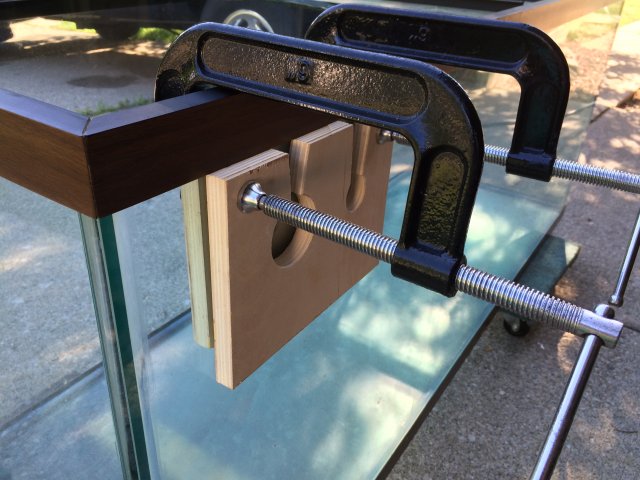
First step was getting it outside to drill the overflow
20190328_163824.jpg

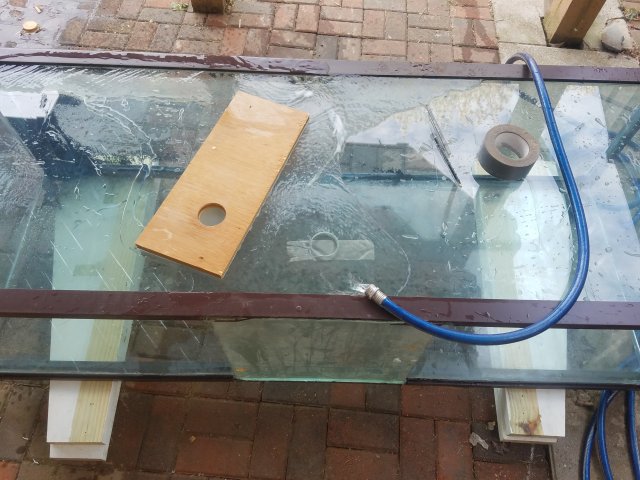
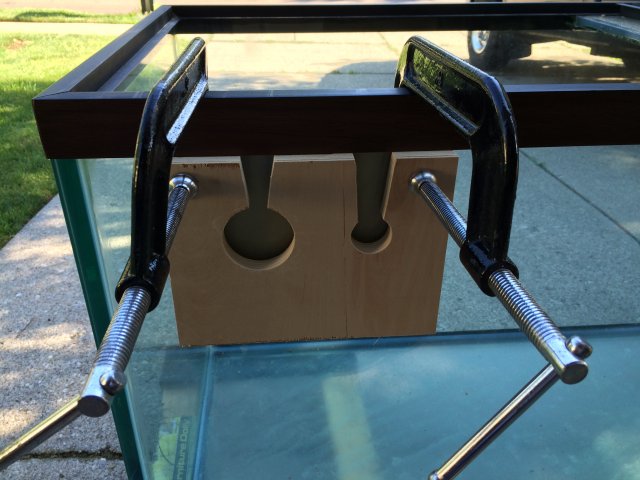
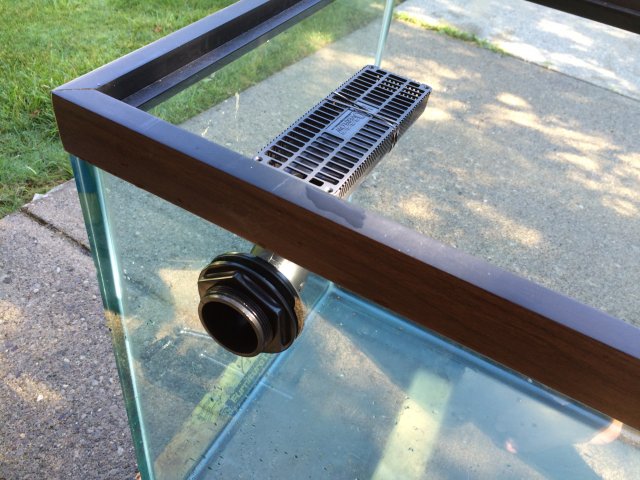
I decided to go with a single overflow in the middle of the back panel 1.5". I will be running 2 returns over the back of the tank 3/4". Halfway through the drilling and i took a break. That 3/4" glass is a bear!
20190328_165557.jpg

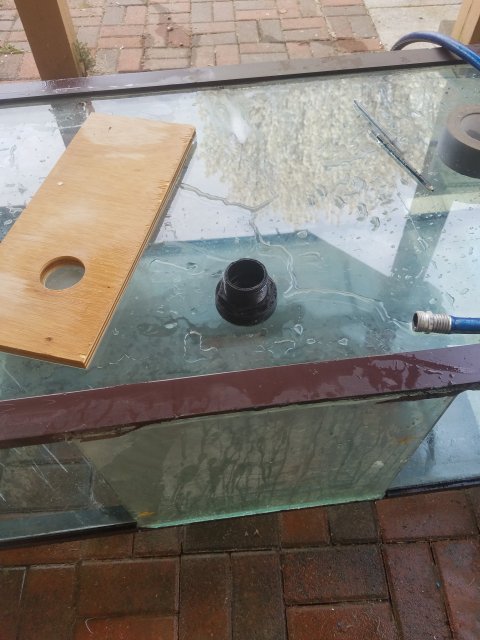
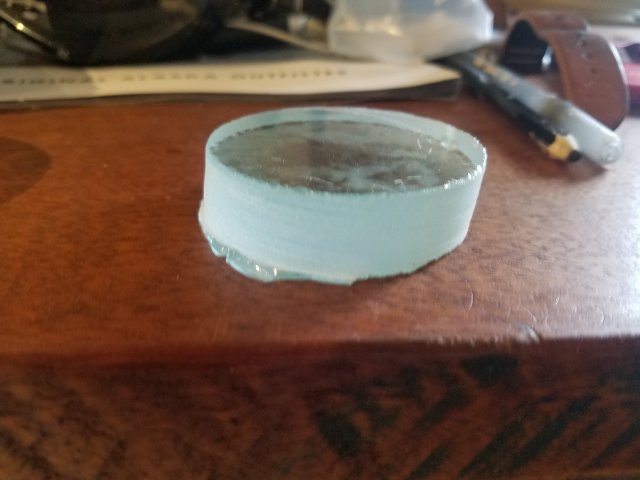
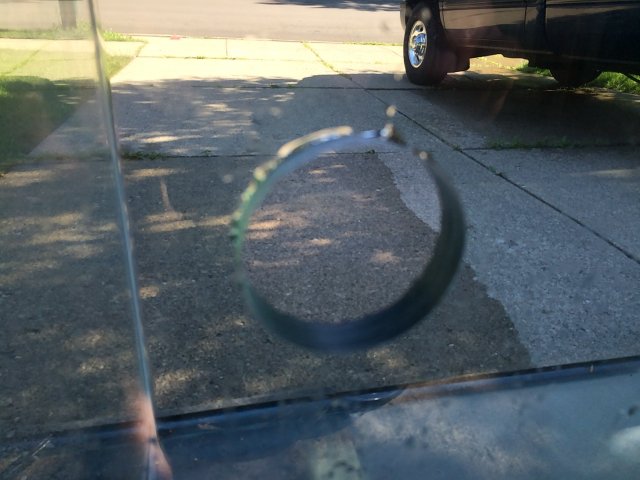
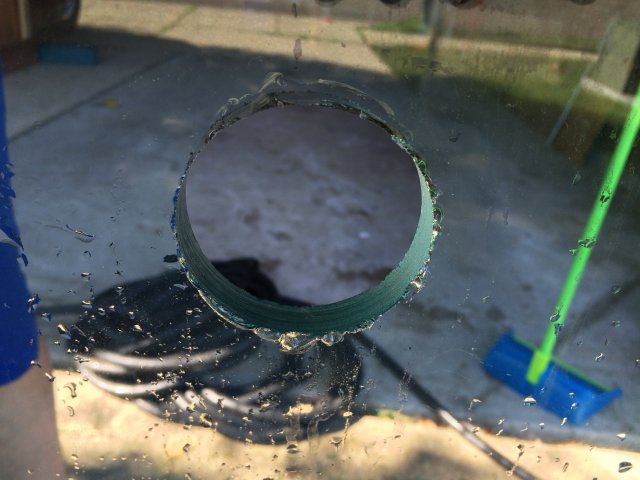
Overall it wasn't as tough as i was stressing it to be, though when i examined the cutout i noticed my perpendicularity was off a little. Wont affect the functionality methinks, but its a good thing im not drilling for a tank manufacturer or anything.
20190328_170706.jpg
20190328_173626.jpg

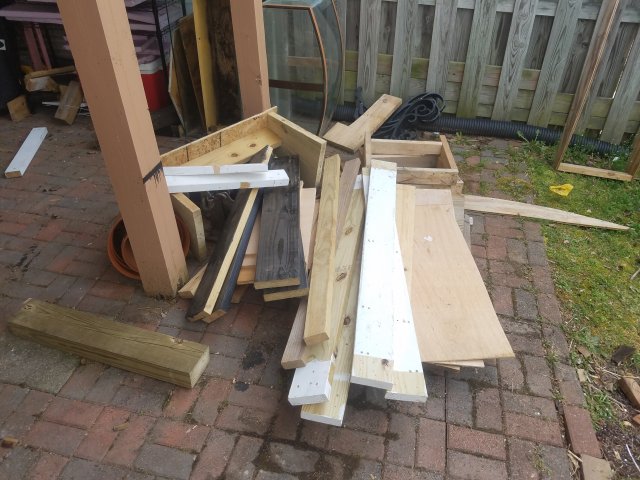
Now im on to somehow constructing a stand out of this:
20190328_163838.jpg
 

Fish Tank Travis

Potamotrygon
MFK Member
Feb 28, 2016
3,277
2,157
164
36
Dayton, OH
UPDATE

Ive decided to further the overhaul on this tank and make it into one of my main displays. It has been serving as a transfer tank and also a single species tank for my midevil in the backroom.

I'll be installing an overflow and 75 gallon sump and building a stand and canopy, as well as cleaning up the glass and seals. I started on it this afternoon:

First step was getting it outside to drill the overflow
View attachment 1366627

I decided to go with a single overflow in the middle of the back panel 1.5". I will be running 2 returns over the back of the tank 3/4". Halfway through the drilling and i took a break. That 3/4" glass is a bear!
View attachment 1366628

Overall it wasn't as tough as i was stressing it to be, though when i examined the cutout i noticed my perpendicularity was off a little. Wont affect the functionality methinks, but its a good thing im not drilling for a tank manufacturer or anything.
View attachment 1366629
View attachment 1366635

Now im on to somehow constructing a stand out of this:
View attachment 1366636
Nice project. I drilled five holes in the back of my Odell 220 that has the same glass thickness.
80EC53EB-D44A-4579-9044-03FD3BF8429B.jpegE4597B7F-08B5-4236-B2A4-CD7D718E2512.jpeg83838947-530B-44E1-8F5A-44F20237B7CD.jpeg128D03EB-88B1-4675-95B7-3931B823B6C0.jpeg80D9E674-A0A3-4F72-9464-A4A2E6F401E3.jpeg8D2E1835-494F-4107-96D2-D3C3014979C4.jpegF395CBA9-3631-426F-A09A-2A03CFBC8960.jpeg
Three were for 1.5” bulkheads and two were for 3/4” bulkheads.

While you have the tank out in the garage, I would highly recommend you go ahead and drill a second 1.5” bulkhead for use as an emergency drain. A single overflow is asking for trouble in the event it ever gets clogged, especially with a 75 gallon sump waiting to be drained all over your floor. I believe a single 1.5” overflow is rated to about 1200 gph.
 
  • Like
Reactions: Backfromthedead

Backfromthedead

Potamotrygon
MFK Member
Jul 12, 2017
4,544
6,111
164
Fredericksburg va
Nice project. I drilled five holes in the back of my Odell 220 that has the same glass thickness.
View attachment 1366718View attachment 1366719View attachment 1366720View attachment 1366721View attachment 1366722View attachment 1366723View attachment 1366724
Three were for 1.5” bulkheads and two were for 3/4” bulkheads.

While you have the tank out in the garage, I would highly recommend you go ahead and drill a second 1.5” bulkhead for use as an emergency drain. A single overflow is asking for trouble in the event it ever gets clogged, especially with a 75 gallon sump waiting to be drained all over your floor. I believe a single 1.5” overflow is rated to about 1200 gph.
Hey i was just thinking about ordering some of those parts from customaquariums!

I have decided, with your advice as confirmation, to go ahead and drill the returns and another drain. I had already ordered the drill bits in all the sizes i needed just in case. Thanks!
 

Fish Tank Travis

Potamotrygon
MFK Member
Feb 28, 2016
3,277
2,157
164
36
Dayton, OH
Hey i was just thinking about ordering some of those parts from customaquariums!

I have decided, with your advice as confirmation, to go ahead and drill the returns and another drain. I had already ordered the drill bits in all the sizes i needed just in case. Thanks!
I do like the overflows and returns, but I wouldn’t advise buying them due to price. For my setup which is three overflows and two returns the cost was about $450 shipped to my door. I ended up modifying all of them also, because they were very noisy. I setup my drains as full-siphon drains, I replaced the third drain that is my emergency drain completely with parts from bulk reef supply (way cheaper), and I removed the siphon stopper part of the returns and just drilled siphon break holes that sit under the water line while the tank is running.
 
  • Like
Reactions: Backfromthedead

Fish Tank Travis

Potamotrygon
MFK Member
Feb 28, 2016
3,277
2,157
164
36
Dayton, OH


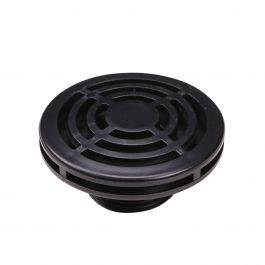
These are some of the things I ended up using. The top link is the low-profile strainer and the bottom link is a pvc supplier that sells a lot of black pvc fittings. The black fittings are actually black and not dark grey.
 
  • Like
Reactions: Backfromthedead

Backfromthedead

Potamotrygon
MFK Member
Jul 12, 2017
4,544
6,111
164
Fredericksburg va
I do like the overflows and returns, but I wouldn’t advise buying them due to price. For my setup which is three overflows and two returns the cost was about $450 shipped to my door. I ended up modifying all of them also, because they were very noisy. I setup my drains as full-siphon drains, I replaced the third drain that is my emergency drain completely with parts from bulk reef supply (way cheaper), and I removed the siphon stopper part of the returns and just drilled siphon break holes that sit under the water line while the tank is running.
Full siphon was my plan initially, as the cost of that gear was the hitch in the metaphorical getup. Im thinking I'll do two more 1" overflows in the corners and two returns in the middle spaces. Only question i have is how would i position an emergency overflow? Even if i had another overflow in this setup and the main overflow clogged i would still have flooding issues???
 

Backfromthedead

Potamotrygon
MFK Member
Jul 12, 2017
4,544
6,111
164
Fredericksburg va


These are some of the things I ended up using. The top link is the low-profile strainer and the bottom link is a pvc supplier that sells a lot of black pvc fittings. The black fittings are actually black and not dark grey.
Lol i looked at that exact strainer last time i was planning this out. I have a strainer already but it is longer and protruding, not disc shaped.
 

Fish Tank Travis

Potamotrygon
MFK Member
Feb 28, 2016
3,277
2,157
164
36
Dayton, OH
Full siphon was my plan initially, as the cost of that gear was the hitch in the metaphorical getup. Im thinking I'll do two more 1" overflows in the corners and two returns in the middle spaces. Only question i have is how would i position an emergency overflow? Even if i had another overflow in this setup and the main overflow clogged i would still have flooding issues???
Your full-siphon overflows will be submerged a bit into the water. You will control this by putting valves on the lines that go down into your sump and then closing them off until the flow from the pump matches the flow from the overflows, so they run full-siphon and quiet. This will take some tuning to achieve and is a reason why I highly recommend using the Jebao DCP pumps because they have a very fine adjustability on their controller that can be used to match the valves rather than trying to match the valves to the pumps. Then, the emergency overflow will be a bit higher than the full-siphon overflow but not so high that it will let the tank overflow. The emergency overflow should remain fully open. It’s not uncommon to get a little bit of a trickle going down the emergency drain either. If I were you, I’d recommend making the two 1” bulkheads your full-siphon overflows and then making your 1.5” the emergency drain.

Also, you need to make sure that your sump can handle the extra water volume if you lose power and the main tank drains down to where the full-siphon drains are. This should be easy for you since you have a 150 gallon tank with a 75 gallon sump. I’ve managed it just fine with my 220 that has a 55 gallon sump.
 
  • Like
Reactions: Backfromthedead
zoomed.com
hikariusa.com
aqaimports.com
Store