
Good call on the black on the exterior, that looks sharp in contrast to the interior color.
'Cleveland' Rocks!
- Thread starter Parka
- Start date
You are using an out of date browser. It may not display this or other websites correctly.
You should upgrade or use an alternative browser.
You should upgrade or use an alternative browser.

Yeah! I was just going to comment that maybe a light color would look good, but when I scrolled down to the next pic and saw the black, I like it. Focuses the eye on the interior of the tank.
Good call on the black on the exterior, that looks sharp in contrast to the interior color.
Thanks! I'm pleased with the look but I'm a little bit disappointed that I couldn't get Competition Blue, with pure white, I mighta been able to pull it off.Yeah! I was just going to comment that maybe a light color would look good, but when I scrolled down to the next pic and saw the black, I like it. Focuses the eye on the interior of the tank.
Other than that, I have reached my tipping point! As in it is Tank Tipping time and I'm not too um, ratchets and pulleys and that sort of thing, it's not my strong suit...
I start the tip with a car jack and then my plan is to DEFY GRAVITY! dang it... I think I will begin building the hood while I don't tip the tank. And I can work on the drawers and doors too, in the meantime sort of thing. Tip TIPPINGTON!
The 'Chicago' sat idle for about 5 weeks waiting to get tipped. I had a helper then and he knew how to pulley it over safely.
Good Morning!
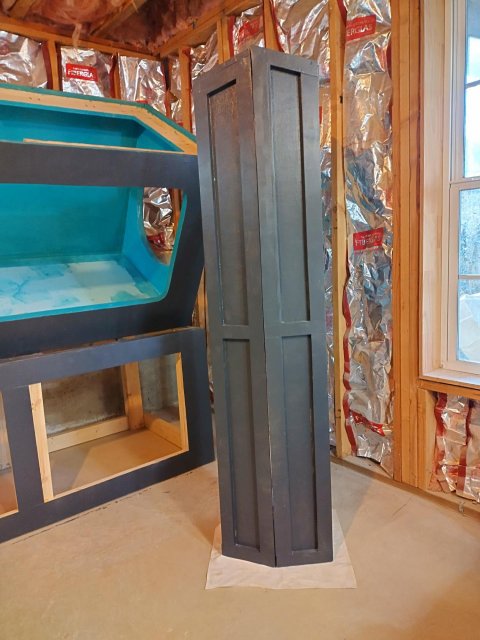
Good evening, I'm going to talk about the hood a little bit. I have it rough built, it still needs a bit more bracing along the back and all the openings will be closed off with thin plywood, these hoods are lightweight and sturdy and almost entirely for looks because the 4 openings across the top of the tank will each have its own flat clear plastic lid, cut from a piece of corrugated green-house roof material.
The hood was built with 15 degree angels across the front and each end. The hood is two separate structures and working with angles can be a bit challenging. I want to remind all, I am not an experienced expert wood worker, I self taught myself enough different techniques and procedures to develop a decent skill set to nice looking work with right angles and rectangles. Right angles and rectangles are like checkers. 15 degree angles, and crown molding too, now that is EXTRA hard checkers... not Chess though.
After everything is ready, the hoods will be fastened to the tank with hinges and I will make cool little skinny rope pulls to lift & lower the hoods.
I still want to get it tipped over ASAP. To install the glass!
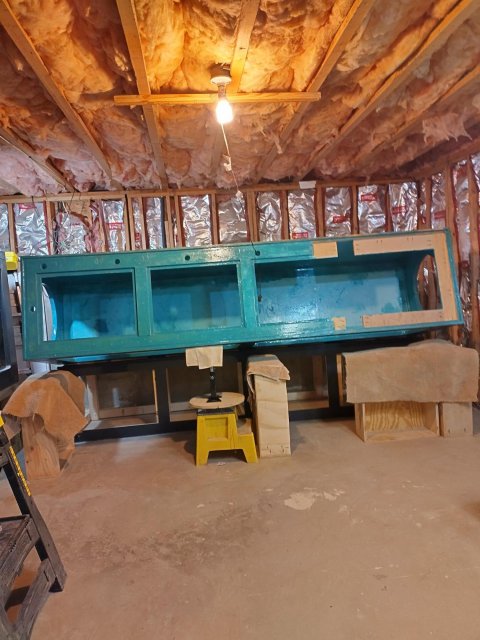
Good Morning! I have a worthy progress update on the 'Cleveland', I got this weekend penciled in for the Leak Test... I was nervous about tipping it by myself so I built the hoods while I considered my options. The hoods turned out nice and they fit perfect.

And so I start the tip with a car jack and at that angle shown, it does not take much effort to pull the structure to the pivot point and when it teeters, at that point I give it another light tug and it fell right where I had planned... and then I used the jack again, to lift it a tiny bit, remove the taller stop boxes and then lower the tank to a level position, (not shown).

As I jacked it up for the tip, I would keep it blocked as it got lifted. So yes, very excited!

And so I start the tip with a car jack and at that angle shown, it does not take much effort to pull the structure to the pivot point and when it teeters, at that point I give it another light tug and it fell right where I had planned... and then I used the jack again, to lift it a tiny bit, remove the taller stop boxes and then lower the tank to a level position, (not shown).
As I jacked it up for the tip, I would keep it blocked as it got lifted. So yes, very excited!
Attachments
at that point I give it another light tug and it fell right where I had planned...
Fell? Sounds like you gave it the "stress" test!
Looking good, can't wait for the glass and leak test.

It was a stress test all right, for Me! I had to pull it towards me, and I was highly agitated! I have NO Qualms, none whatsoever, about dropping this Big 500 Long, back, away from me, back on the stand, where it belongs! I feel like Rockin out to some Aerosmith now... Pulling it towards me, if my arm got stuck or something, I was all by my lonesome! Oh My! I better do the Sign of the Cross! I do it with both hands at the same time.
So earlier this late afternoon, I set one side of glass in place and I use a home made set-up, a lift table and it works like a lucky charm. It consists of a 4' x 16" 'table top' with a pair of car jacks fastened underneath at each end and 3 pairs of casters on top ... to slide the glass panel over top and above the opening ... after a fat bead of 'licone has bean laid, and then ya position the glass panel just right and lower the jacks, and then slam a few pressure braces in place near the corners to really squeeze that sealant.
On my other two builds, especially Chicago, the glass laps over the tank openings by as much as 4 inches along the bottom, giving it a very wide seal.
On this build, on all four openings, only ONE inch of glass will contact the frame of the tank. I think it will be plenty sufficient, and the Leak Test is scheduled for this Saturday.
I will go back downstairs tonight and set the other panel and then in the morning I will set the round end glass sections. The glass was packed very well, it was double boxed and the inner box is shown below.
Now that made me laugh! About tipping it on its ends, that's funny. For the end pieces I will need to place a block to keep the glass from sliding and then on the outside I will place a pair of large suction cups with handles, these are designed for handling large panels of glass, countertops, etc, and then I can use a stick through the handles to increase the pull of the glass to the tank. Pics this evening of the end glass installed.Lift table sounds like the perfect piece of equipment to do a precise, controlled landing of the glass. Now I'm waiting with bated breath to see how you're going to tip the tank on end to install the round glass pieces.
As soon as the ends are in place, I will finish the top brace and it will finish up in just a few minutes. And then I must mix up another small batch of 'poxy and finish painting the top brace with sticky 'poxy, Yeah!
Here is a picture of the no longer needed Lift Table.

I also wanted to mention that the Highly Anticipated Leak Test will be done with the waters from the 'Chicago' and 'Akron', that way Chi and Kron get a water change in the process, how very exciting!


