Grinch and Bichir Girl's Fish Room
- Thread starter Grinch
- Start date
You are using an out of date browser. It may not display this or other websites correctly.
You should upgrade or use an alternative browser.
You should upgrade or use an alternative browser.
Progress report! 

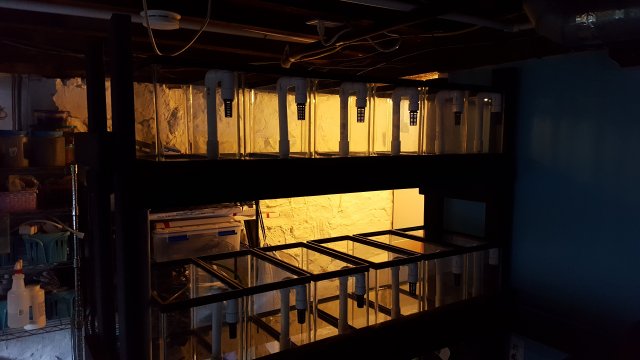
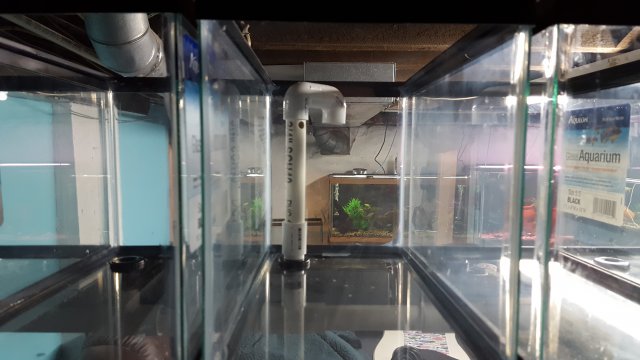
Here is the durso drain from the tanks on the rack. From the 3/4" threaded strainer -> 3/4 threadedx3/4 slip bushing -> 3/4 street elbow -> 3/4 90 -> 3/4 pipe -> 3/4 coupler -> 3/4x1/2 reducer bushing ->1/2 pipe. 1/2" should be plenty big for draining the tanks. I've read that Durso's <1" tend not to work well unless the pipe size is stepped down as done here... hopefully it works! If I had this to do over again, I'd have bought threaded street 90's. I probably also could have found a fitting to simplify the step down, but oh well.
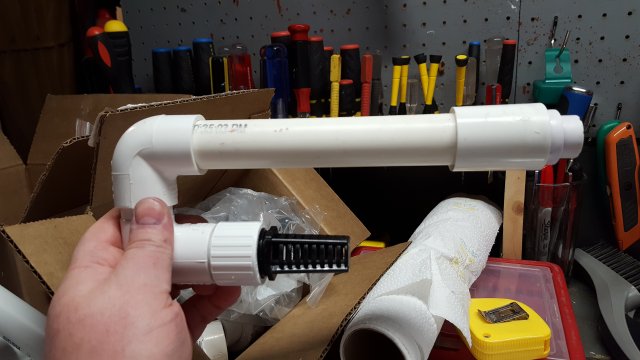
I glued the step-down portion of the durso to the bulkhead, so if I pull the stand pipe out the tank will mostly drain. I glued this small portion as a safety mechanism for when the tank is in isolation and running on sponge filters... there will always be some water in the tank if the non-glued fittings leak.
They fit into the tanks pretty well I think. I positioned the bulkhead hole such that if I swap out the street 90 for a regular 90 the durso strainer can be rotated into the center of the back pane of glass (see mock-up below) or well out into the tank. In this configuration the joint with the 90 could also be rotated to bring some of the strainer up out of the water in order to reduce the area of strainer that is exposed. This would be beneficial if there are small plants or fry in the tank. You can also pull the standpipe off and replace it with just the strainer/threaded-coupling assembly in order to have a tank about 50% full. Long story short... this is a very flexible setup.
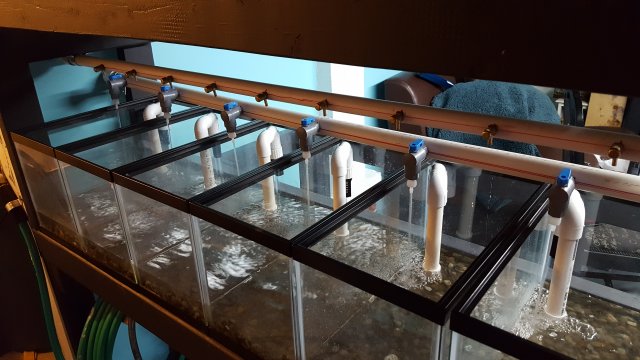
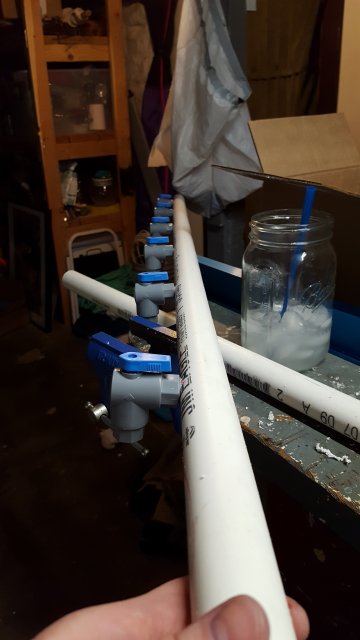
This is one of the distribution manifolds. I looked at buying a pre-built manifold, but I didn't like any of the ones I found from flexPVC or Pent-Air. So I made my own. The trick in making your own it to get all of the valves lined up evenly (and where you want them). I don't have a drill press... I think I did pretty well using a cordless drill free-hand. These are 1/4" 90 ball valves with MPT and FPT ends screwed into 1" schedule 40 PVC.
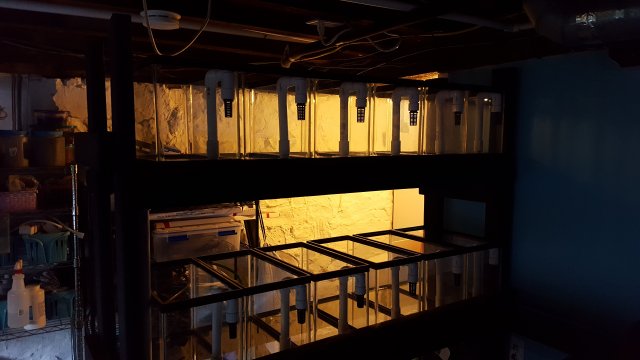
Here are the drains from the top shelf. The bulkheads are 1/2" leading into a 1/2"x1"x1" tee... so it's 1" pipe draining.
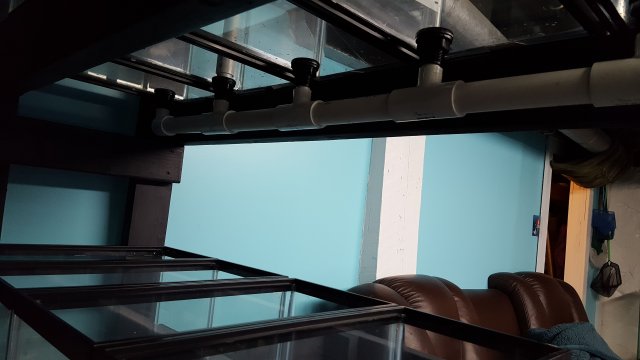
Each of the rows drains to a wye which then runs into a filter sock. I used a union at this point to allow the filter sock assembly to be removed easily. I didn't use unions elsewhere in the drains because I figure 1) if I need to remove a tank I've got plenty of room to cut it out and at couplings/unions later and 2) the drains aren't pressurized, so leaks are unlikely and easier to deal with.
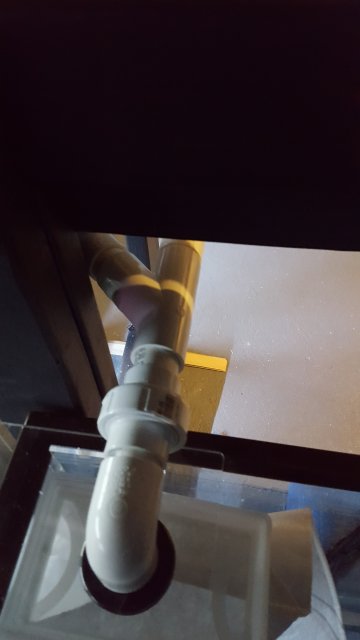
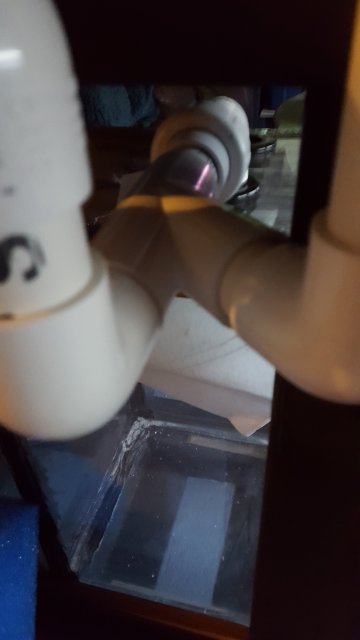
Anyone else feel like that last picture is dirty??
 X-rated plumbing!
Here is the durso drain from the tanks on the rack. From the 3/4" threaded strainer -> 3/4 threadedx3/4 slip bushing -> 3/4 street elbow -> 3/4 90 -> 3/4 pipe -> 3/4 coupler -> 3/4x1/2 reducer bushing ->1/2 pipe. 1/2" should be plenty big for draining the tanks. I've read that Durso's <1" tend not to work well unless the pipe size is stepped down as done here... hopefully it works! If I had this to do over again, I'd have bought threaded street 90's. I probably also could have found a fitting to simplify the step down, but oh well.

I glued the step-down portion of the durso to the bulkhead, so if I pull the stand pipe out the tank will mostly drain. I glued this small portion as a safety mechanism for when the tank is in isolation and running on sponge filters... there will always be some water in the tank if the non-glued fittings leak.

They fit into the tanks pretty well I think. I positioned the bulkhead hole such that if I swap out the street 90 for a regular 90 the durso strainer can be rotated into the center of the back pane of glass (see mock-up below) or well out into the tank. In this configuration the joint with the 90 could also be rotated to bring some of the strainer up out of the water in order to reduce the area of strainer that is exposed. This would be beneficial if there are small plants or fry in the tank. You can also pull the standpipe off and replace it with just the strainer/threaded-coupling assembly in order to have a tank about 50% full. Long story short... this is a very flexible setup.

This is one of the distribution manifolds. I looked at buying a pre-built manifold, but I didn't like any of the ones I found from flexPVC or Pent-Air. So I made my own. The trick in making your own it to get all of the valves lined up evenly (and where you want them). I don't have a drill press... I think I did pretty well using a cordless drill free-hand. These are 1/4" 90 ball valves with MPT and FPT ends screwed into 1" schedule 40 PVC.

Here are the drains from the top shelf. The bulkheads are 1/2" leading into a 1/2"x1"x1" tee... so it's 1" pipe draining.

Each of the rows drains to a wye which then runs into a filter sock. I used a union at this point to allow the filter sock assembly to be removed easily. I didn't use unions elsewhere in the drains because I figure 1) if I need to remove a tank I've got plenty of room to cut it out and at couplings/unions later and 2) the drains aren't pressurized, so leaks are unlikely and easier to deal with.


Anyone else feel like that last picture is dirty??
I made the second distribution manifold and plumbed the return system today. I haven't glued it together yet, so the configuration might still change a little bit. I'm waiting to glue it together until I finish the air distribution system.
Anyway, here is the pump chamber of the sump and the ball valve controls. The pump is a quiet one 5000, which should have enough juice to run the system. This was a pump we already had, so if we have to upgrade, no big deal... we'll see. Leading up from the pump is a threaded coupling, union (to make servicing the pump easier) and then a series of ball valves. The valve at right controls flow to the 90 gallon that will be above the sump eventually. The valve at left controls flow out to the smaller tanks. The valve in the sump is a bypass to prevent damage to the pump etc.
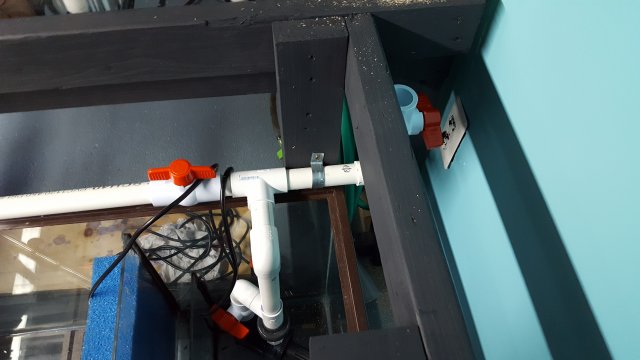
The water return to the racks dog-legs under the drains and there is a union to facilitate easier repairs etc. Unions are your friend with this stuff. The dog leg was made with two 45 degree fittings.
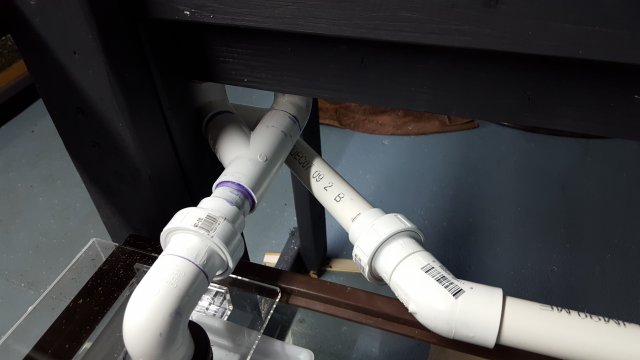
Here is the manifold I made today installed above the first rack. Note that a nipple fitting has been added to the 90 ball valve. This nipple fitting reduces from 1/4 NPT to a 3/16 barb, which will conveniently fit air line tubing. The 1/4 FNT fitting give us lots of flexibility to change things around if we decide we more flow.
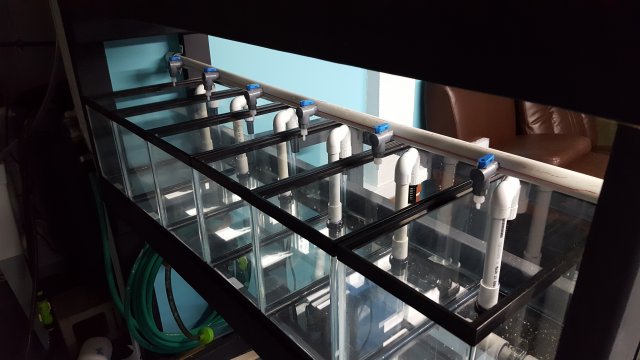
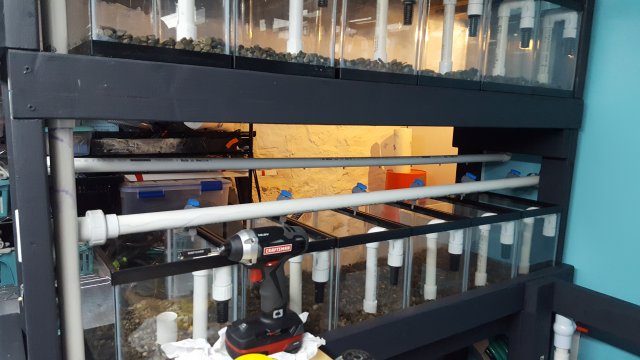
To plumb in the top returns I had to trim the stand risers. I had anticipated having to do "something" to these, which is why I made them a little long rather than ending them flush with the bottom of the second row. I used a reciprocal saw for this, so I made a mess and it wasn't pretty, but it got the job done. Note the union fitting to the left of the distribution manifold. Also note the cap just to the left of the union fitting. The cap is on a vent for the drains and the return jogs around the vent.
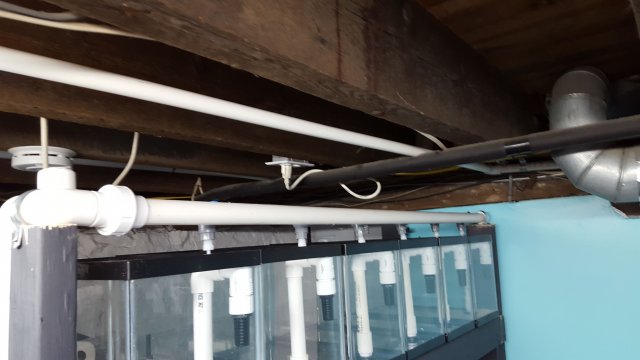
The next step is to tap into the fish room's air supply and plumbing the rack for air. The 3/4 pvc running below the floor joists is part of the air-loop through the fish room. I was planning ahead a couple of years ago knowing that "something" was going to be in this foot print, so I ran the air through this area round-about where I thought it needed to be. Looks like I got pretty close!
Anyway, here is the pump chamber of the sump and the ball valve controls. The pump is a quiet one 5000, which should have enough juice to run the system. This was a pump we already had, so if we have to upgrade, no big deal... we'll see. Leading up from the pump is a threaded coupling, union (to make servicing the pump easier) and then a series of ball valves. The valve at right controls flow to the 90 gallon that will be above the sump eventually. The valve at left controls flow out to the smaller tanks. The valve in the sump is a bypass to prevent damage to the pump etc.

The water return to the racks dog-legs under the drains and there is a union to facilitate easier repairs etc. Unions are your friend with this stuff. The dog leg was made with two 45 degree fittings.

Here is the manifold I made today installed above the first rack. Note that a nipple fitting has been added to the 90 ball valve. This nipple fitting reduces from 1/4 NPT to a 3/16 barb, which will conveniently fit air line tubing. The 1/4 FNT fitting give us lots of flexibility to change things around if we decide we more flow.

To plumb in the top returns I had to trim the stand risers. I had anticipated having to do "something" to these, which is why I made them a little long rather than ending them flush with the bottom of the second row. I used a reciprocal saw for this, so I made a mess and it wasn't pretty, but it got the job done. Note the union fitting to the left of the distribution manifold. Also note the cap just to the left of the union fitting. The cap is on a vent for the drains and the return jogs around the vent.

The next step is to tap into the fish room's air supply and plumbing the rack for air. The 3/4 pvc running below the floor joists is part of the air-loop through the fish room. I was planning ahead a couple of years ago knowing that "something" was going to be in this foot print, so I ran the air through this area round-about where I thought it needed to be. Looks like I got pretty close!
Ran the air-loop through the stand today, built the air manifolds, and glued it all together. I got carried away with the tap and had to go back and take apart the manifolds and use lots of teflon tape 
 . After about an hour of trouble-shooting, no discernible leaks.
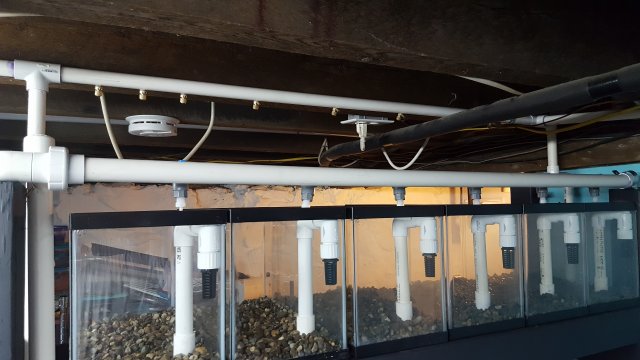
Bichir Girl took care of the gravel washing and filling. I glued the water return together. Should be ready for water tomorrow.
 But will the water manifolds leak like the air manifolds!?!?!

Bichir Girl took care of the gravel washing and filling. I glued the water return together. Should be ready for water tomorrow.

I messed around with the leaking tank today and it's still leaking. Looks like I messed up the gluing and didn't get a good seal between the bulkhead and the drains.
The goal now was to get some of these tanks actually up and running instead of just filled with stagnant water. First step, I had to drop the stand pipes down 1/4" to fit the durso assembly easily under the glass tops (oops!). I then drilled all of durso's and fit the hole with a vent tube. It is not glued in place, but it's also not going anywhere unless the lid comes off the tank.
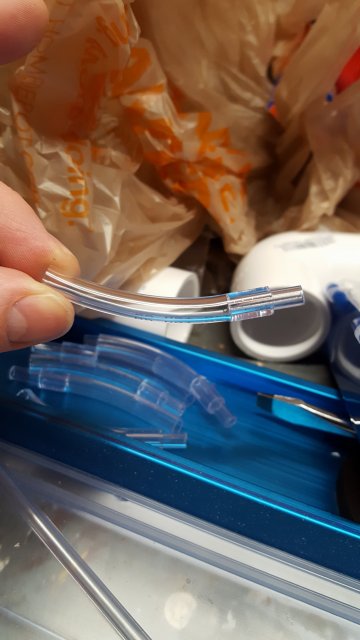
I then assembled the last little bit of the returns into the tanks
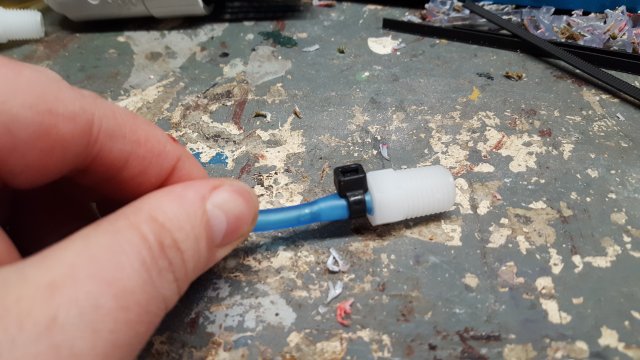
And put it all together.
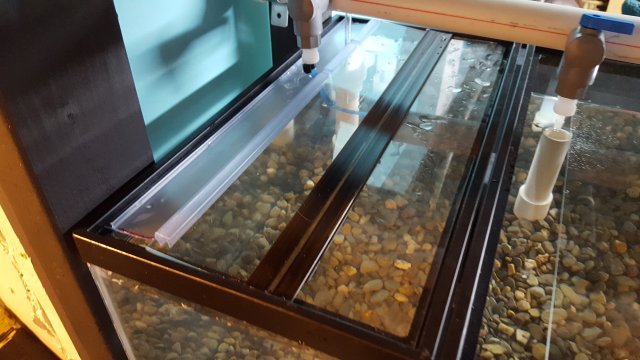
We have 5 of the tanks on the rack running now, for a total of 22 tanks. We'll get that up to 29 soon, but first things first, time for a fish auction!
The goal now was to get some of these tanks actually up and running instead of just filled with stagnant water. First step, I had to drop the stand pipes down 1/4" to fit the durso assembly easily under the glass tops (oops!). I then drilled all of durso's and fit the hole with a vent tube. It is not glued in place, but it's also not going anywhere unless the lid comes off the tank.

I then assembled the last little bit of the returns into the tanks

And put it all together.

We have 5 of the tanks on the rack running now, for a total of 22 tanks. We'll get that up to 29 soon, but first things first, time for a fish auction!


