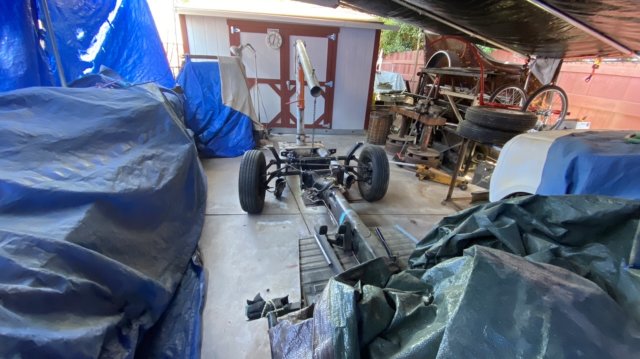
It’s been a whole year
- Thread starter Ulu
- Start date
You are using an out of date browser. It may not display this or other websites correctly.
You should upgrade or use an alternative browser.
You should upgrade or use an alternative browser.
Test fitting of my frame rails.

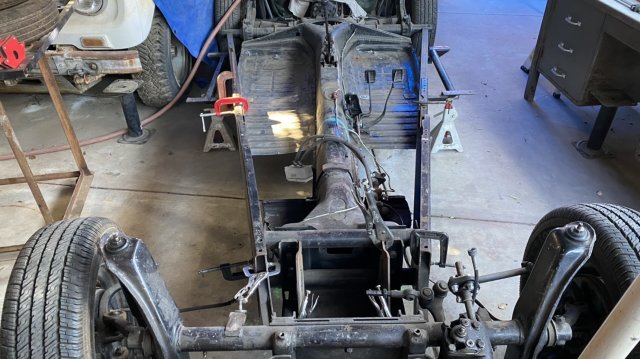
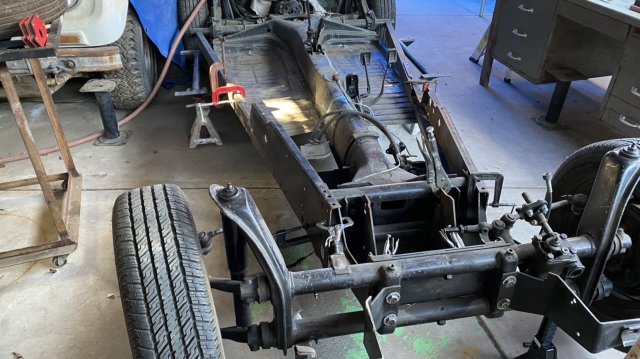
If you look at the second photo, it appears that the tube down the center of the chassis is twisted. There is much old rust repair in this frame and a lot of welding has been done on the driver side of the tube, causing it to draw to the driver’s side.
this throws the whole chassis off a bit. The centerline of the tube is not perpendicular to the rear axle. This was not evident when the car was assembled because the rear springs are slightly different in adjustment.
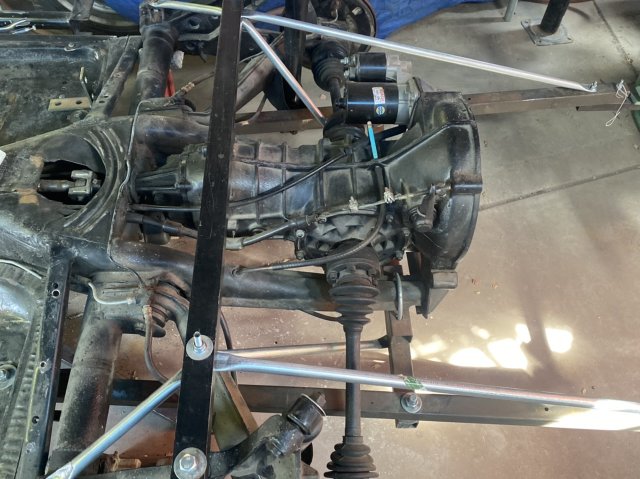
I replaced the rear trusswork with new galvanized tubing. This will stiffen the tail and provide more axle clearance. My axles struck the previous braces on a hard launch.
New spring plate covers didn't need to be chrome, but they were available. I did not have to order them.
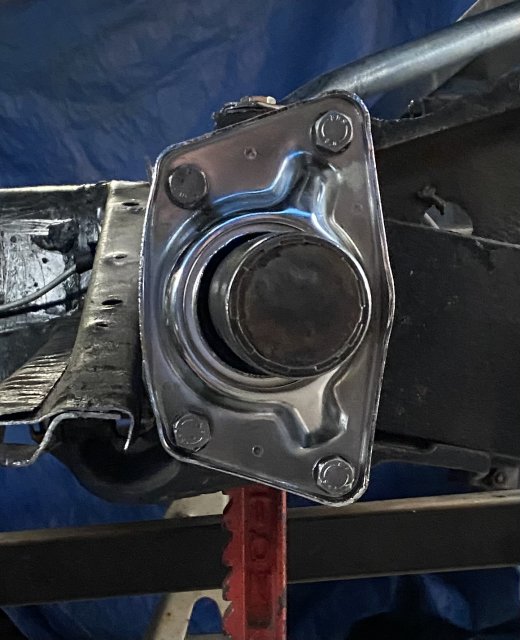
But I definitely needed new ones. These things were rusted out.

Hoisting off the front axle.
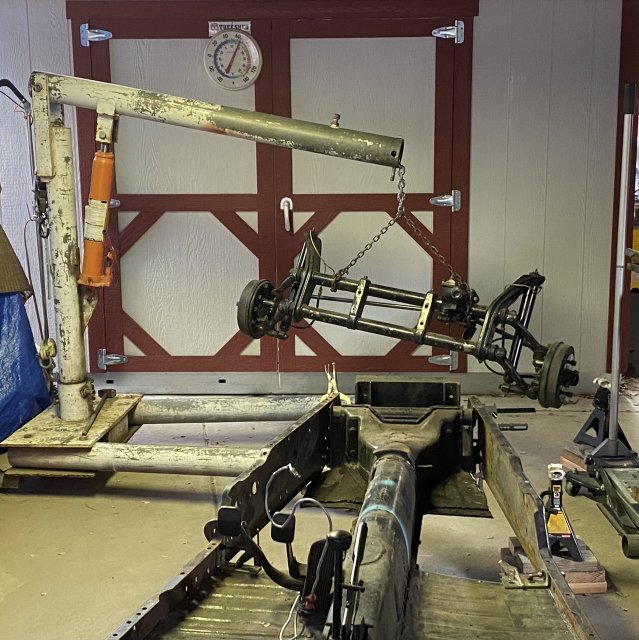
Checking the frame for twist and warp. It’s got them both.

The underside of the head frame is a patchwork of repairs.

I start chopping out the rusty bits.

There was no saving this mess. I chopped off the whole bottom of the headframe.


That charred mess is the remains of a mouse nest that caught on fire as I was grinding through the steel With an angle grinder and the cut off wheel.
It’s hard to tell what’s going on here but the entire bottom of the Volkswagen tunnel was rusted away and patched over with steel plates.
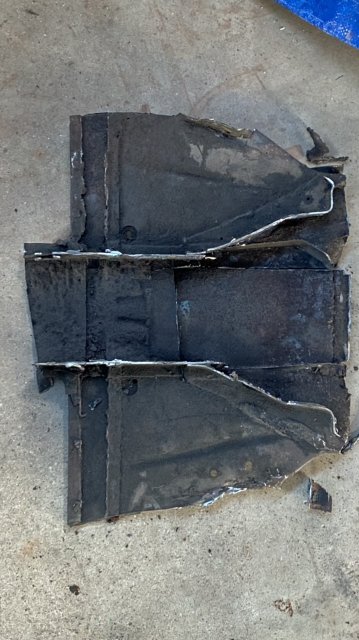
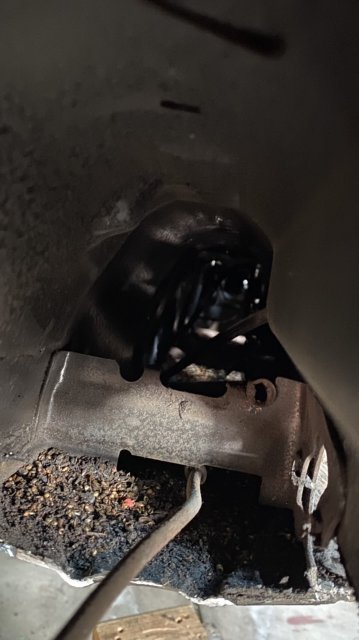
I flushed out the tunnel with a water hose and an air hose, and then dried it with the shop vac. There was a lot of burnt mouse nest still inside there.
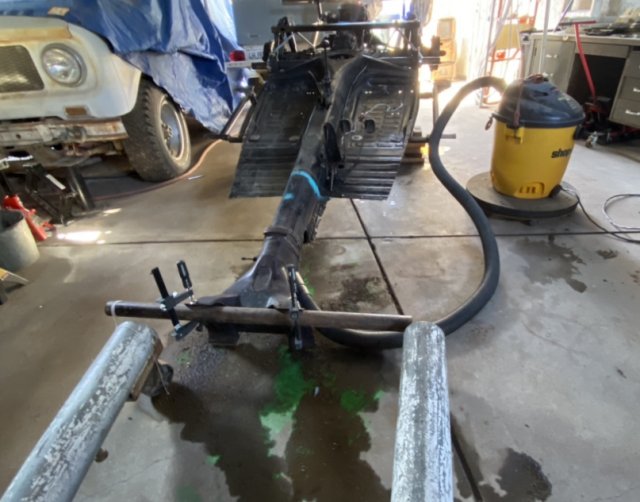

New spring plate covers didn't need to be chrome, but they were available. I did not have to order them.

But I definitely needed new ones. These things were rusted out.

Hoisting off the front axle.

Checking the frame for twist and warp. It’s got them both.

The underside of the head frame is a patchwork of repairs.

I start chopping out the rusty bits.

There was no saving this mess. I chopped off the whole bottom of the headframe.


That charred mess is the remains of a mouse nest that caught on fire as I was grinding through the steel With an angle grinder and the cut off wheel.
It’s hard to tell what’s going on here but the entire bottom of the Volkswagen tunnel was rusted away and patched over with steel plates.

I flushed out the tunnel with a water hose and an air hose, and then dried it with the shop vac. There was a lot of burnt mouse nest still inside there.


I have been building these little brackets for the rear frame attachment to the rear suspension torsion tube.

I am getting better at the TIG welding, with practice, and it is also getting more fun.
Of course all the grinding and sanding and fitting and prep work isn’t much fun.
The welds came out so clean that I only wiped them with a paper towel. No wire brushing needed.
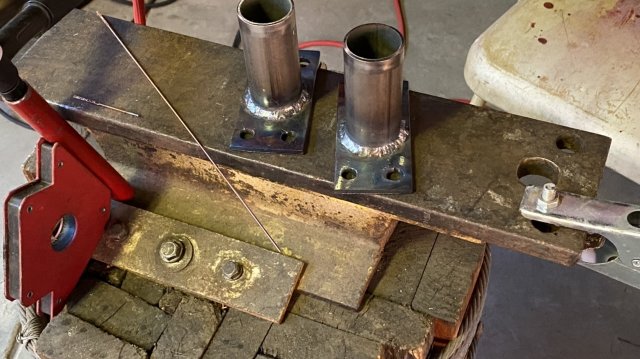
They are not super artistic but they are absolutely strong. The metal wetted out beautifully. I wish I would’ve had a pipe rotator, and the welding would’ve looked a lot more uniform.
So it’s a little ugly but the warpage was minimal.
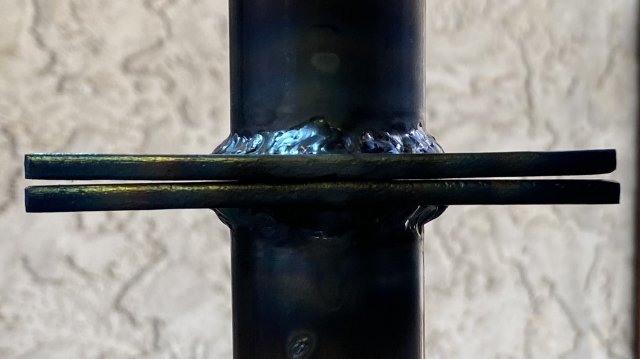

I am getting better at the TIG welding, with practice, and it is also getting more fun.
Of course all the grinding and sanding and fitting and prep work isn’t much fun.
The welds came out so clean that I only wiped them with a paper towel. No wire brushing needed.

They are not super artistic but they are absolutely strong. The metal wetted out beautifully. I wish I would’ve had a pipe rotator, and the welding would’ve looked a lot more uniform.
So it’s a little ugly but the warpage was minimal.

I also did a test fitting of the engine after I changed my rear braces, and I found it did not fit.
I had to make some new braces and relocate the longest one for extra clearance to the valve cover.
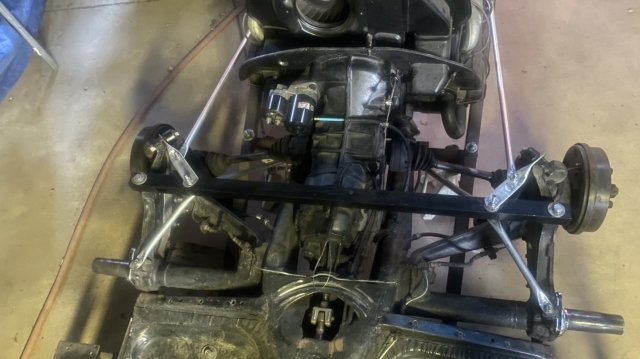
I made this little cart, which makes it easy to install and remove the engine.
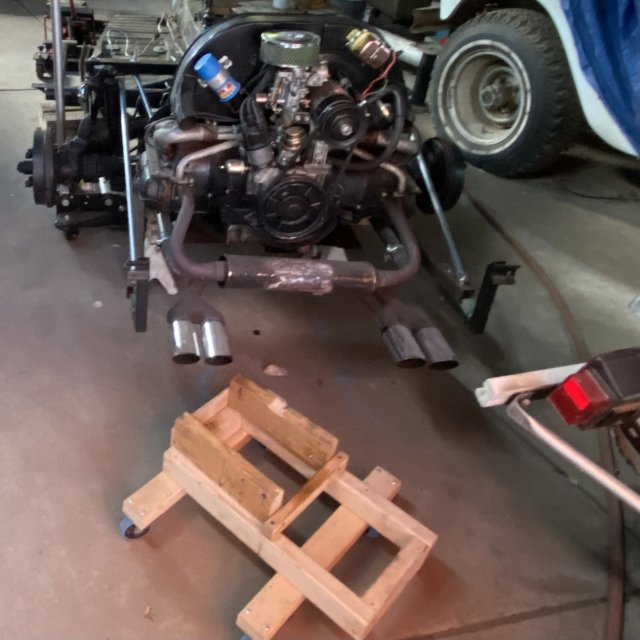
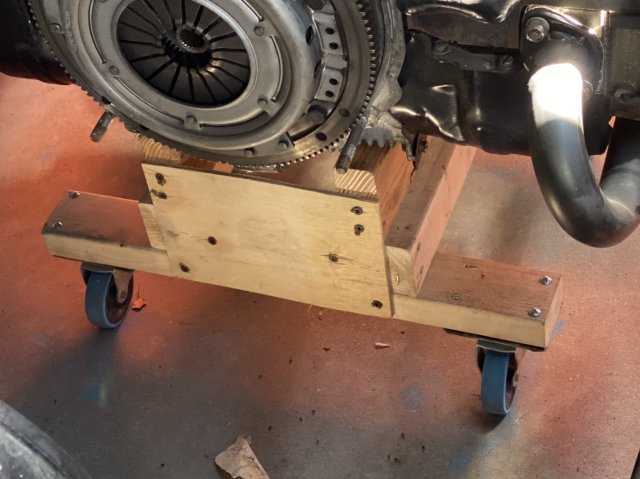
The cart is pretty minimal, and I would want something sturdier if I was to do this every day.
I had to make some new braces and relocate the longest one for extra clearance to the valve cover.

I made this little cart, which makes it easy to install and remove the engine.


The cart is pretty minimal, and I would want something sturdier if I was to do this every day.
I had to sit under the car and tack weld these assemblies to the frame rails, then I removed the rails and welded up everything solid on the bench.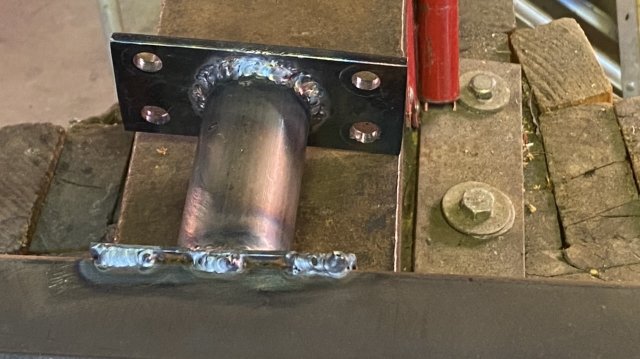
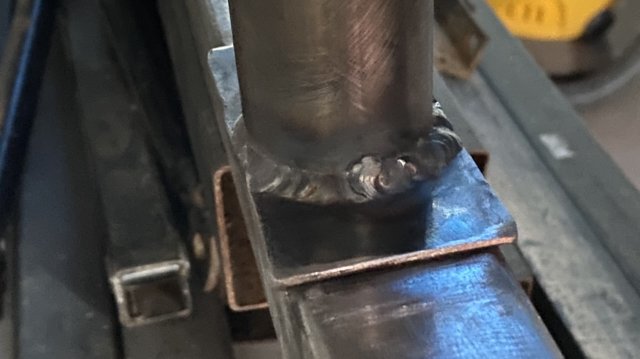
I burned through this tube while making the tack welds, but I was able to patch it up, and all the welding looks pretty good considering that I’m an amateur.
Yesterday I went out there and burned up my quarter sheet sander cleaning the rust and paint off of these rails, and then I shot them with self-etching satin black. This doesn’t require a primer so it is much faster and the paint doesn’t come out so thick.
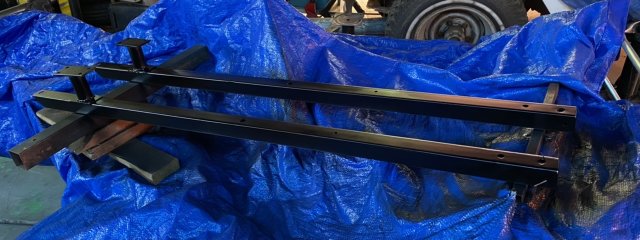

We have a local powder coater, and I was going to have him blast and bake these, but he is way too busy right now and I did not want to wait. They will be just fine with spray paint. They haven’t looked this good since the car was put together in 1981.
You can see that I have the engine back out again and next I have to take out these Rusty bits under the transmission and paint them as well.


I burned through this tube while making the tack welds, but I was able to patch it up, and all the welding looks pretty good considering that I’m an amateur.
Yesterday I went out there and burned up my quarter sheet sander cleaning the rust and paint off of these rails, and then I shot them with self-etching satin black. This doesn’t require a primer so it is much faster and the paint doesn’t come out so thick.


We have a local powder coater, and I was going to have him blast and bake these, but he is way too busy right now and I did not want to wait. They will be just fine with spray paint. They haven’t looked this good since the car was put together in 1981.
You can see that I have the engine back out again and next I have to take out these Rusty bits under the transmission and paint them as well.

I took those rusty rails off in the car yesterday. There she is with just the braces hanging, but now it will be easier to get in there and clean the suspension.

I bought myself a new quarter sheet sander and I started into sanding them.

But then I got sidetracked on garden projects for my wife.
She bought some oak barrels for planters and they had been cut, but they needed an extra iron hoop to keep them from falling apart. I had some old strap iron from a security door I scrapped out and I welded big hoops from them.

I rammed those down tight on two of the barrels and screwed them on from the outside. Then I had to deal with the big barrel.
She wanted some grill work in this thing so she could put flower pots in it. Maybe I could’ve just bought a big barbecue grill from anywhere and put it in there, But I still had all the leftover scrollwork from the security door, Half a tank of Argon gas, lots of filler rod scraps, and the deep need for more welding practice.
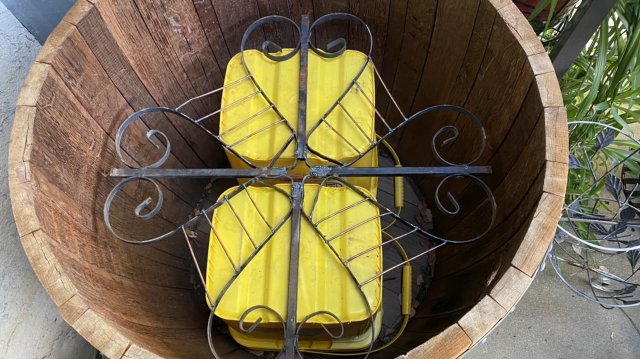
It’s sitting on some buckets and it still needs some little brackets so I can screw it into the wood, but it’s almost done, and today I will get back on the car.

I bought myself a new quarter sheet sander and I started into sanding them.

But then I got sidetracked on garden projects for my wife.
She bought some oak barrels for planters and they had been cut, but they needed an extra iron hoop to keep them from falling apart. I had some old strap iron from a security door I scrapped out and I welded big hoops from them.

I rammed those down tight on two of the barrels and screwed them on from the outside. Then I had to deal with the big barrel.
She wanted some grill work in this thing so she could put flower pots in it. Maybe I could’ve just bought a big barbecue grill from anywhere and put it in there, But I still had all the leftover scrollwork from the security door, Half a tank of Argon gas, lots of filler rod scraps, and the deep need for more welding practice.

It’s sitting on some buckets and it still needs some little brackets so I can screw it into the wood, but it’s almost done, and today I will get back on the car.
I finished this up for my wife yesterday. It turned out pretty good. Instead of screwing it right to the barrel I added four little ledgers for it to sit on and it is very strong. It can be lifted to clean the barrel, and it’s going to need it I am sure.
Of course it delayed the work on my car, but the important thing is that there are over 80 little welds that I made on this thing so I got a lot of practice starting and stopping.

If anyone wonders why I constructed this in the manner that I did, it’s because it’s all made from scraps and bits.
I really did need a project like this so I could get in more practice before I work on the car. I did OK welding 1/16 to 1/8 but now I’m going to have to weld some thicker metal together plus I’m going to have to weld some very thin metal. Lots of it. That’s why I bought the TIG welder.
The real test is: can you weld two razor blades together By the sharp edge? I don’t think I’m ready for that yet. LOL
Of course it delayed the work on my car, but the important thing is that there are over 80 little welds that I made on this thing so I got a lot of practice starting and stopping.

If anyone wonders why I constructed this in the manner that I did, it’s because it’s all made from scraps and bits.
I really did need a project like this so I could get in more practice before I work on the car. I did OK welding 1/16 to 1/8 but now I’m going to have to weld some thicker metal together plus I’m going to have to weld some very thin metal. Lots of it. That’s why I bought the TIG welder.
The real test is: can you weld two razor blades together By the sharp edge? I don’t think I’m ready for that yet. LOL


