The Pond...

Luc70

Dovii
MFK Member
Jan 8, 2009
731
359
102
Bangkok, Thailand
This is looking very nice!
Will you use bottom drains to sump?
Will the sump have individual chambers for settlement and purge taps to clean ?

I'm interested in your seive. Will it be wedge wire screen ?

How will you waterproof the wood/concrete. No glass viewing panel ? It could easily be done for 650mm water depth.
Wow, that's a lot of questions in a short post..lol..

No bottom drains.. the concrete layer was only to get over the ridges. It's less than 20mm in most places.
The sump is not your usual fish-pond sump. it's basically a vessel to keep the pond level steady.
It's an aquaponics system, so lots of water will be going into and out of the grow-beds, flow into the pond and then get into the sump.
To make sure there's no debris and fish waste solids going into the grow beds, the screen is there to filter out as much as possible.

It's not going to be a wedge wire screen, too expensive. instead I took a 300 micron stainless mesh.
Will be fitted into a frame and the rubbish will flow into a filter-sock that needs to be cleaned out.

Instead of using a bottom drain, I'll be trying to build a rectangular air-lift pump which, if my thoughts and plans are correct, will lift a sizeable amount of water and gunk from the bottom of the pond up into the sump (and on top of the wire-mesh screen).

Windows are nice, but they would not fit the overall looks of the pond.
Waterproofing will be fairly easy..lol.. Liner.. Already ordered and delivered.
The sump will have no chambers whatsoever except for the screen.
The bio-filtration will take place in the grow-beds which are filled with expanded clay balls.

Total growbed volume estimated at 3x1x0.2m, which would equal a 0.6 cbm (or 600 litre) of clay-balls.
Should be plenty enough for some very happy Koi and vegetables growing like they're on steroids.

Volume of the water for the Koi (swimming area) estimated at 2000 litre, but need to do some better measuring some time soon.
Still, I guess that 600 litre of very porous clay balls for bio-filtration on 2000 litre water is not going to give me much problems.
And of course, solids being filtered out by the screen, so it's only amonia to be converted into plant food.

Hope that explains it a bit more!

Cheers,
Luc
 

Luc70

Dovii
MFK Member
Jan 8, 2009
731
359
102
Bangkok, Thailand
Just to add, the grow beds will have flood drain bell-syphons. They'll load up with water, then release all of it in one go.
That's where the sump comes in, catching that irregular amount of water and keeping the level steady inside the pond itself.

Planning for now is to have the divider wall done this weekend and hopefully start with the liner.
If that all works out, then I can start adding the overflows to the sump and maybe in 2 weeks time begin to put water in.
 

fishdance

Redtail Catfish
MFK Member
Jan 30, 2007
1,788
952
150
Thank you Luc for the extra info. I understand now. It will work beautifully and already looks nice. Hopefully the plant beds will prevent green water in your pond. I have tried 300 stainless mesh which clogged badly for me but your clay beads should stop most of the particulates. I ended up using static micro K1 media for a fine mechanical filter - (flood, air stir and flush to clean).

I have some experience with airlifts in commercial aquaculture so let me know if you need assistance later. Can be a bit noisy if you need high flows. Have also played with laminar flow and multi level lifts.

Will look forward to future progress.
 

Luc70

Dovii
MFK Member
Jan 8, 2009
731
359
102
Bangkok, Thailand
Thank you Luc for the extra info. I understand now. It will work beautifully and already looks nice. Hopefully the plant beds will prevent green water in your pond. I have tried 300 stainless mesh which clogged badly for me but your clay beads should stop most of the particulates. I ended up using static micro K1 media for a fine mechanical filter - (flood, air stir and flush to clean).

I have some experience with airlifts in commercial aquaculture so let me know if you need assistance later. Can be a bit noisy if you need high flows. Have also played with laminar flow and multi level lifts.

Will look forward to future progress.
Thanks for the reply FD, sure nice to get some feedback every now and then..
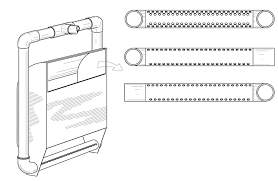
For the Airlift pump, below is what I have in mind to try.

images.png

Rectangle instead of round. Got some plans as well for the air-injection.
Will be an interesting project, also because it will not just push water over the divider wall.
Instead, there'll be 3 or 4 50mm pipes going through the divider near the top.
The airlift will spill the water into a 'basket' from where it will flow through the pipes and then on the screen.
So hopefully, most particulate will be removed (especially from the bottom of the fishpond) before the water then goes into the grow beds with clay balls.
This is to avoid organic waste accumulating there and starting to rot.

From the research papers on this design, they seem to move tremendous amounts of water, but with very little lift capacity.
Which, in my case would be no problem. My plans are to have it like 300mm wide, total height about 550mm and depth approx. 25mm.

Cheers,
Luc
 

jjohnwm

Sausage Finger Spam Slayer
MFK Member
Mar 29, 2019
3,760
9,190
164
Manitoba, Canada
I'm so happy to have re-found this thread, after somehow losing track of it. What an interesting project! Thoroughly planned and beautifully executed. I'm looking forward to following along. :)
 
  • Like
Reactions: deeda and Luc70

Luc70

Dovii
MFK Member
Jan 8, 2009
731
359
102
Bangkok, Thailand
Good to see you back John..

Nice on time for the latest update.
Full weekend and close to getting the liner in.

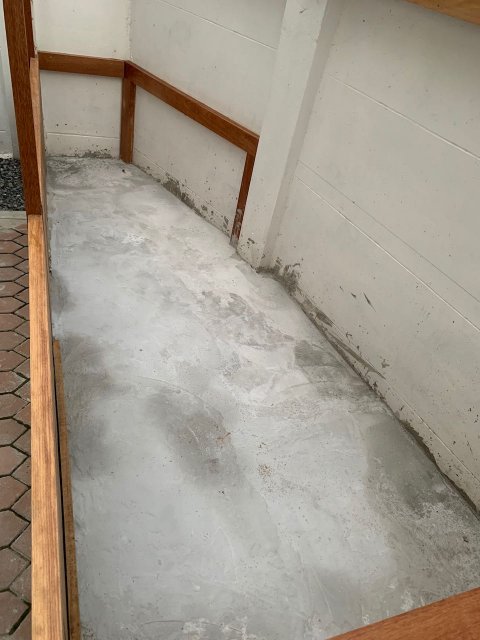
IMG_1948.jpeg
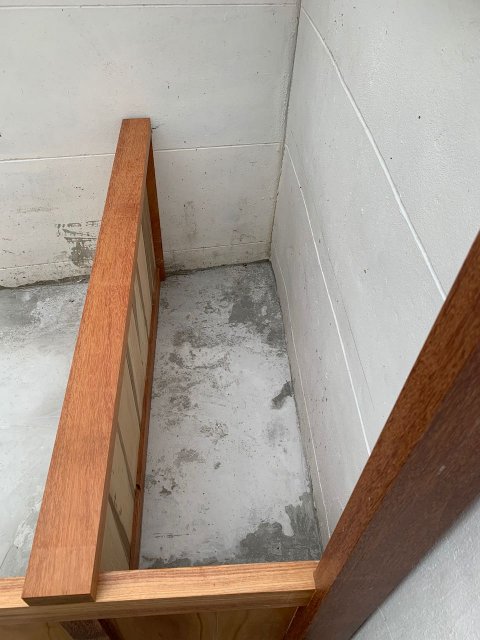
First job was to get a skim-coat on. Much more level now.
Not perfect, but for a first time..acceptable.
Might still fill a couple spots next week, but overall I'm happy with it.

This is the pond-area almost complete.
There's only a wood beam to be done on the right lower side and then a final sanding and a finishing layer of poly-urethane.

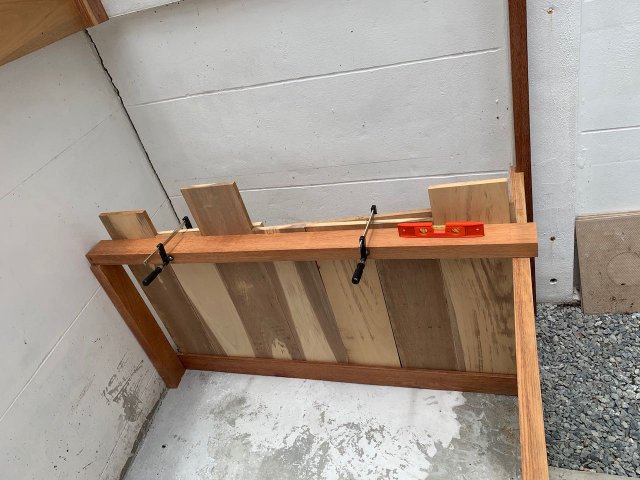
IMG_1939.jpeg

Next job was to build a wall!
Nothing fancy, quick and dirty job of planks stacked and glued.
Measured the height and loaded everything up in my car again.

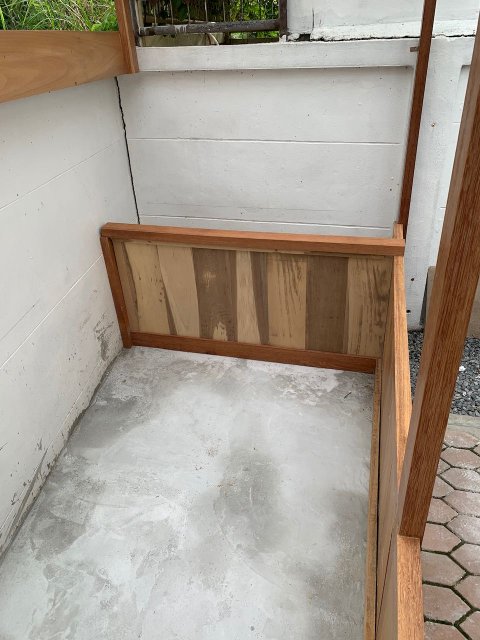
IMG_1942.jpeg

Couple of hours later, loaded up my car again and with a thunderstorm looming, got the wall installed.
(Mind you, that roof is nice to work under...lol..No storm going to stop me from working there anymore)

IMG_1943.jpeg

The beam on top of the wall is not fixed in place yet. The whole beam will more backwards by about 30mm.
There'll be a short beam connected 90' that will sit flush behind the post.
Backwall and right side the same, forming a frame for the sump/filter cover.
Big enough sump to hold excess water so that the pond water stays at the same level.
Each time a grow-bed drains or fills up, the sump will act as a balancing tank.

IMG_1950.jpeg

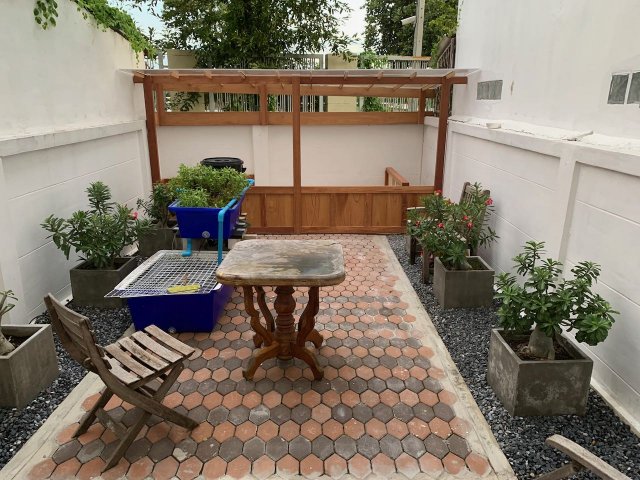
Overview after 2 days of work again.

IMG_1945.jpeg

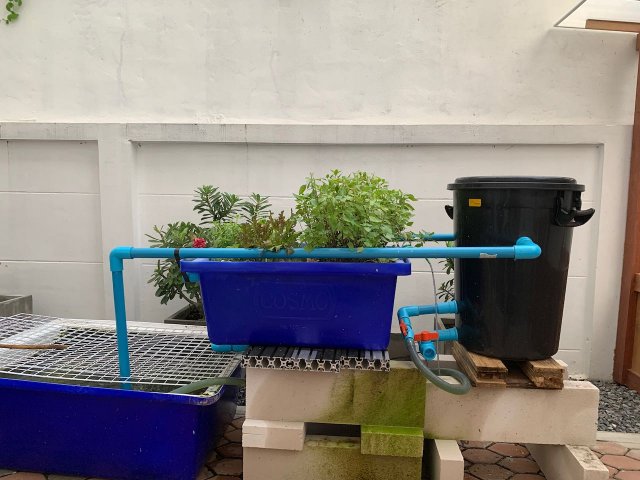
And the veggies got a haircut again..
There's a slow dripping leak on the pump inlet which causes algae to grow on the blocks.
We'll just leave it dripping, raining season takes care well enough for topping up the water again..lol

Schedule for next weekend is to fit the last beams, clean, sand and paint everything one more time.
The weekend after that is a long weekend, so perfect for getting the liner installed and filling it up!

Cheers,
Luc
 

fishdance

Redtail Catfish
MFK Member
Jan 30, 2007
1,788
952
150
With the image you posted, I would not use a single point of air entry to service two branches unless the air pressure can be balanced throughout with another closed circuit loop. Similarly with the types of air distribution pipes you have shown, make sure all the air holes are directly facing down, not facing to side or top of the pipe. Air coming through will have to displace all the water so you get even(ish) air distribution all along the pipe length. If your air holes are facing upwards, the holes closest to the air supply will get most volume/bigger bubbles and slowly decreasing as you move away. The laws of physics apply - unless that's what you want.

To be honest, rectangular uplifts have been overrated. In theory they do have less side wall resistance per water volume but in practice (real life situations), it is easier to over engineer a round pipe uplift for a fraction of the effort to make a rectangular lift. If you require more water movement, go wider diameter and apply more air up to 150mm pipe diameter for the water height you stipulate. After that, just use two uplifts. If you are shifting, not lifting much (above tanks water height as datum ), you can move tremendous amounts for not much energy. Playing around with bubble size and air volume will give you the results you seek easily. 90mm stormwater pipe is favoured because of the low cost, thin wall, abundance of cheap fittings. Plastic pipe past 100mm becomes more expensive due to the thicker wall requirements. Water and air noise may be louder than you anticipate?

If you have water gravity falling from your plant beds, you could also look at RAM pumps if energy conservation is a high priority. These are lower volume in comparison but can achieve very high head lifts for no energy cost.

How do you overcome the bell siphon's becomng stuck? The dreaded constant flow in and out balence? Do you have a vacume breaker or use two bells?

Pond is definitely taking shape now. Thank you for the updates. I will try to re-visit a bit more frequently.
 
  • Like
Reactions: Luc70

Luc70

Dovii
MFK Member
Jan 8, 2009
731
359
102
Bangkok, Thailand
With the image you posted, I would not use a single point of air entry to service two branches unless the air pressure can be balanced throughout with another closed circuit loop. Similarly with the types of air distribution pipes you have shown, make sure all the air holes are directly facing down, not facing to side or top of the pipe. Air coming through will have to displace all the water so you get even(ish) air distribution all along the pipe length. If your air holes are facing upwards, the holes closest to the air supply will get most volume/bigger bubbles and slowly decreasing as you move away. The laws of physics apply - unless that's what you want.

To be honest, rectangular uplifts have been overrated. In theory they do have less side wall resistance per water volume but in practice (real life situations), it is easier to over engineer a round pipe uplift for a fraction of the effort to make a rectangular lift. If you require more water movement, go wider diameter and apply more air up to 150mm pipe diameter for the water height you stipulate. After that, just use two uplifts. If you are shifting, not lifting much (above tanks water height as datum ), you can move tremendous amounts for not much energy. Playing around with bubble size and air volume will give you the results you seek easily. 90mm stormwater pipe is favoured because of the low cost, thin wall, abundance of cheap fittings. Plastic pipe past 100mm becomes more expensive due to the thicker wall requirements. Water and air noise may be louder than you anticipate?

If you have water gravity falling from your plant beds, you could also look at RAM pumps if energy conservation is a high priority. These are lower volume in comparison but can achieve very high head lifts for no energy cost.

How do you overcome the bell siphon's becomng stuck? The dreaded constant flow in and out balence? Do you have a vacume breaker or use two bells?

Pond is definitely taking shape now. Thank you for the updates. I will try to re-visit a bit more frequently.
Been some time, extremely busy with work at the moment, budget-time..lots of bad mood and headache moments..sigh.
Anyhow, thanks for the info FD, sure appreciate. Good tip on the air-diffuser. Think for now I'll just go with the normal round design. It's not lifting above the water-table, just moving water and debris from the bottom and dumping it in the sump.
Energy conservation is not a high priority, but with a 40w pump (2800 l/hr), lifting the water only 40cm above the water-table, I should get easily 2000 l/hr, the pump will have no restrictions so might even get more than that. The air pump is 45w, need to check if that's enough to lift water.

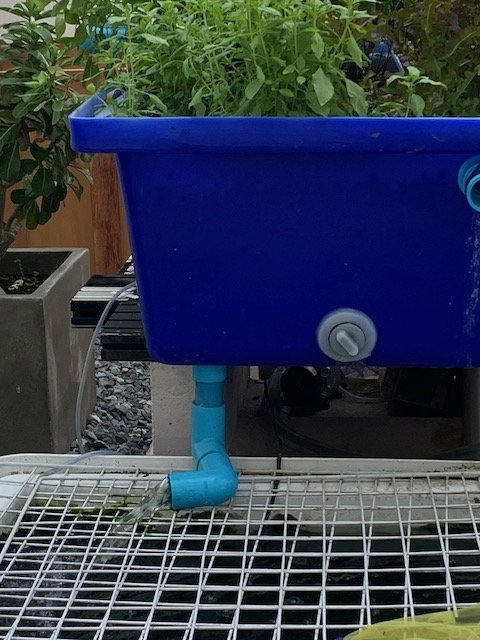
For the Bell Syphon, it's a very crude first try with some old parts I had lying around. So far I've hardly had any problems with it. The stand-pipe and outlet are 1".
What I've found is that the water outlet really makes a difference. See attached picture.
IMG_2162.jpeg
There's also no reducer used, it's just a straight piece of pipe, covered with some plastic because I didn't have an endocarp and because I only had small diameter airline, I used 2 airlines to break the syphon. It fills up fairly quick, empties even faster.. Never really timed it, but I guess the complete cycle is about 4 to 5 minutes.

For the new pond I'll definitely start experimenting a bit more, see what works best.
To get water to the grow beds, I'm planning to make a 'gutter' from wood, with plastic lining. The pump dumps water into it and there's an overflow to let water fall back into the sump if the grow beds don't take up all the water-volume.
Each of the grow-beds gets a 1/2" tap (one of those "antique" design taps to fit with the wood.)..

Hope that explains a bit..
Cheers,
Luc
 
zoomed.com
hikariusa.com
aqaimports.com
Store