Sump and Plumbing for my 535. Need help

mrrobxc

Bronze Tier VIP
MFK Member
Nov 29, 2012
4,540
5,545
599
SE PA
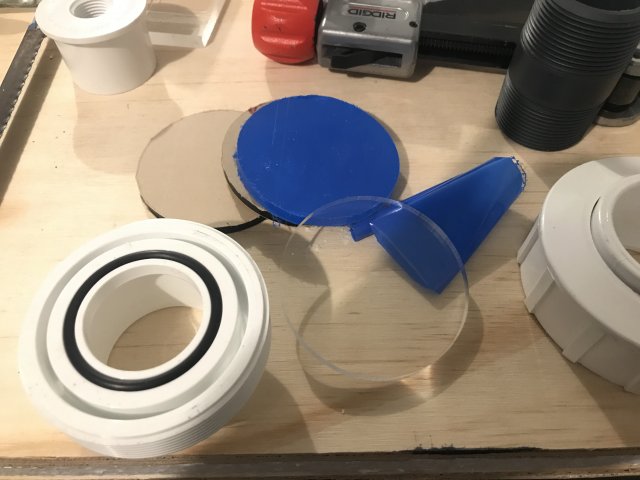
Is that bulkhead cemented in? It would only be a few bucks to have tap plastics cut a washer out of acrylic. And O shape or if that BH is cemented, a C shape to add material. They usually have a scrap piece that’s cheap and will cut a template you draw. Making a washer would increase the flange size of the bulkhead. The gasket between the wash and tank. Have a look into shadow overflows it’s a similar concept with the pass through of a gasket with three surface plates.
It is. I’m wondering if the original gasket that it came with that I cut is inside the hole causing the new gasket to take that shape. Wondering if I somehow cut that out if it would make a difference.

im interested in the washer idea. Would I get two “C” shaped discs and simply slide them between the gasket and the flange or would I need to weld it to the flange?

By the way, thanks for walking me through this.
 

JK47

Retired MFK Admin
MFK Member
Aug 4, 2008
11,112
3,478
2,555
Washington
It shouldn’t be more than $20 but it’s peace of mind. Your looking for something to sandwich between the bulkhead flange and tank wall/hole. I had four of these cut to make union seals and it was $27. That’s no pilot hole, router and smooth cut. They do the work for you.

CABED551-0D25-4FF5-BEBE-4767EF81A737.jpeg
 

mrrobxc

Bronze Tier VIP
MFK Member
Nov 29, 2012
4,540
5,545
599
SE PA
Since they would be two “c“ pieces to connect underneath the flange since the bulkhead is glued in, would I be attaching them to the back wall and then solvent welding them in place or would I be just sliding them in between the flange and the gasket letting the gasket make the seal?
 

JK47

Retired MFK Admin
MFK Member
Aug 4, 2008
11,112
3,478
2,555
Washington
Since they would be two “c“ pieces to connect underneath the flange since the bulkhead is glued in, would I be attaching them to the back wall and then solvent welding them in place or would I be just sliding them in between the flange and the gasket letting the gasket make the seal?
No problem. Yep but I would recommend one thicker wall material than multiple thin. You want to distribute the load around the bulkhead flange. No solvent welding. Just slip it in as a shim which is what this really is and then use the bulkhead gasket. Be careful not to cut the bulkhead gasket.
 
  • Like
Reactions: mrrobxc

mrrobxc

Bronze Tier VIP
MFK Member
Nov 29, 2012
4,540
5,545
599
SE PA
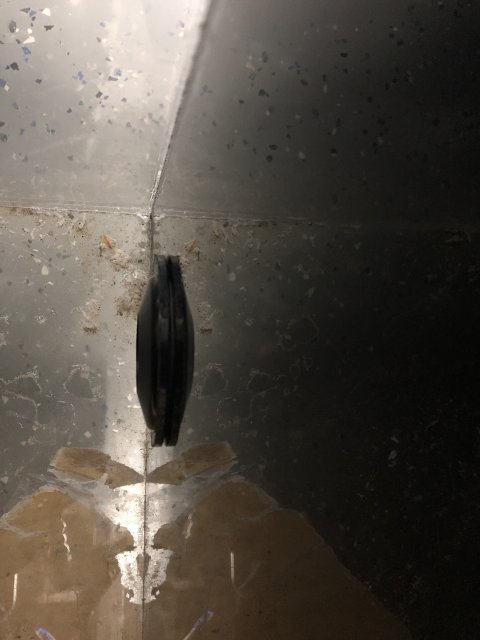
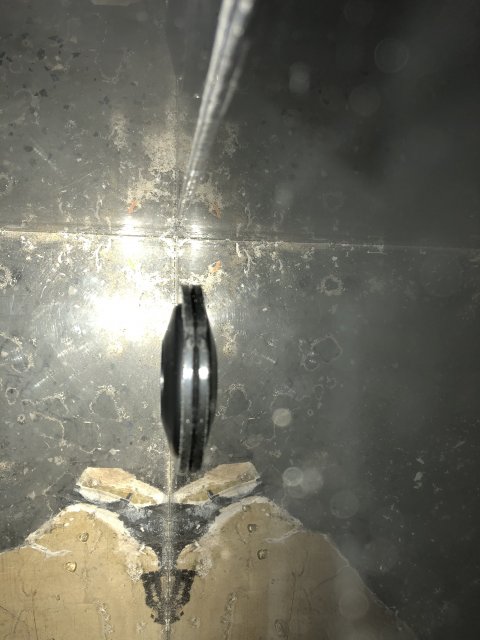
I went ahead and removed the original gasket I cut down to fit inside the new gasket and retightened the bulkhead and now the gasket sits flat. Wondering if this will do the trick. 3/4 bulkhead using a 1” bulkhead gasket on a 1 3/4” hole.

EC5C46C7-3881-482F-BAA4-F4757160A021.jpeg 9C26FA31-39BC-4DF6-BB60-8DDEA19D4E24.jpeg
 
  • Like
Reactions: kno4te

mrrobxc

Bronze Tier VIP
MFK Member
Nov 29, 2012
4,540
5,545
599
SE PA
Is it snug? As in secure against the back wall?
It appears so. I’ll take more pics tonight but it’s not protruding our at the lips like before after removing the other nut. I still have to tighten the nut since it’s only hand tight.
 

DN328

Potamotrygon
MFK Member
Aug 14, 2014
2,416
1,097
164
Fish Tank
I assume that the other side is outside of your tank and that's not a weir wall in the picture. Sorry, skipped some posts but always up for a challenge with creative approach and learning something too.

Im sure JK47 JK47 is pointing you down the right path.
 
  • Like
Reactions: mrrobxc

mrrobxc

Bronze Tier VIP
MFK Member
Nov 29, 2012
4,540
5,545
599
SE PA
I assume that the other side is outside of your tank and that's not a weir wall in the picture. Sorry, skipped some posts but always up for a challenge with creative approach and learning something too.

Im sure JK47 JK47 is pointing you down the right path.
Yeah. That’s the inside wall shot from above. It’s the corner where the back of the tank meets the bottom and the wall.

JK47 JK47 has been a huge help so far. Trying to solve this puzzle without having to cut and start over. I like the washer idea but don’t know how it’ll work when it’ll be a “c” shaped washer leaving less tension the on the open part of the “c” when pressed against the gasket.

Might have to cut it all out and put a schedule 80 bulkhead here to make up for the gap due to my stupidity in grabbing the wrong hole saw bit and boring a 1 3/4” hole on a 3/4” gasket.
 

JK47

Retired MFK Admin
MFK Member
Aug 4, 2008
11,112
3,478
2,555
Washington
Yeah. That’s the inside wall shot from above. It’s the corner where the back of the tank meets the bottom and the wall.

JK47 JK47 has been a huge help so far. Trying to solve this puzzle without having to cut and start over. I like the washer idea but don’t know how it’ll work when it’ll be a “c” shaped washer leaving less tension the on the open part of the “c” when pressed against the gasket.

Might have to cut it all out and put a schedule 80 bulkhead here to make up for the gap due to my stupidity in grabbing the wrong hole saw bit and boring a 1 3/4” hole on a 3/4” gasket.
No worries man. I don’t think you will have to cut it out. If you have them make a doughnut shape and then cut that in half it would form a full circle behind the bulkhead and fully support it. More of a backing plate type thing. Black scrap acrylic would disappear too. You could cut up a 1” bulkhead and do it yourself. Layers:

Bulkhead flange ~
Shim/backing plate material ~
Bulkhead gasket ~
Tank wall/hole ~
 
  • Like
Reactions: mrrobxc
zoomed.com
hikariusa.com
aqaimports.com
Store